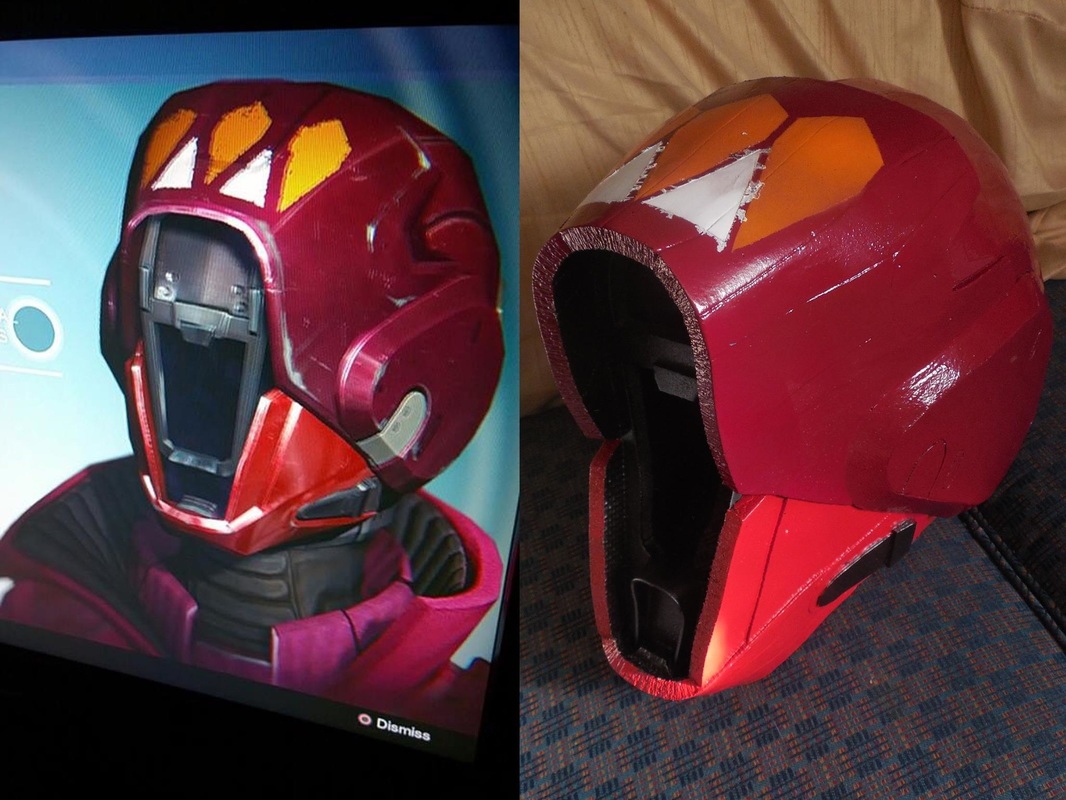
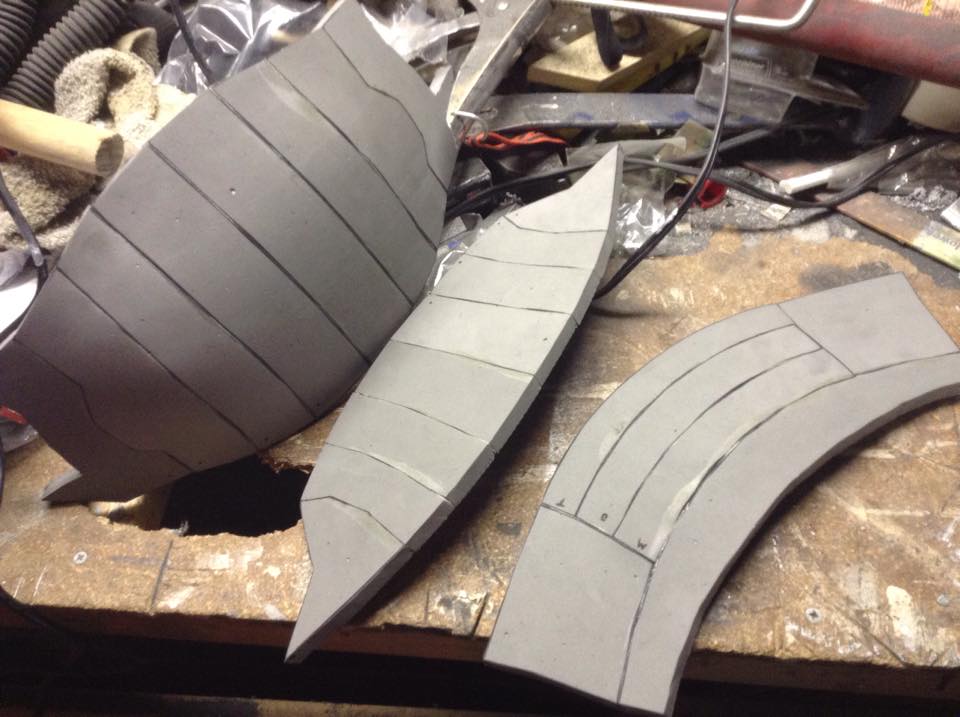
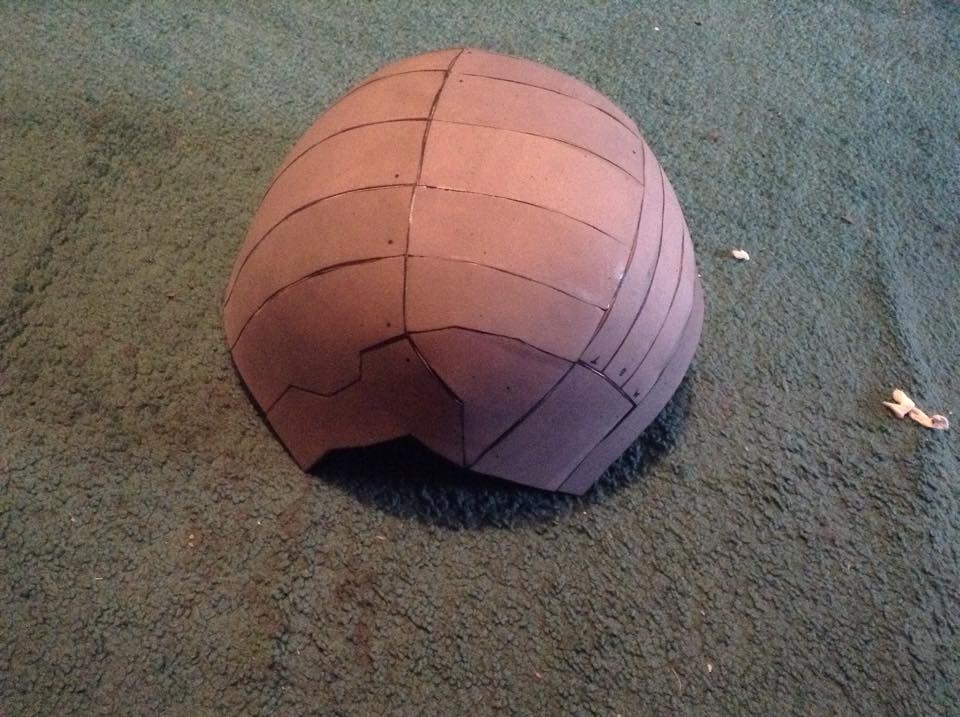
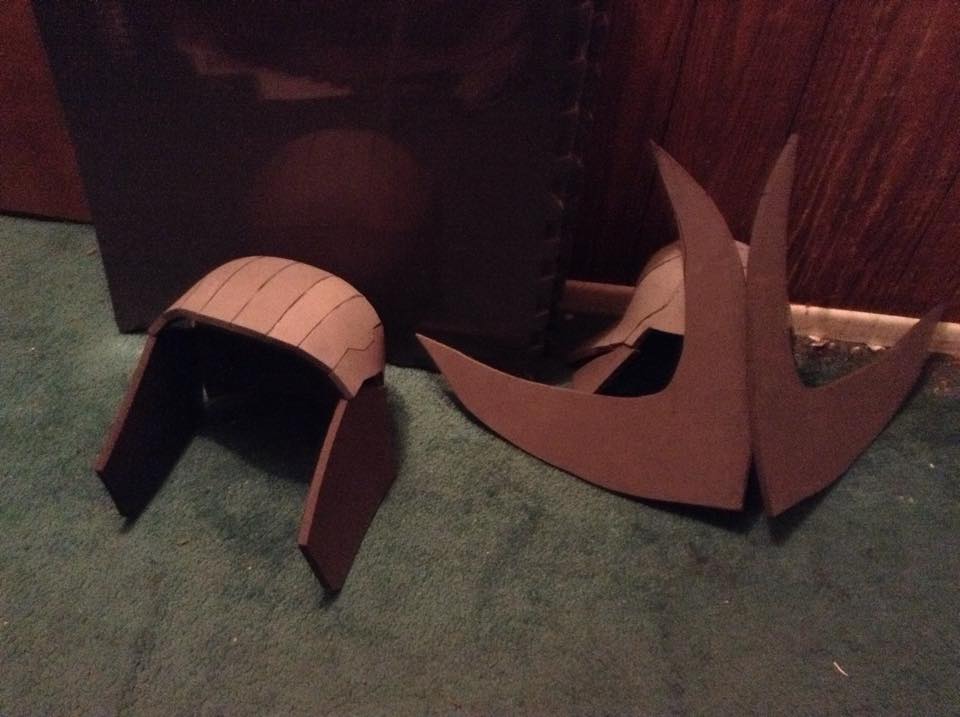
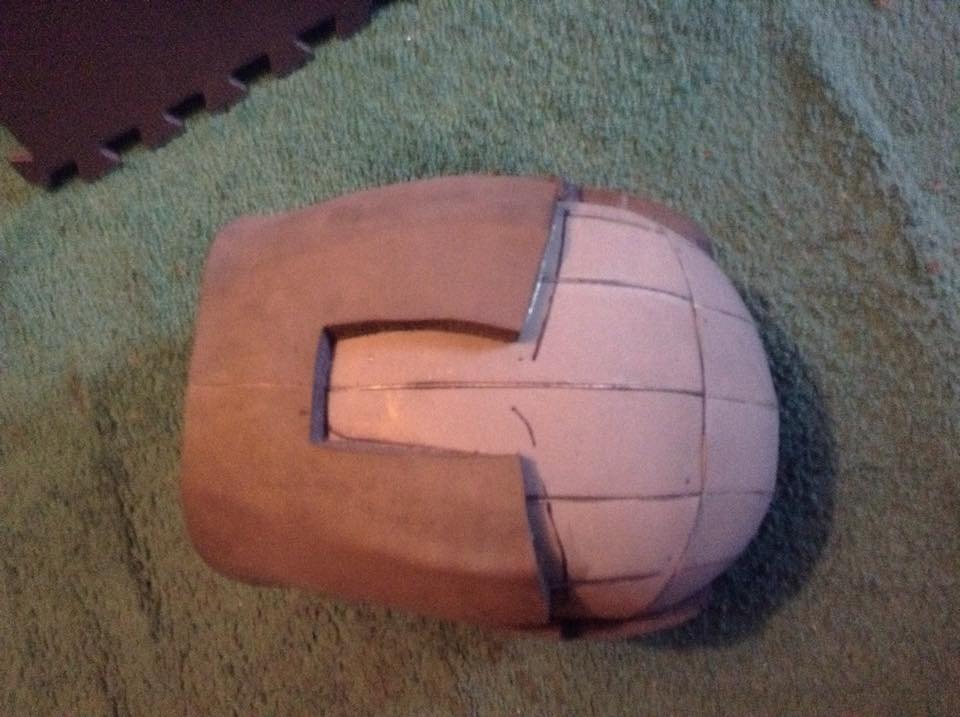
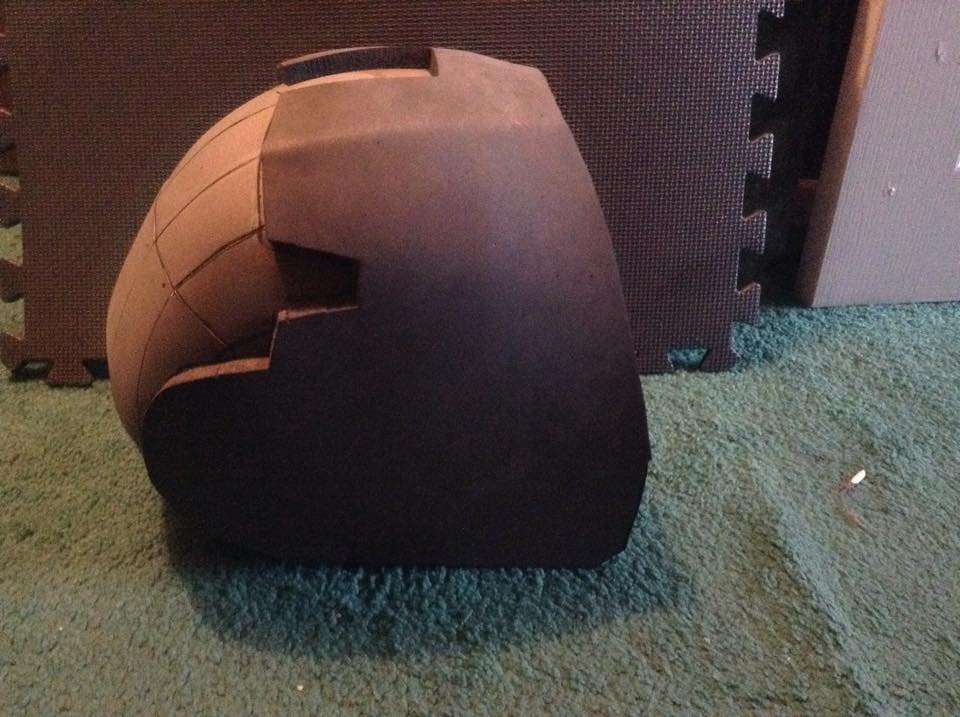
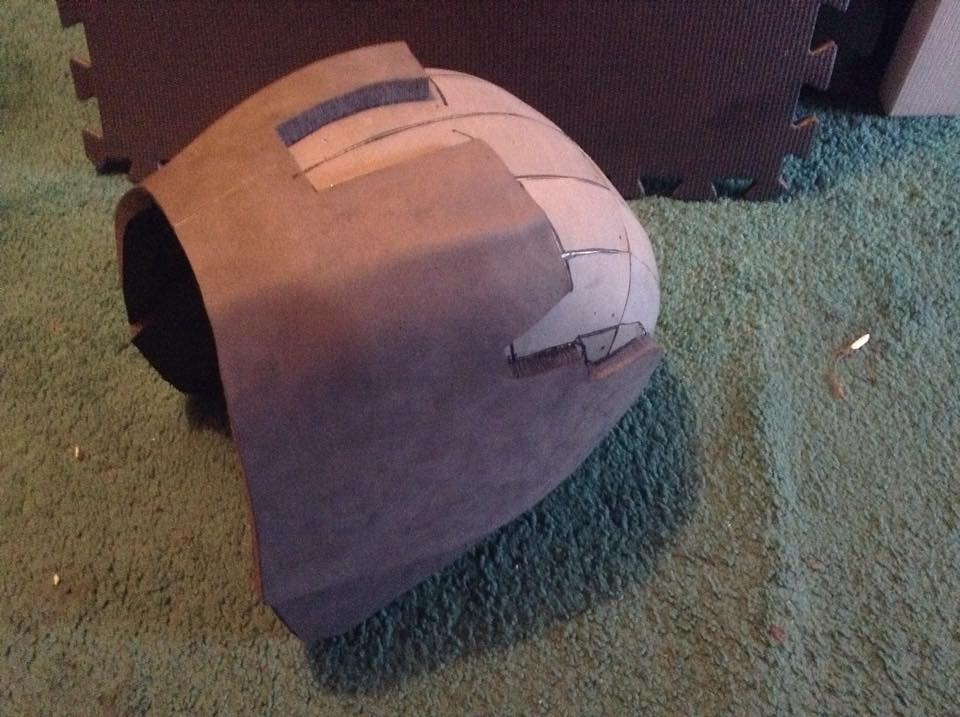
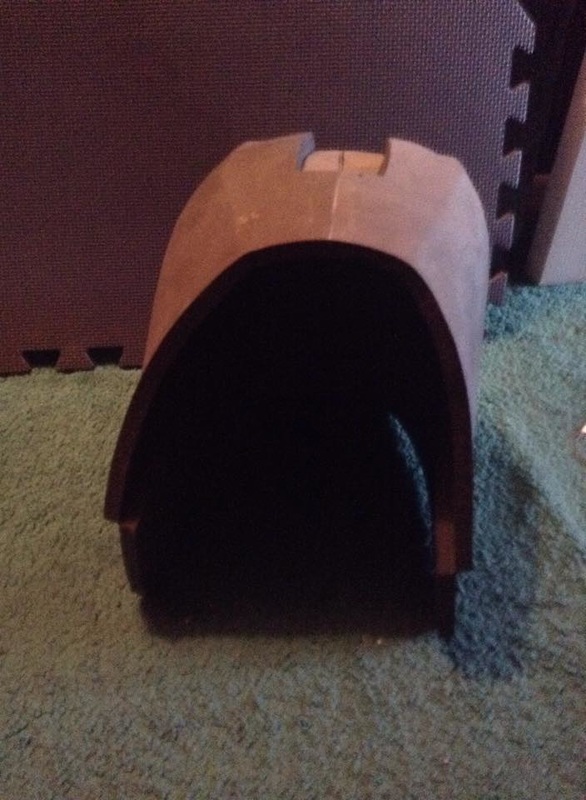
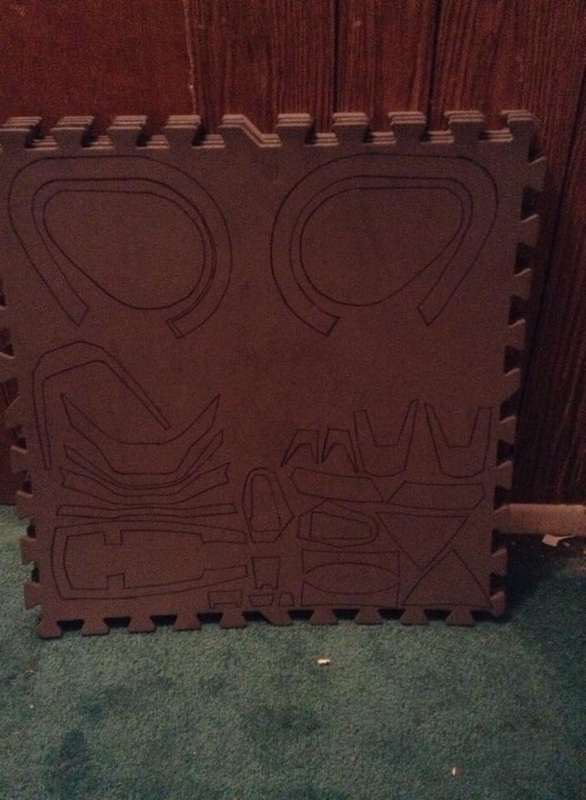
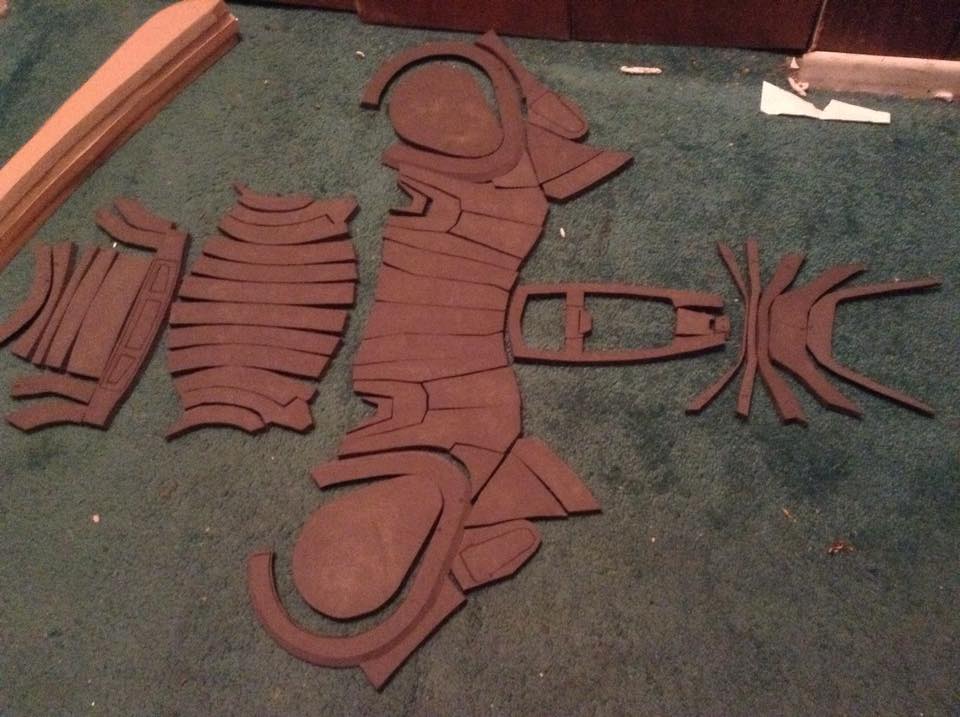
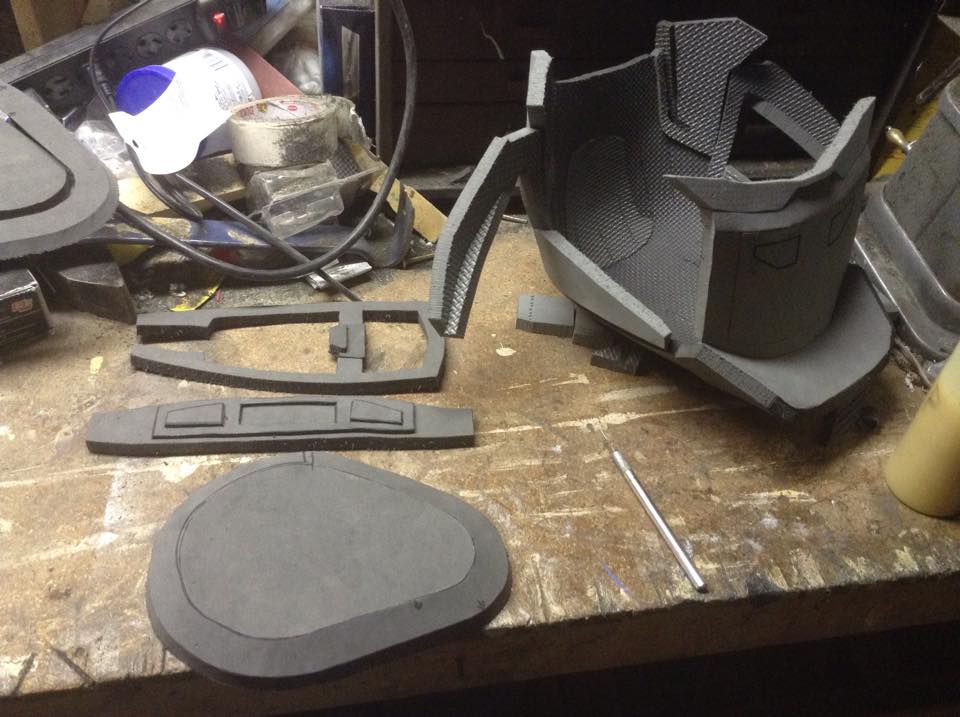
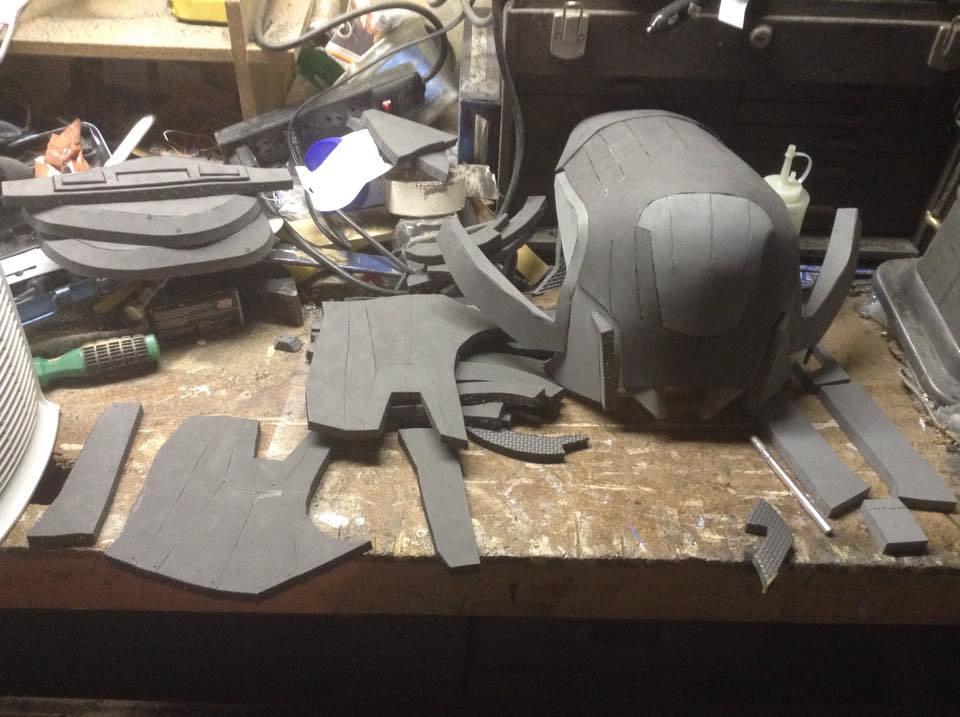
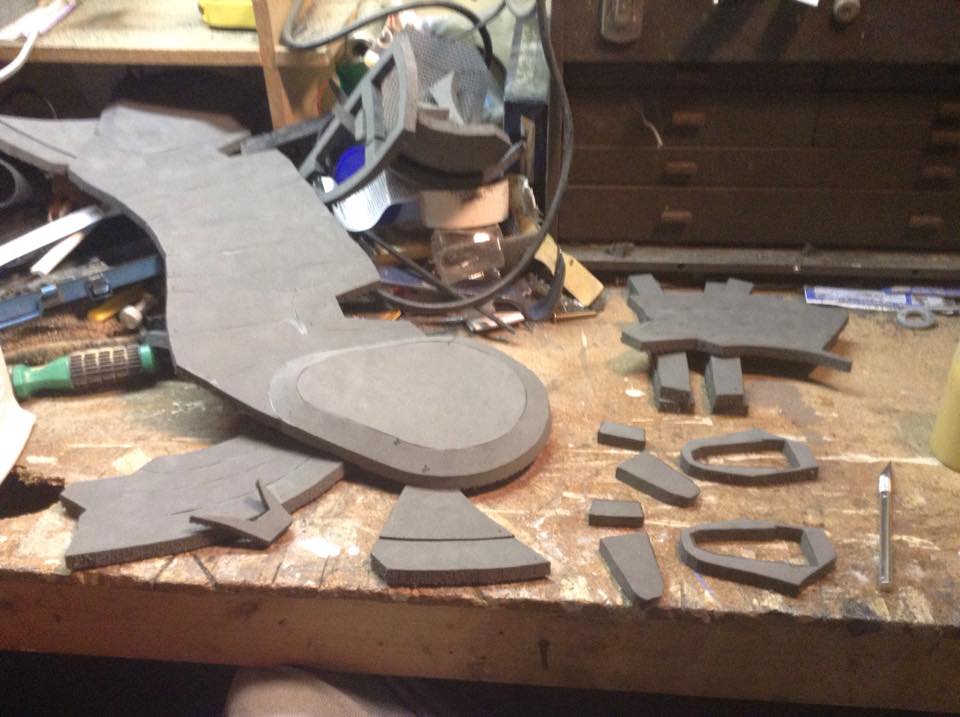
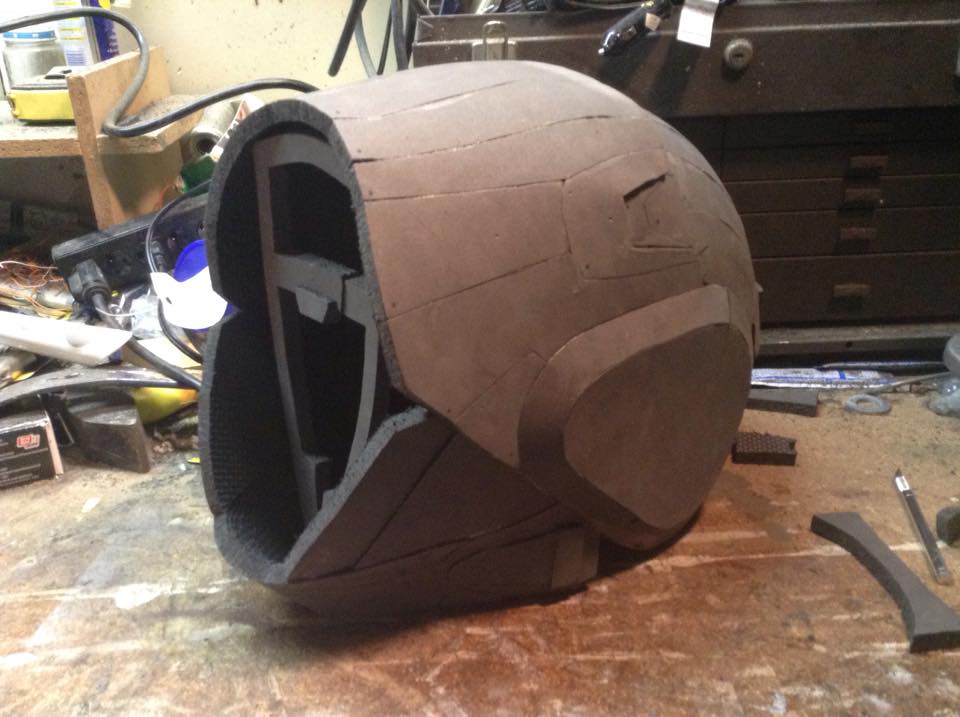
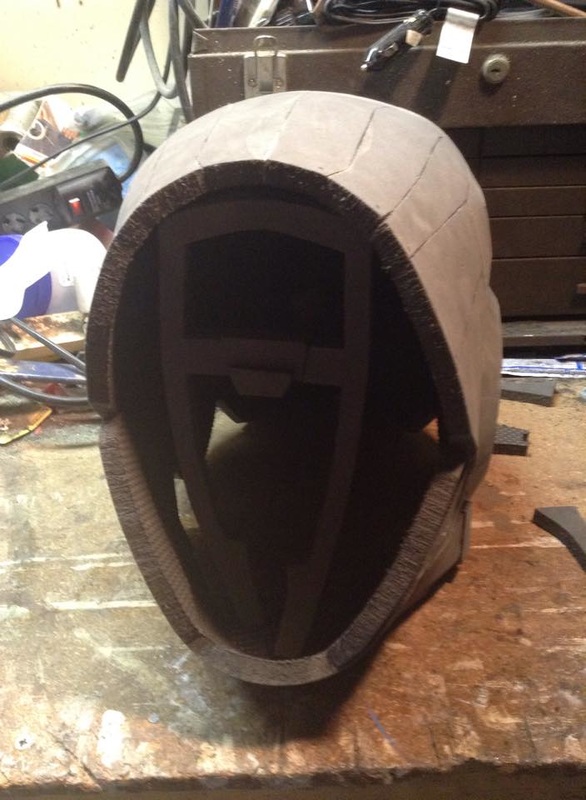
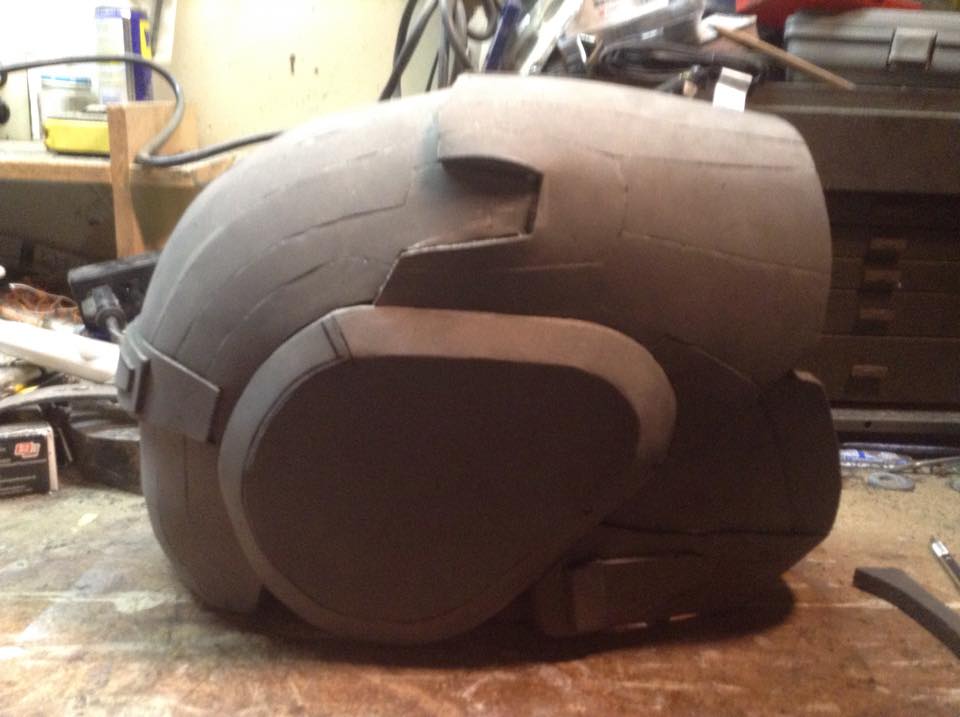
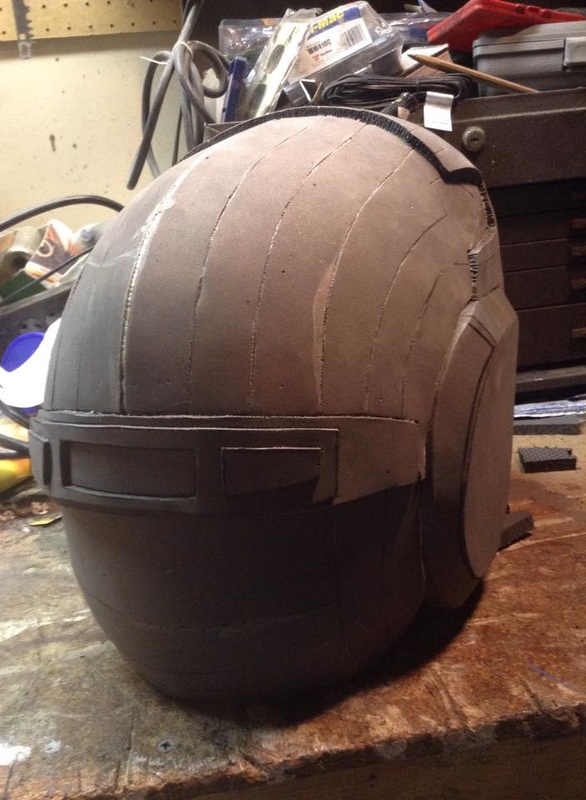
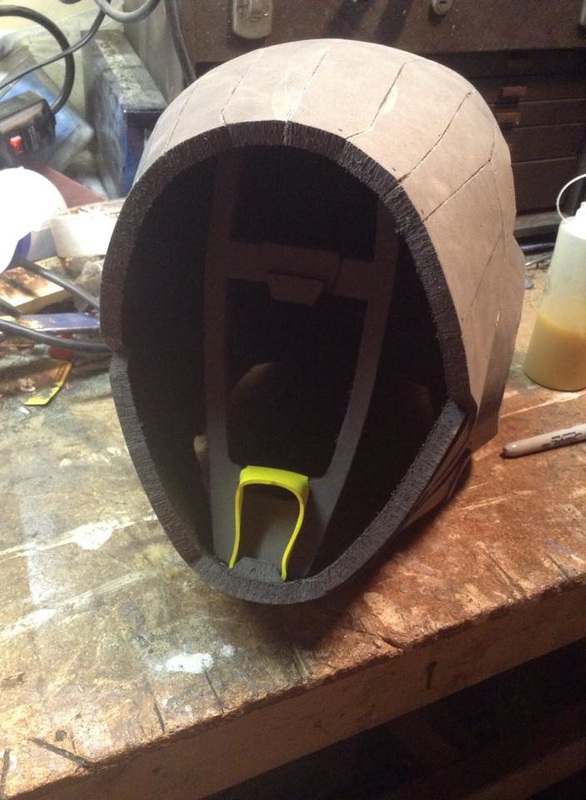
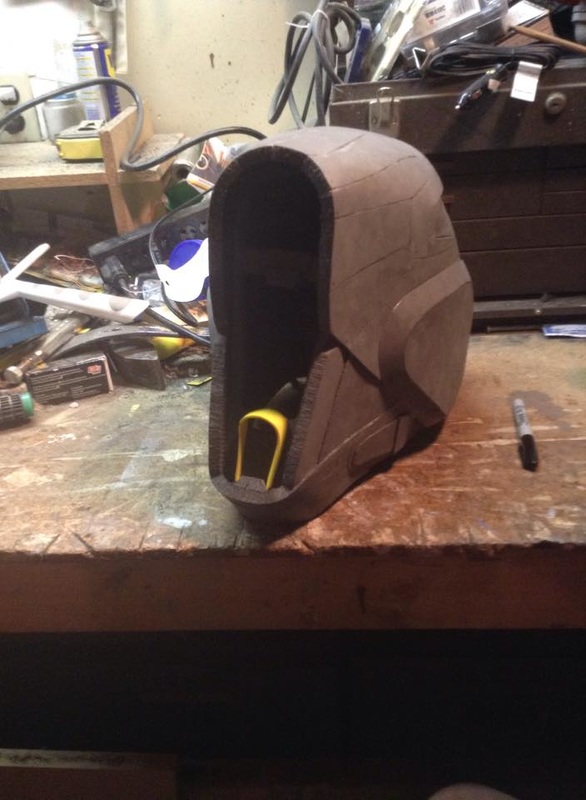
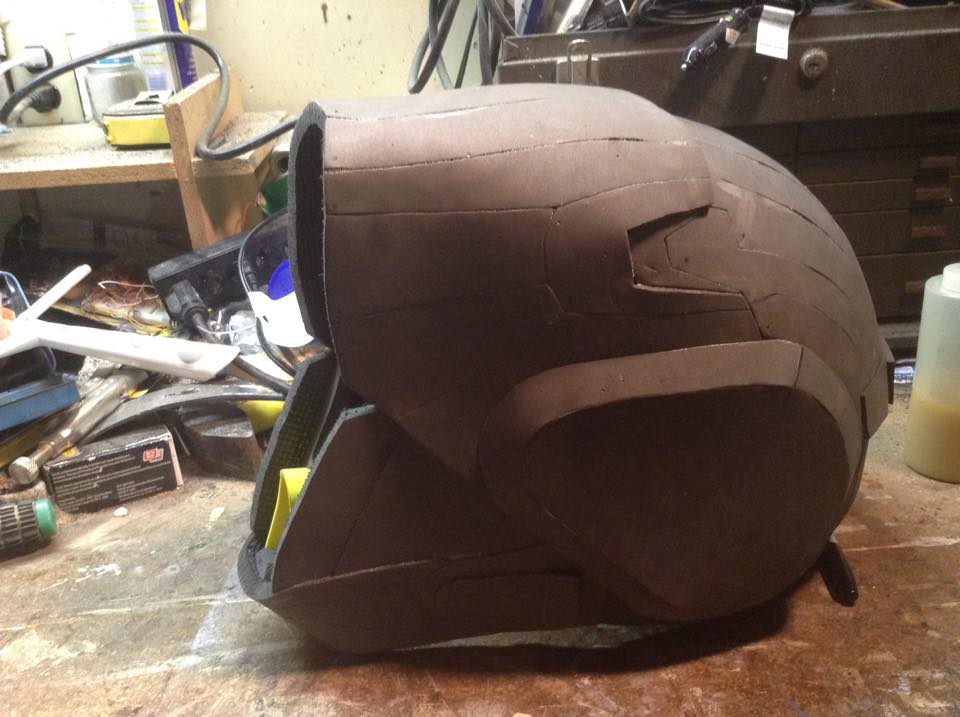
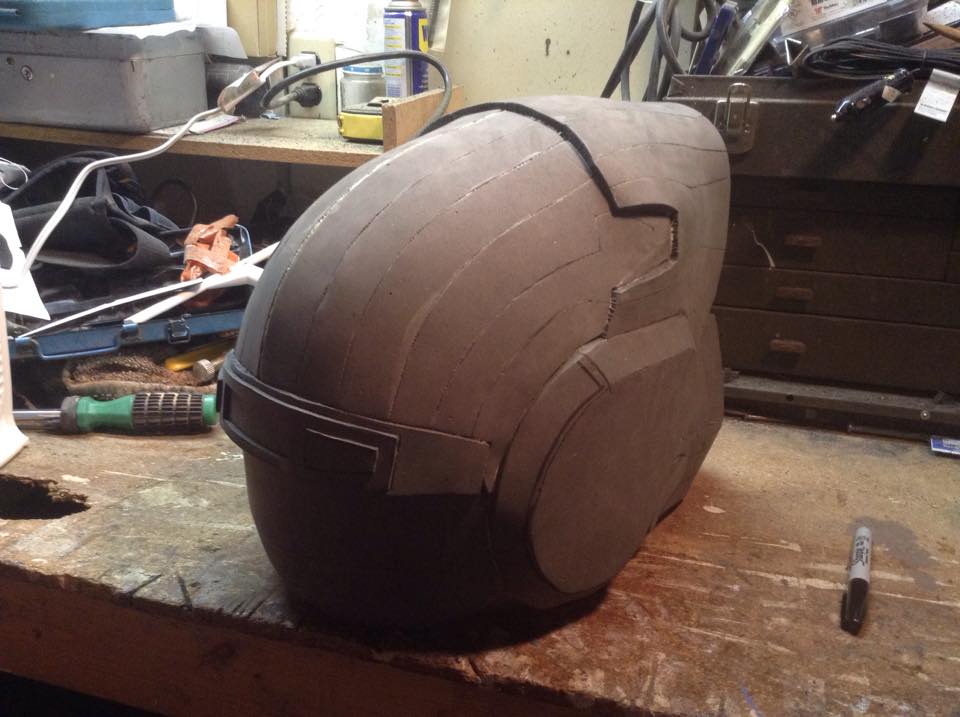
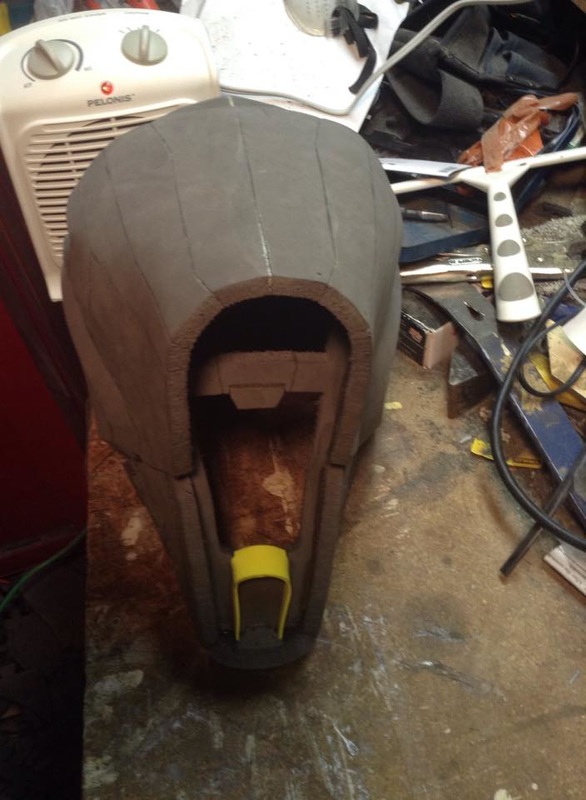
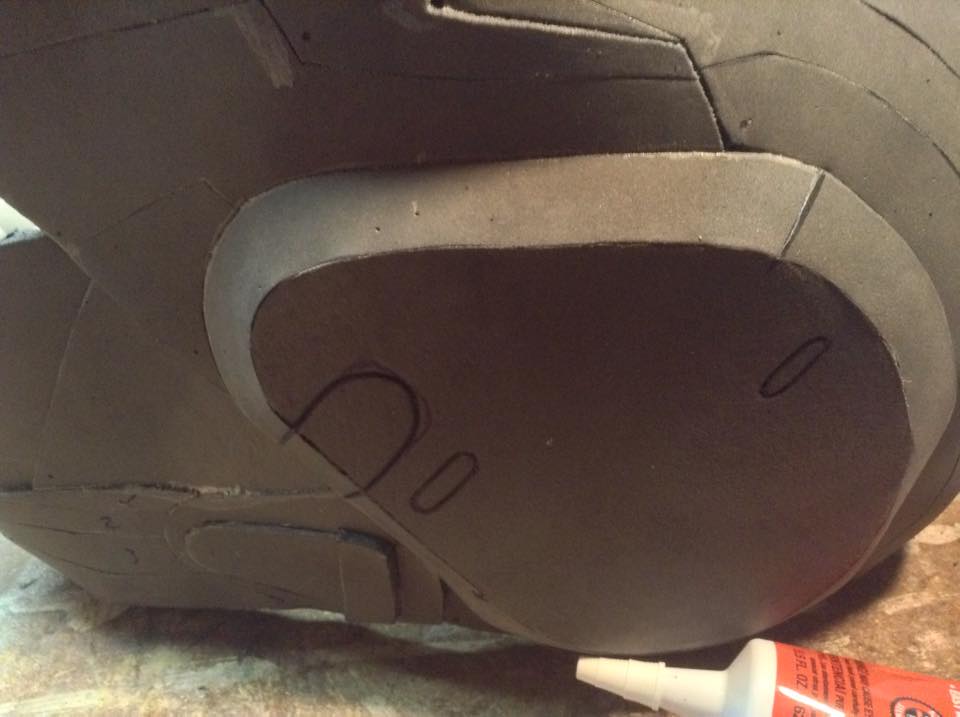
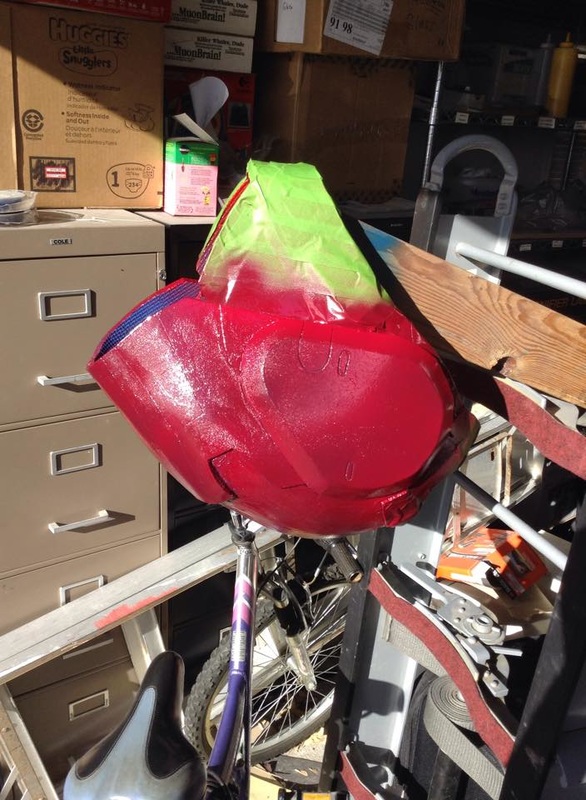
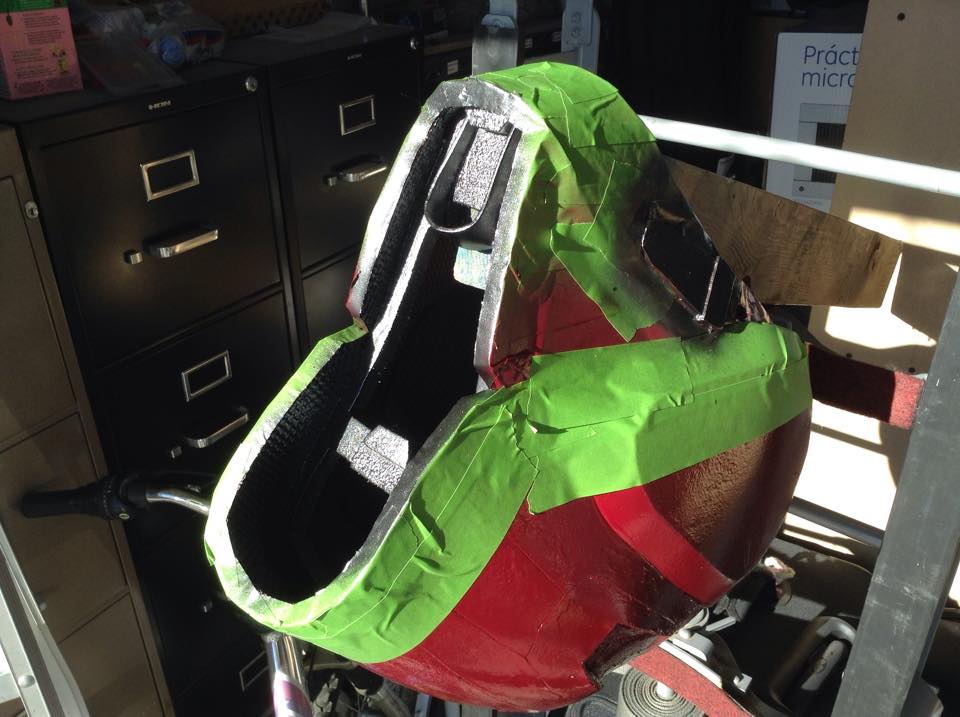
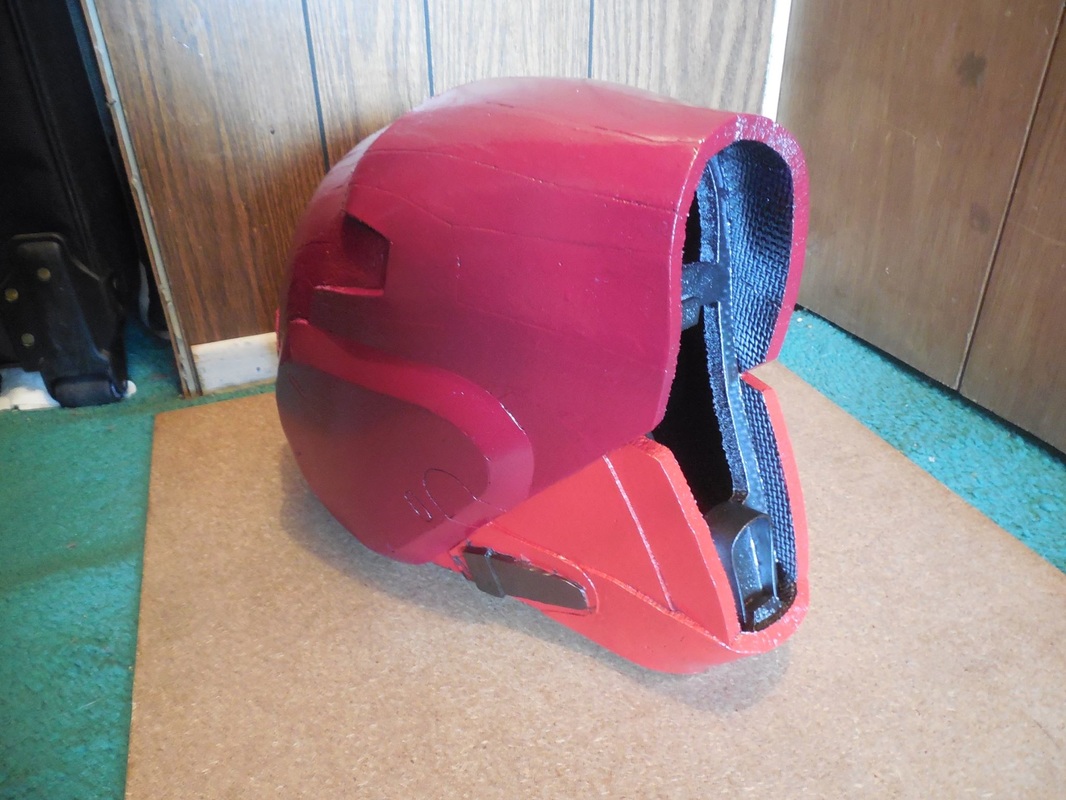
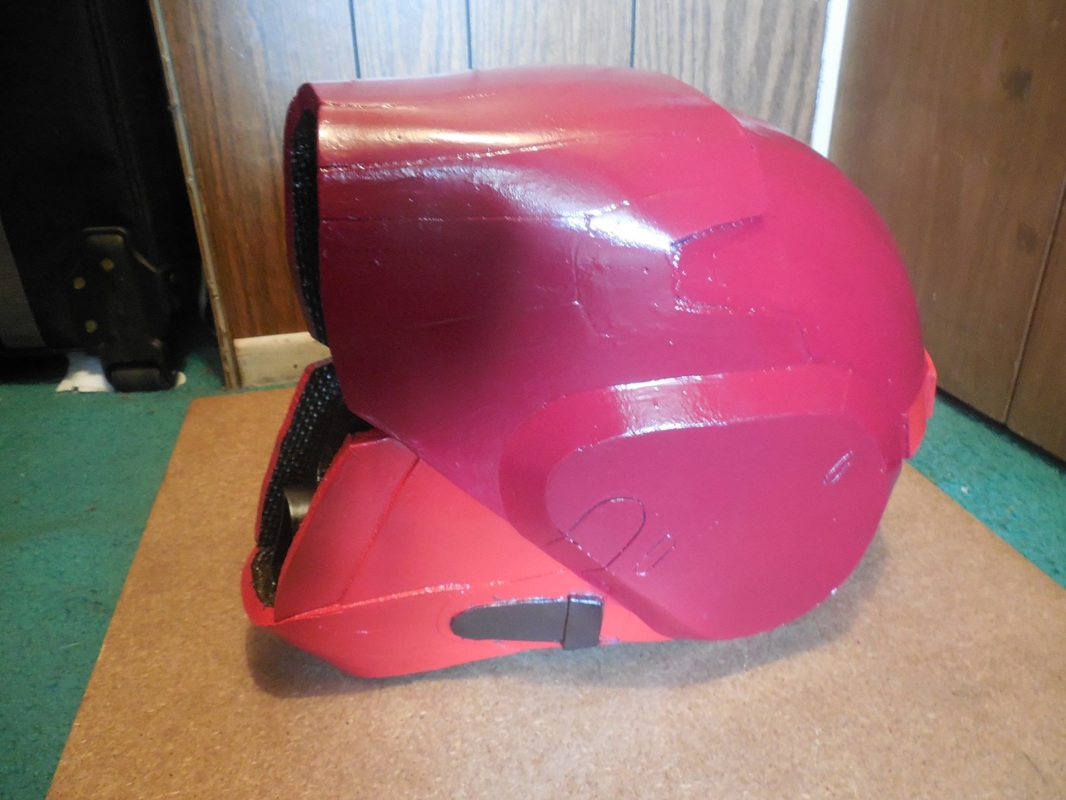
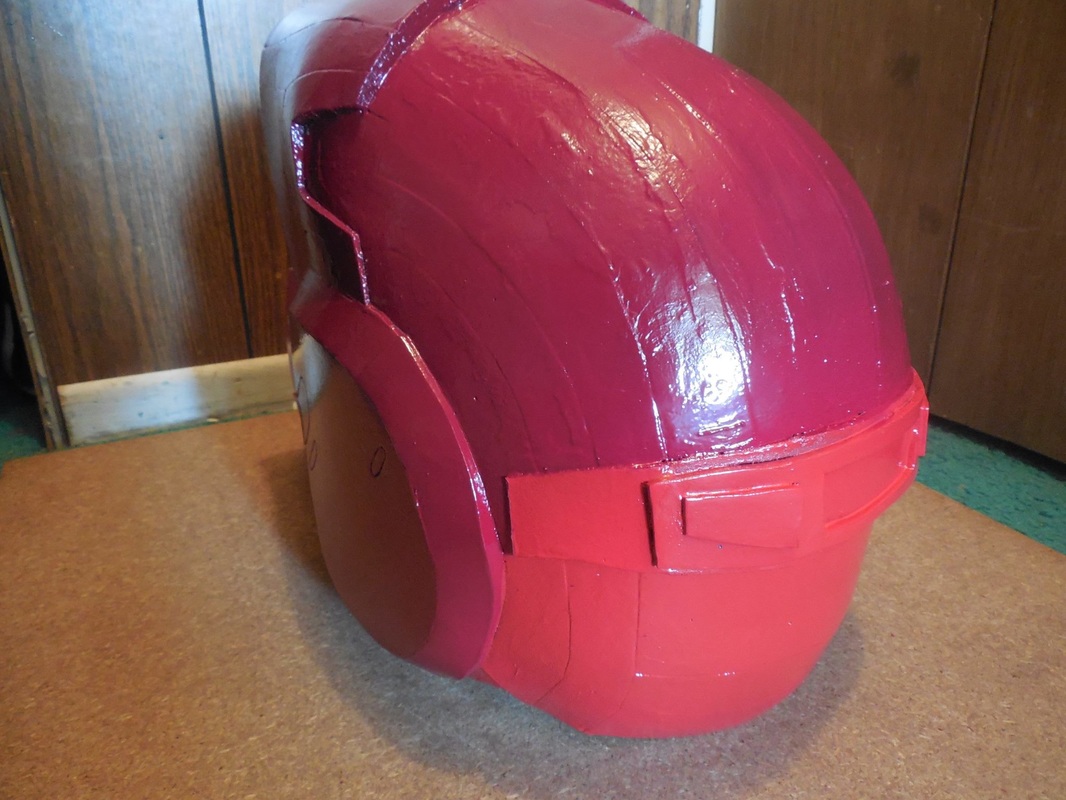
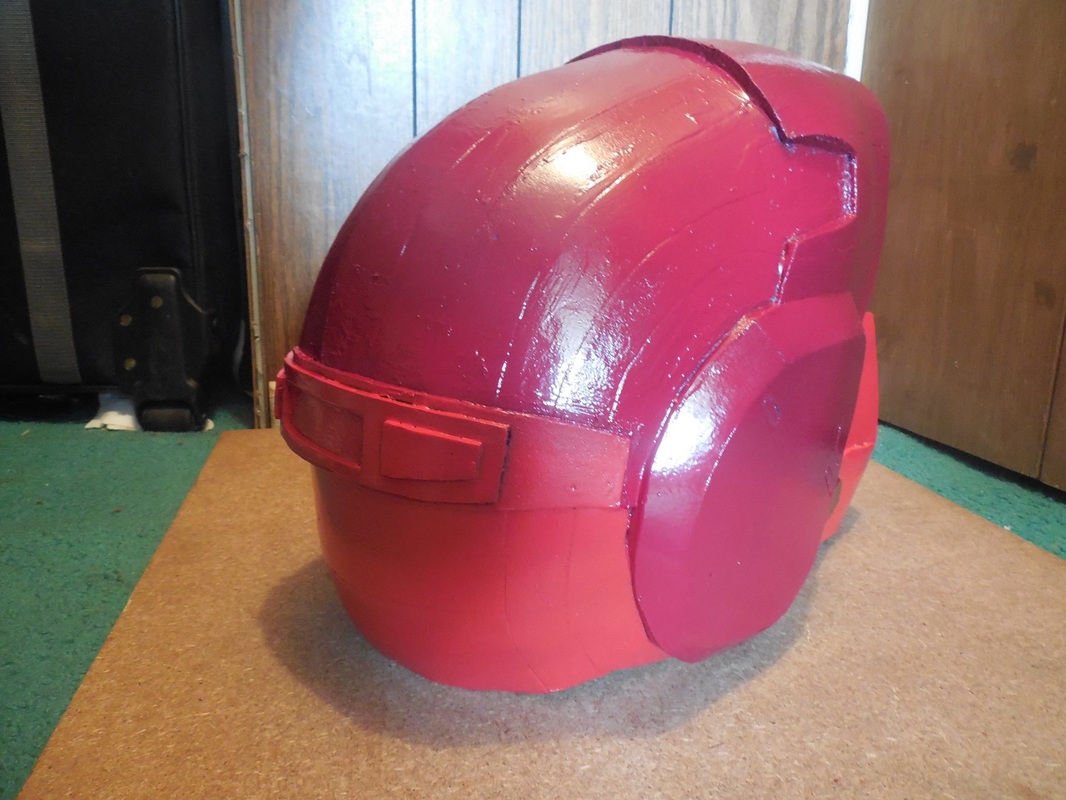
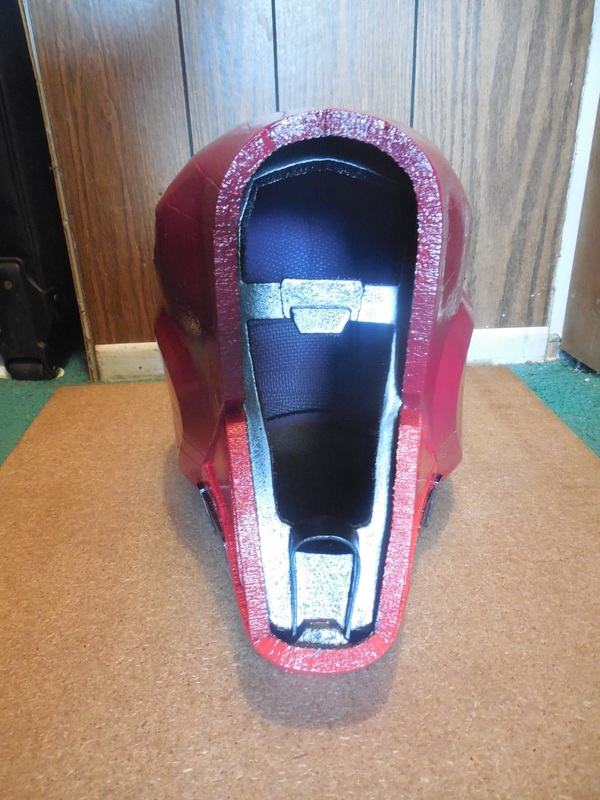
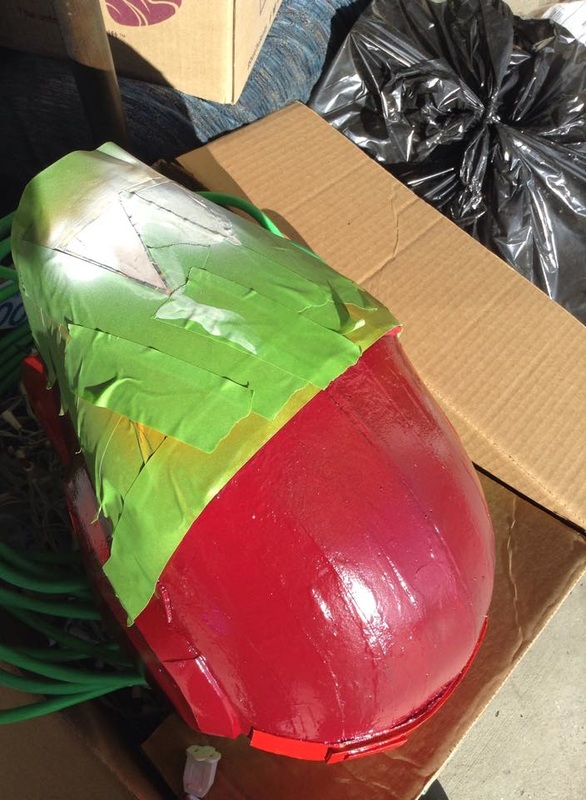
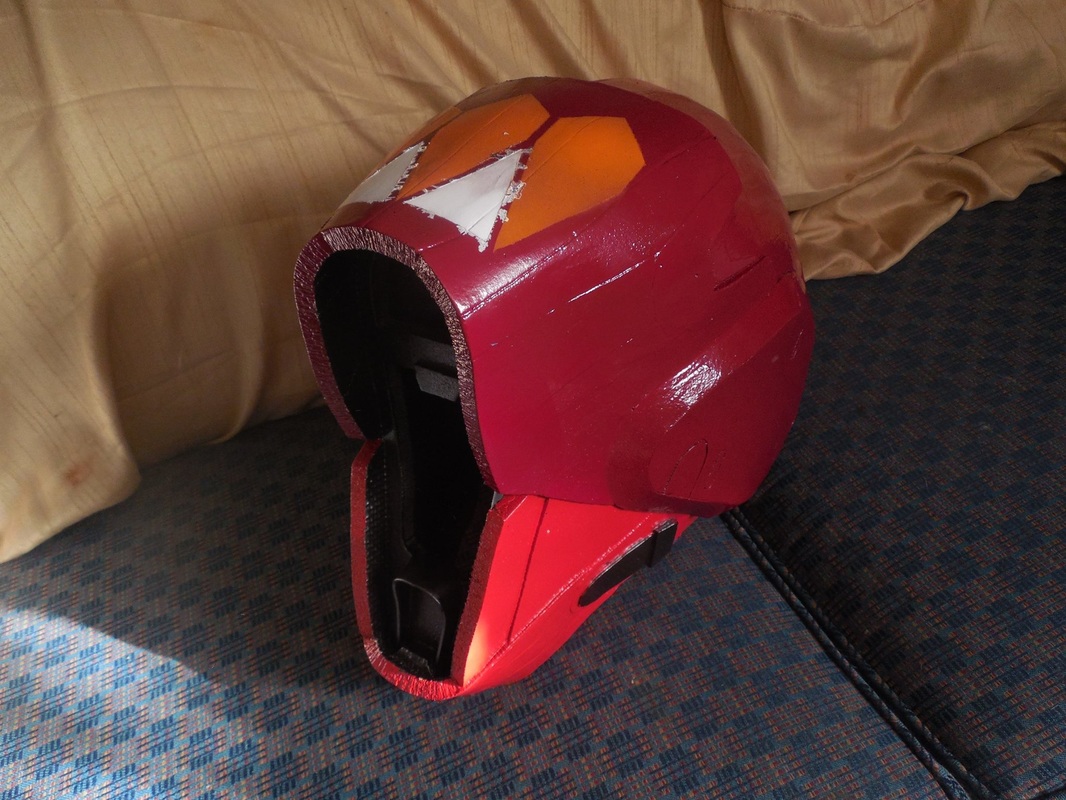
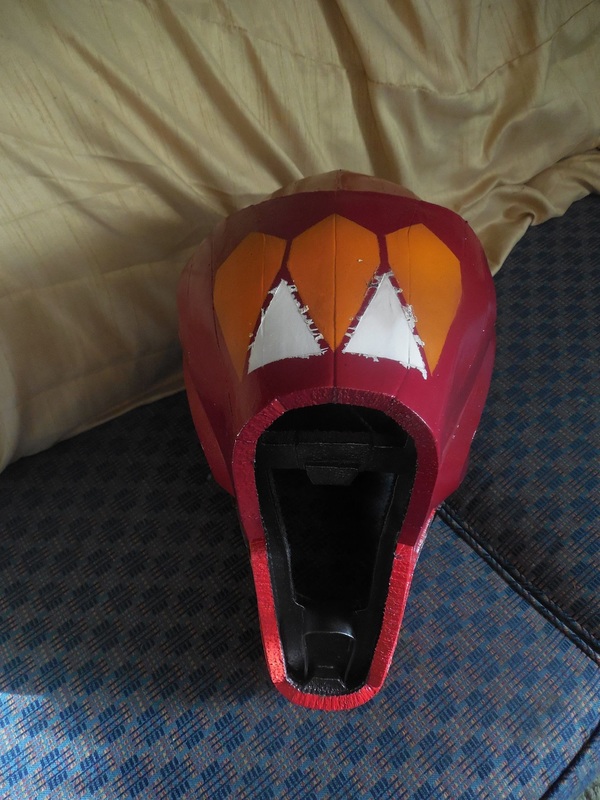
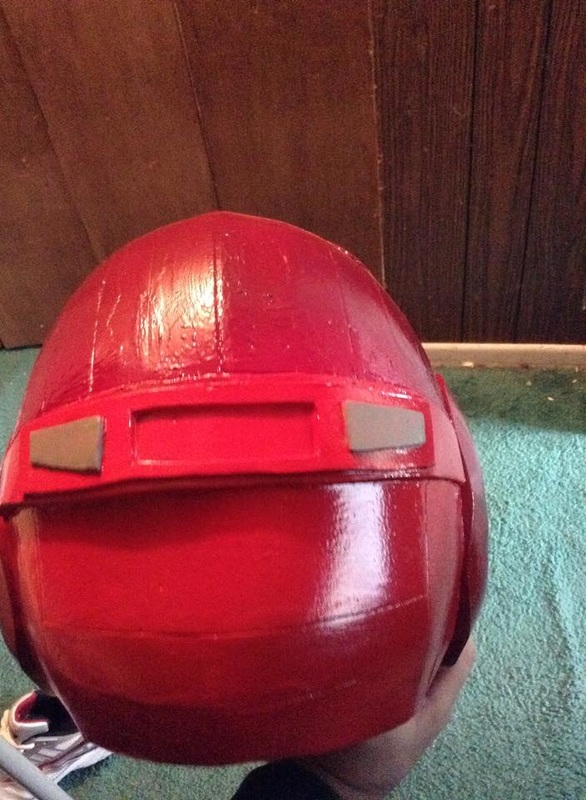
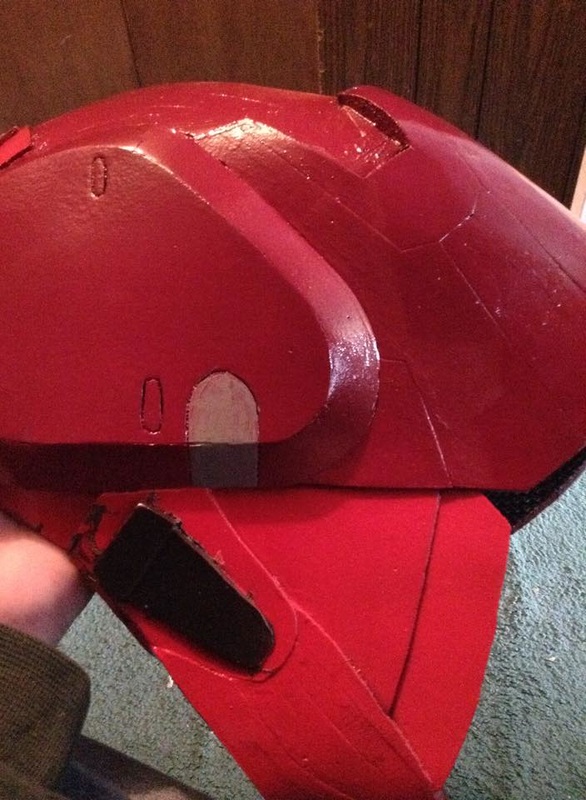
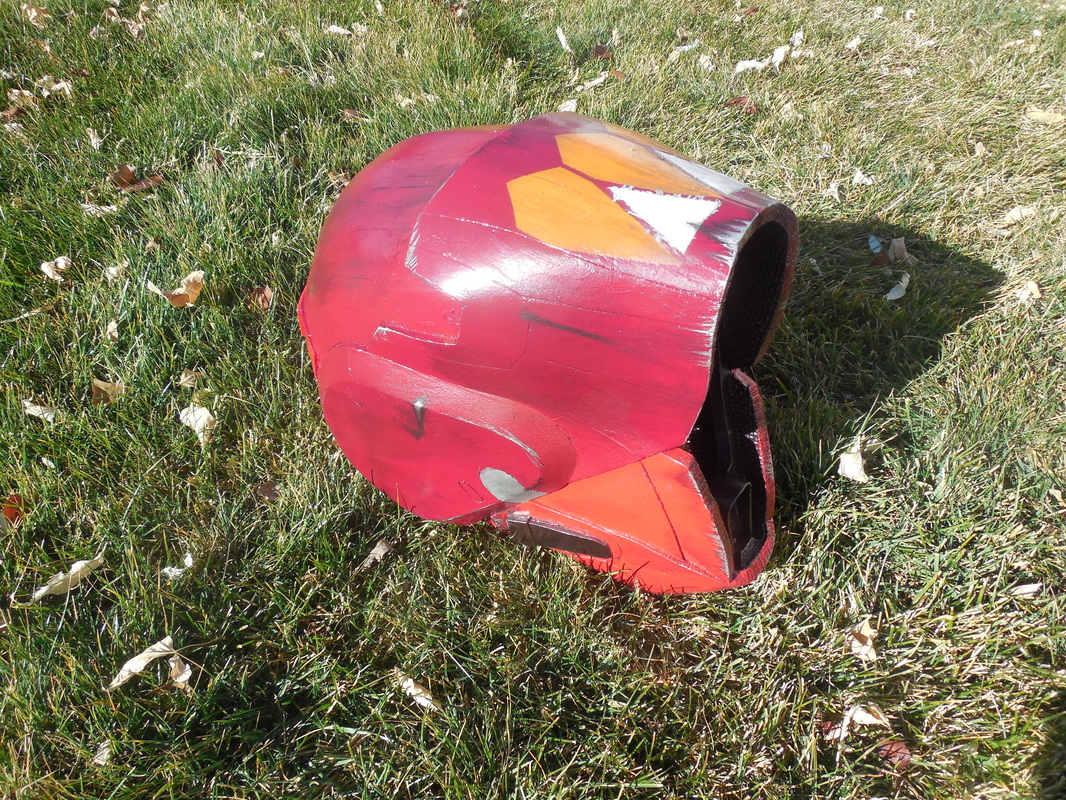
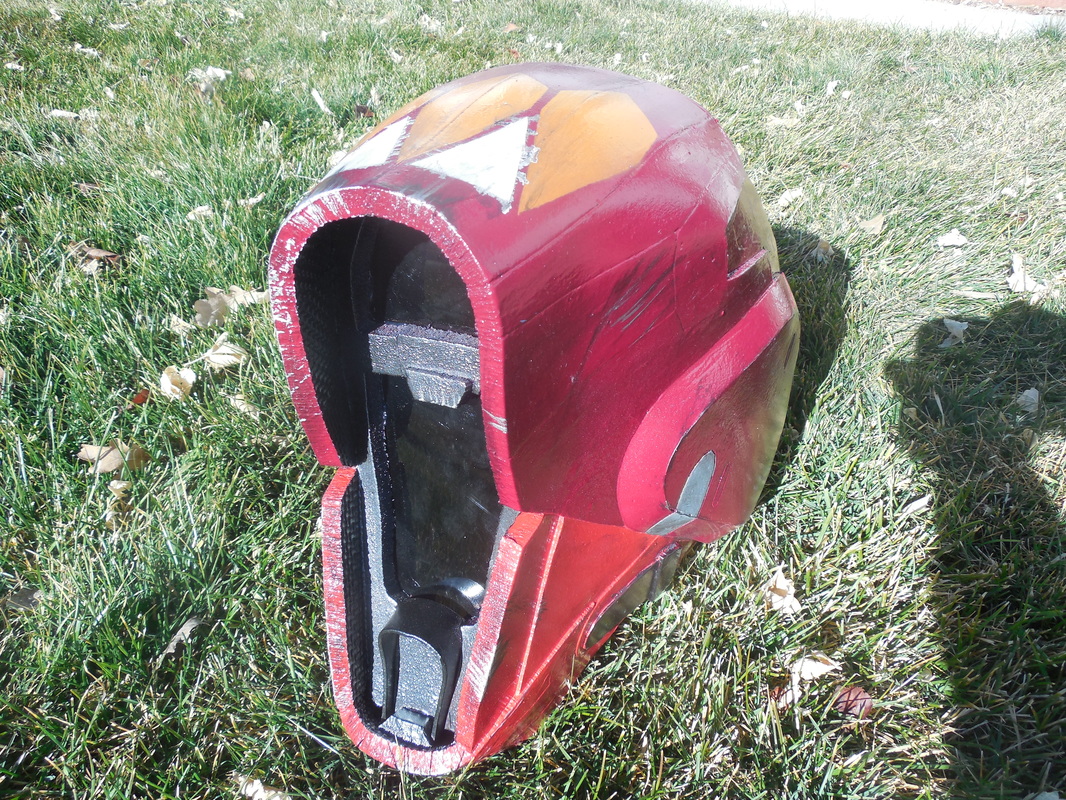
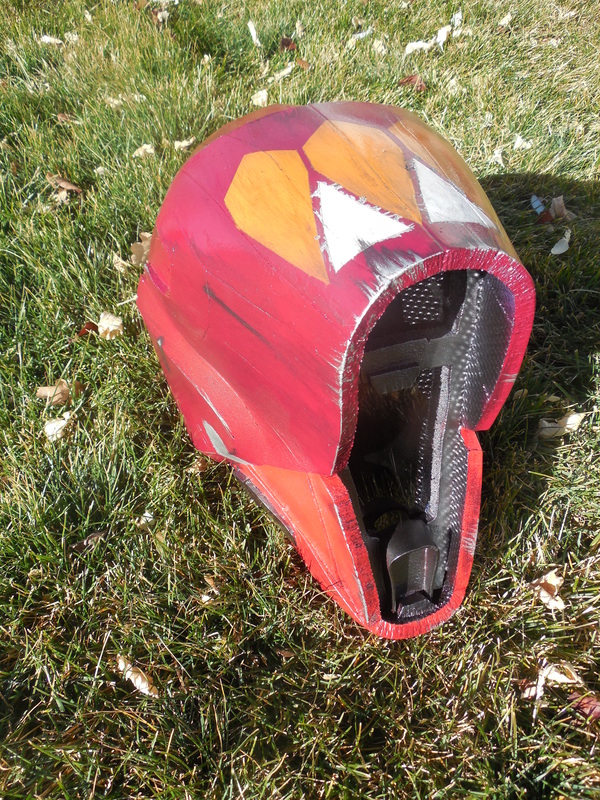
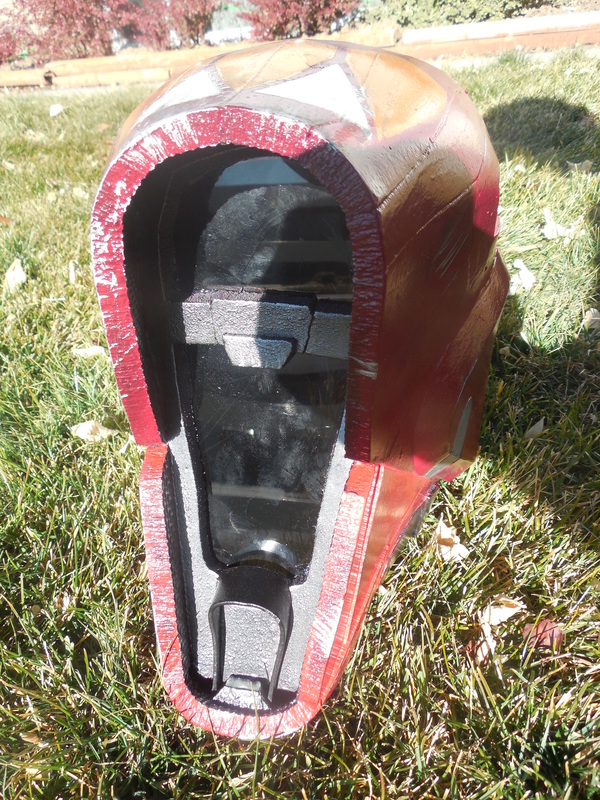
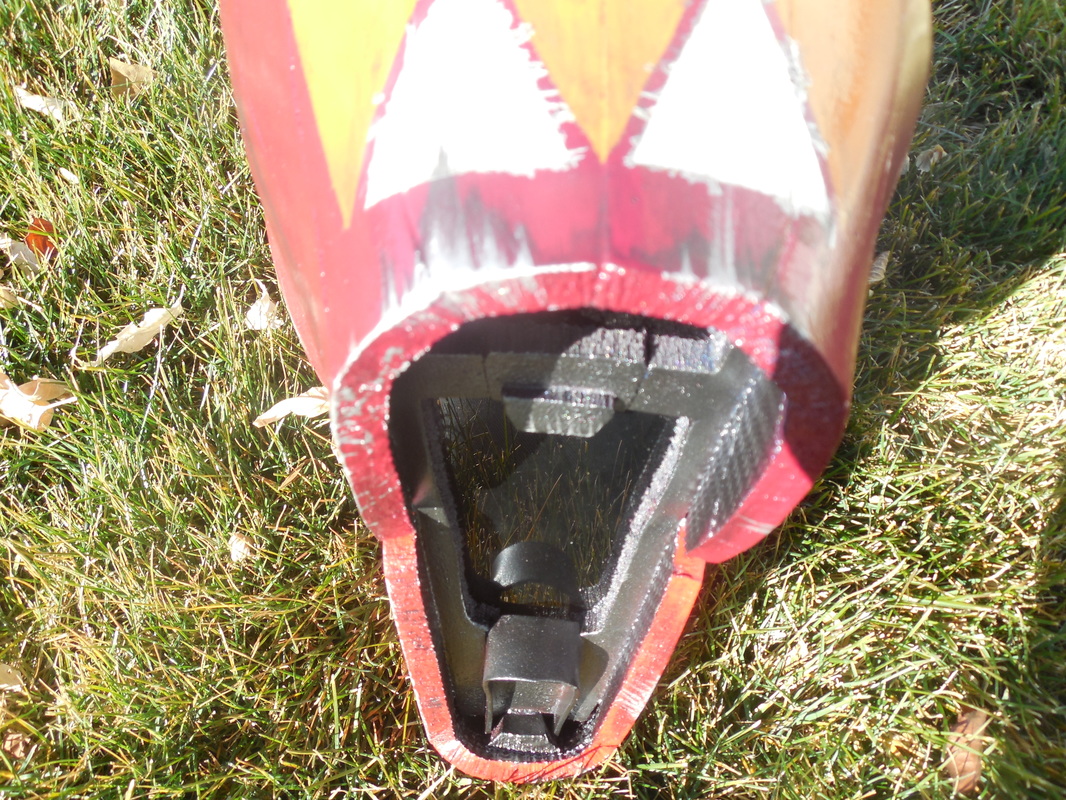
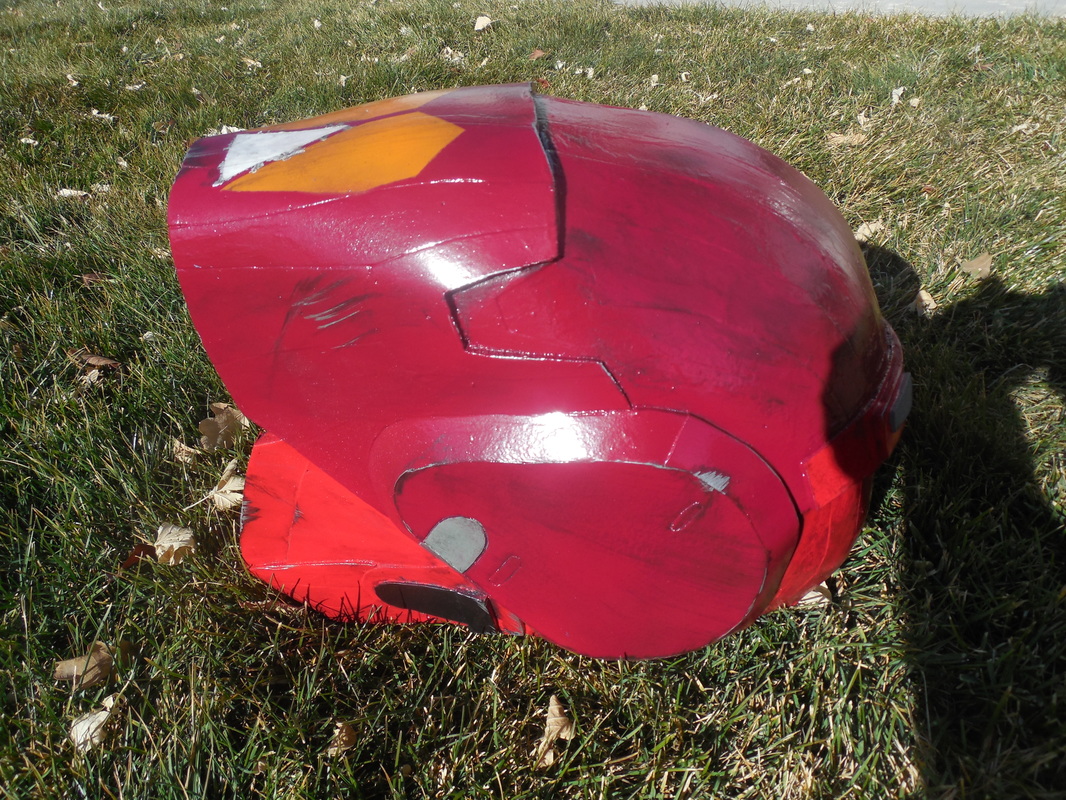
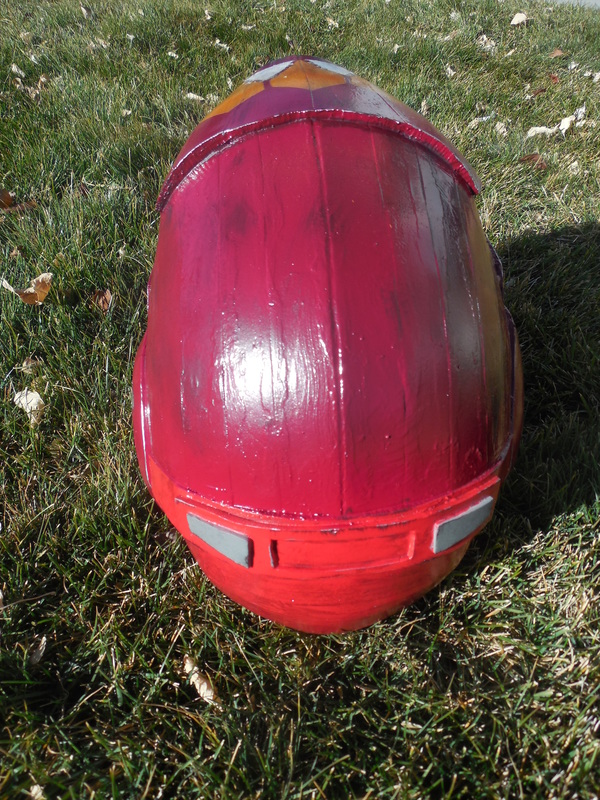
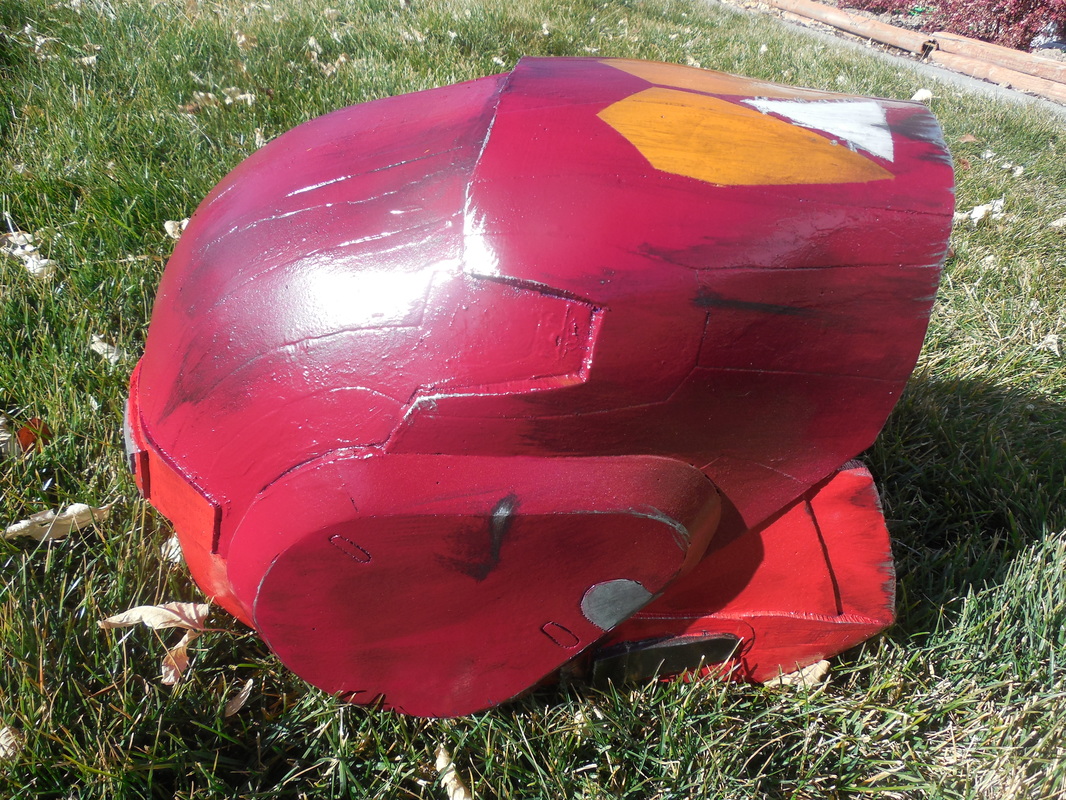
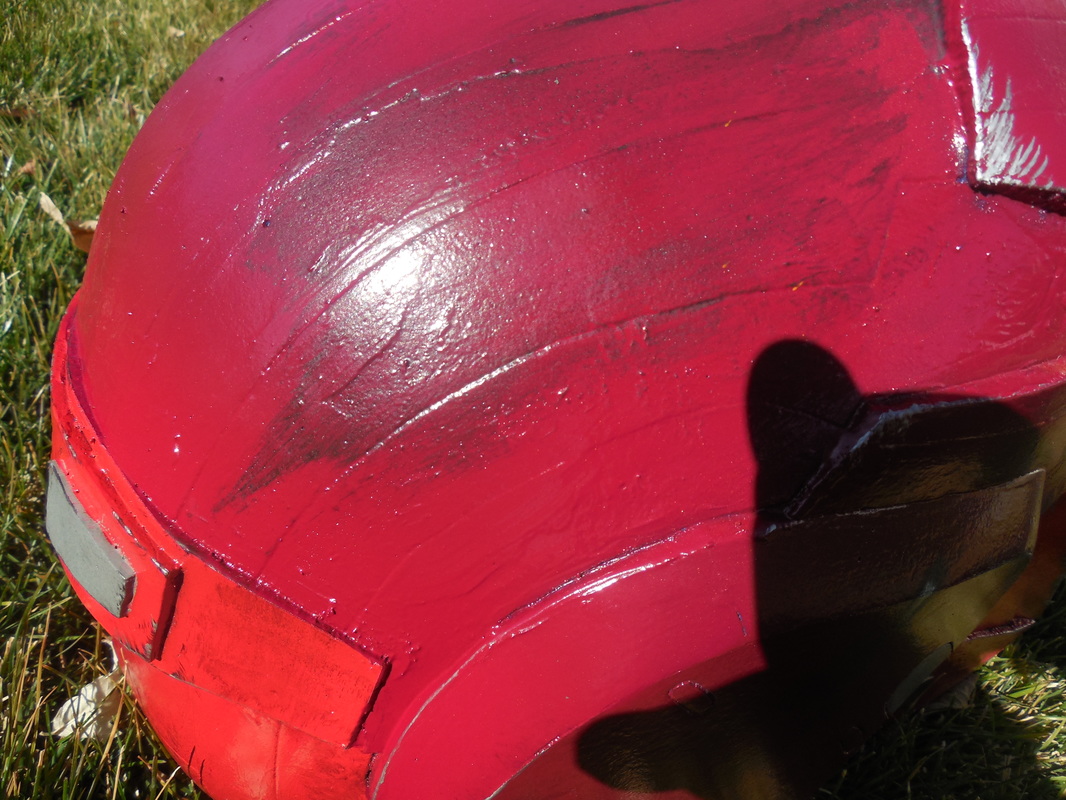
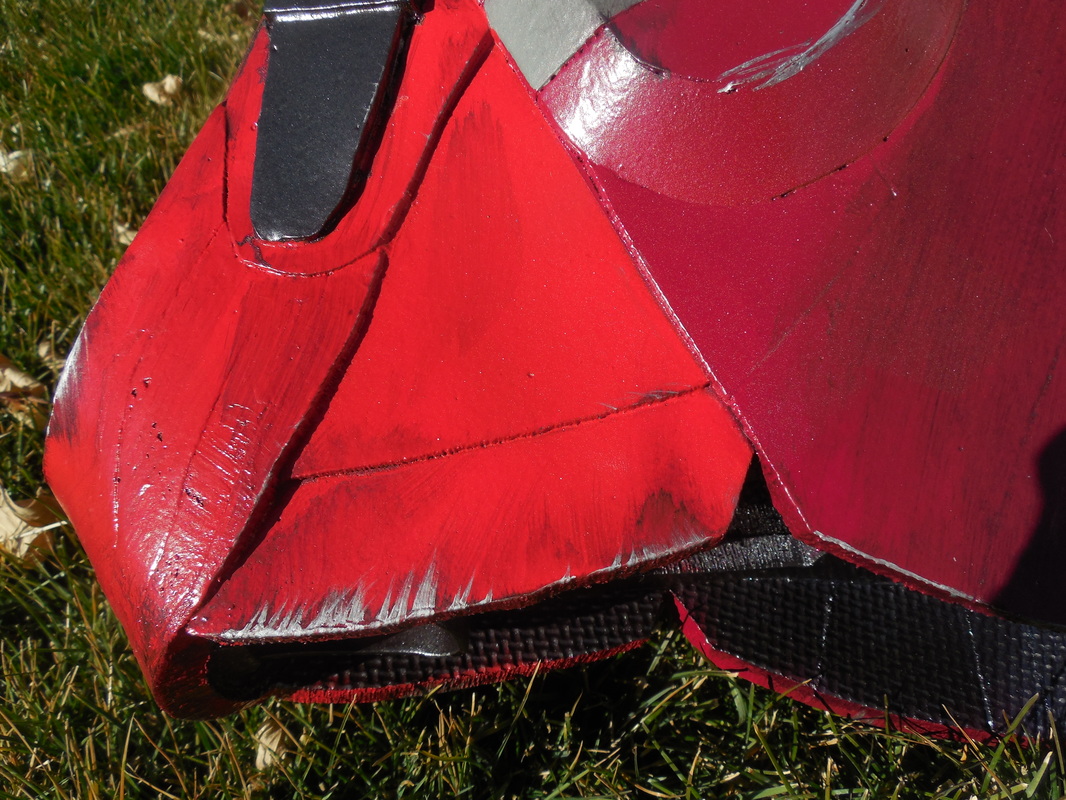
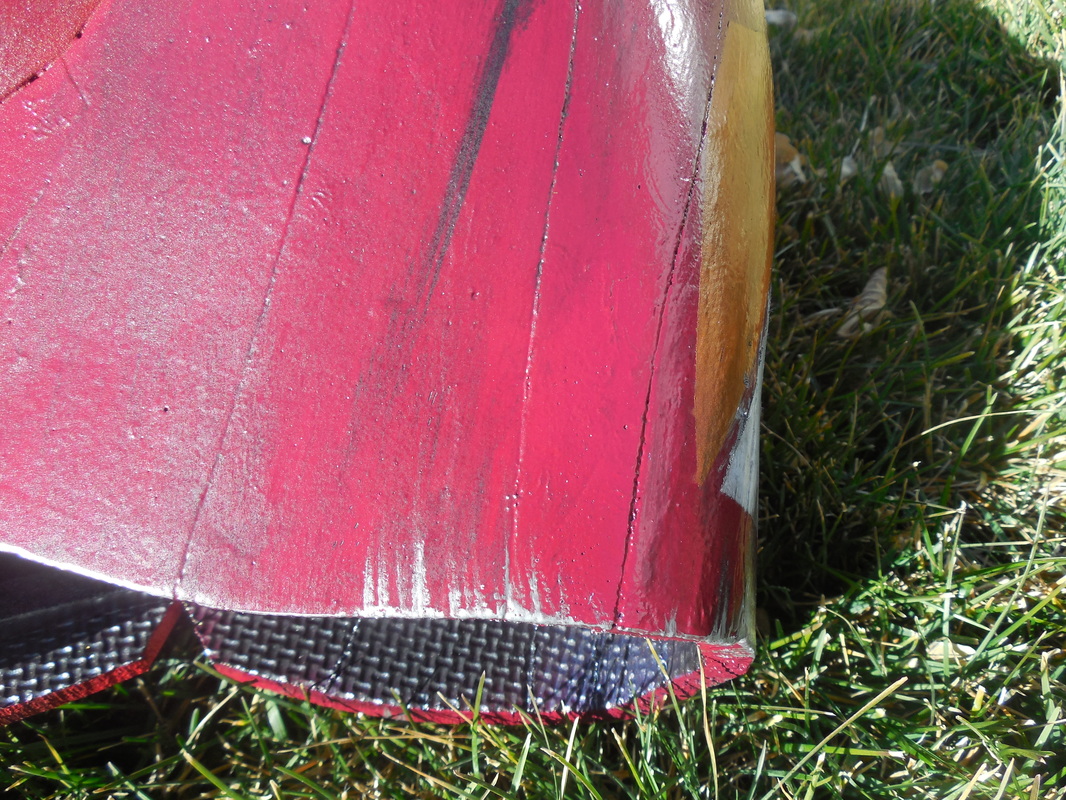
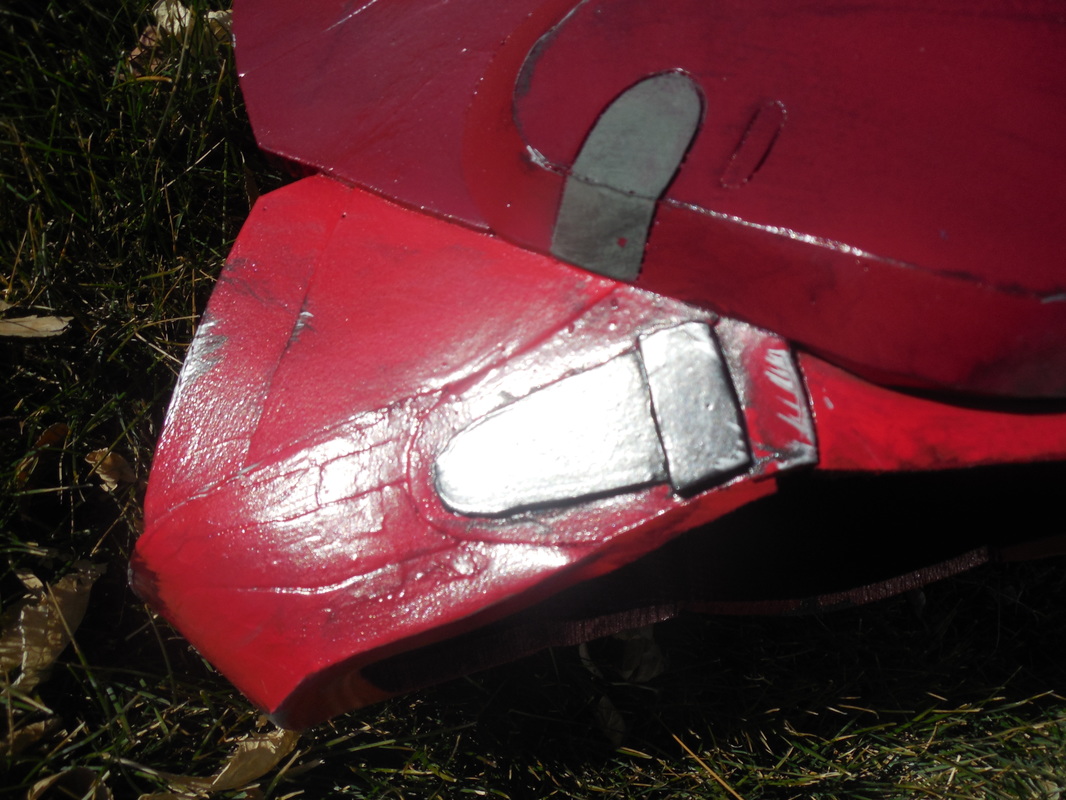
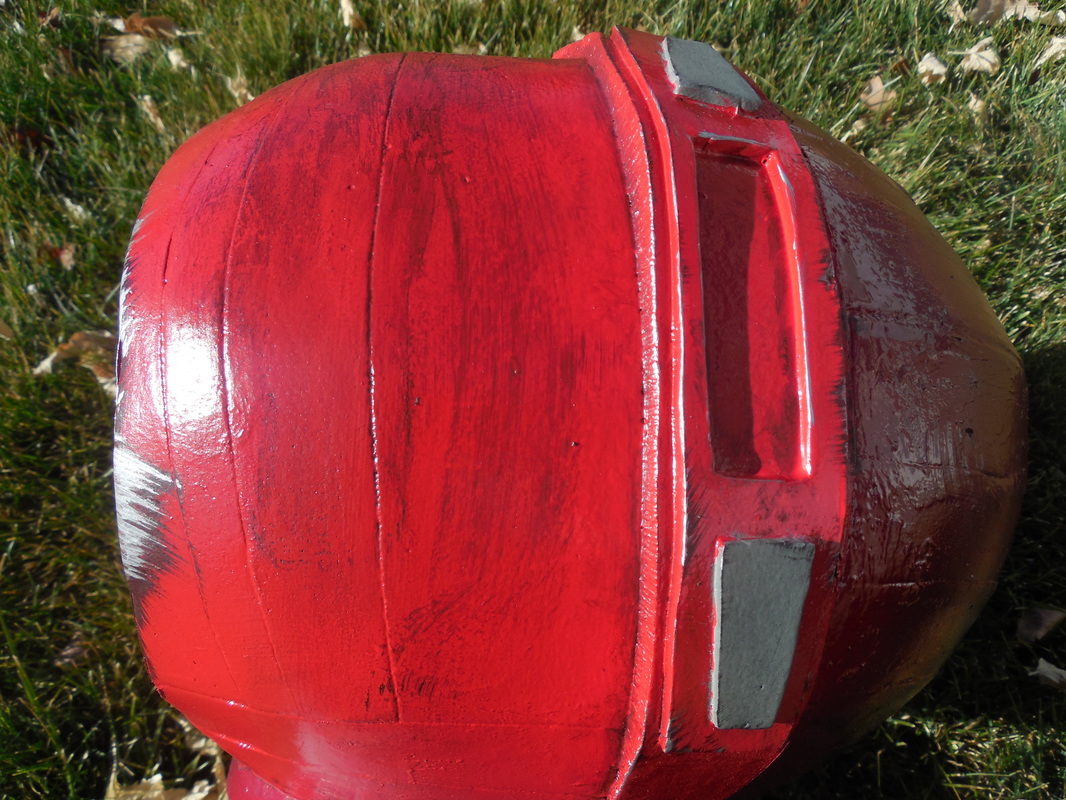
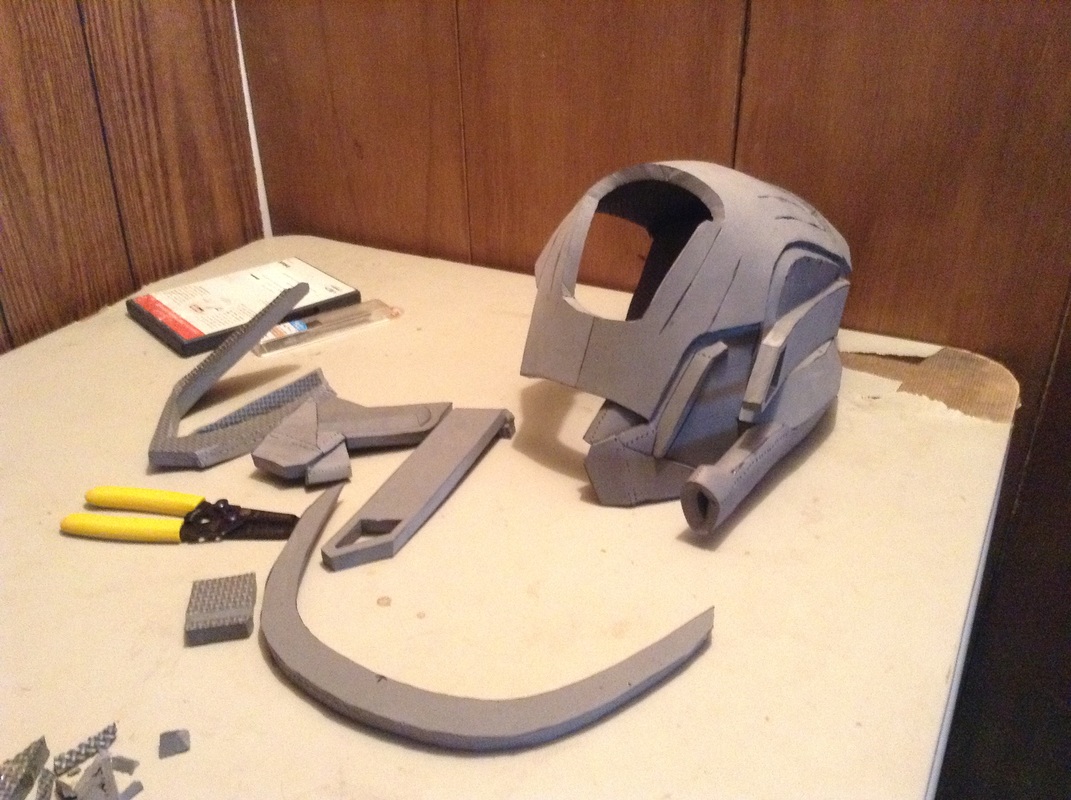
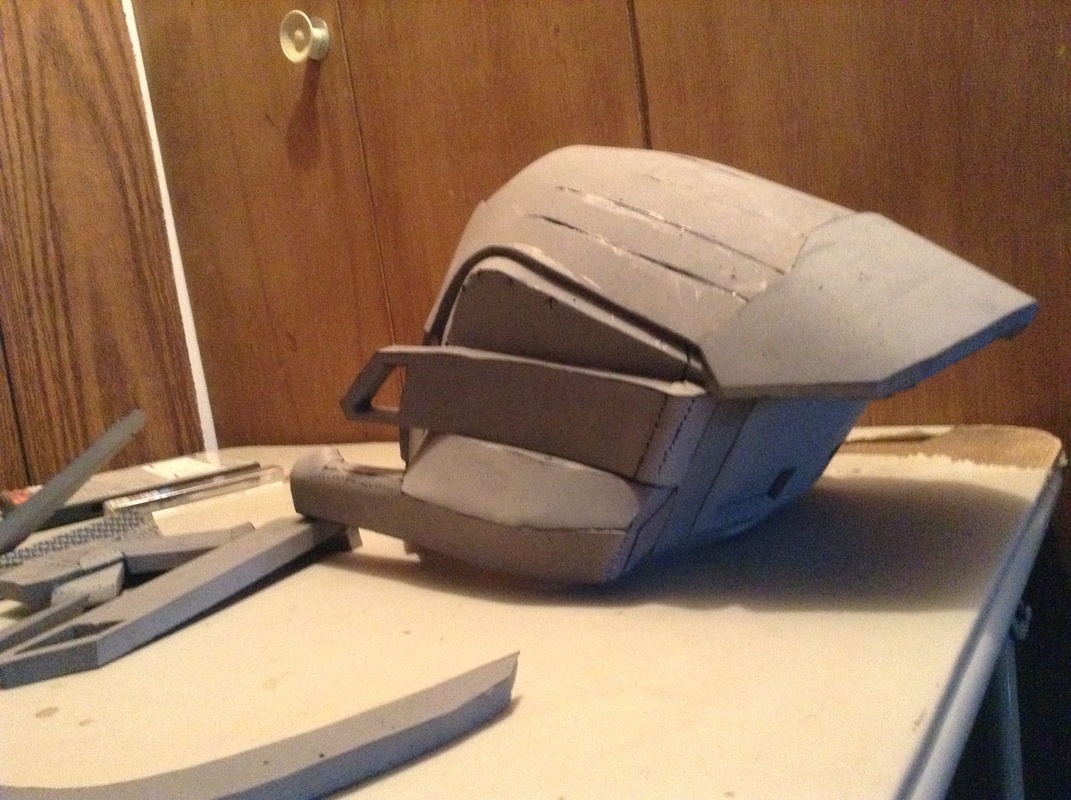
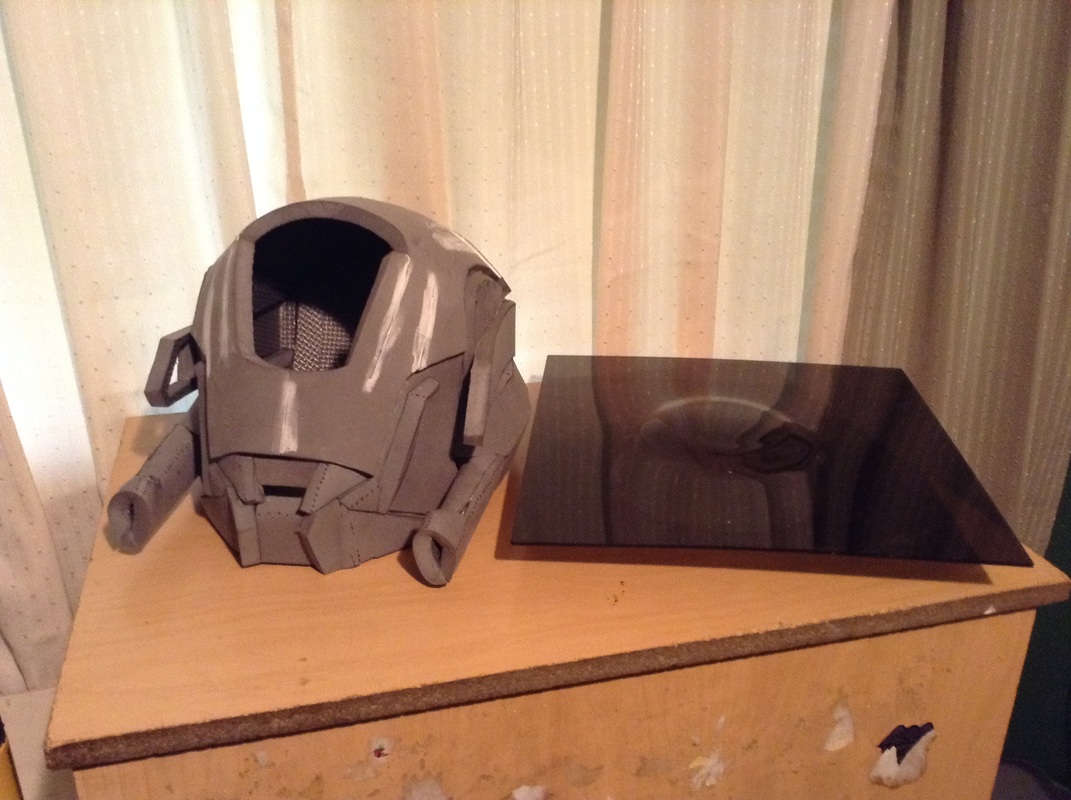
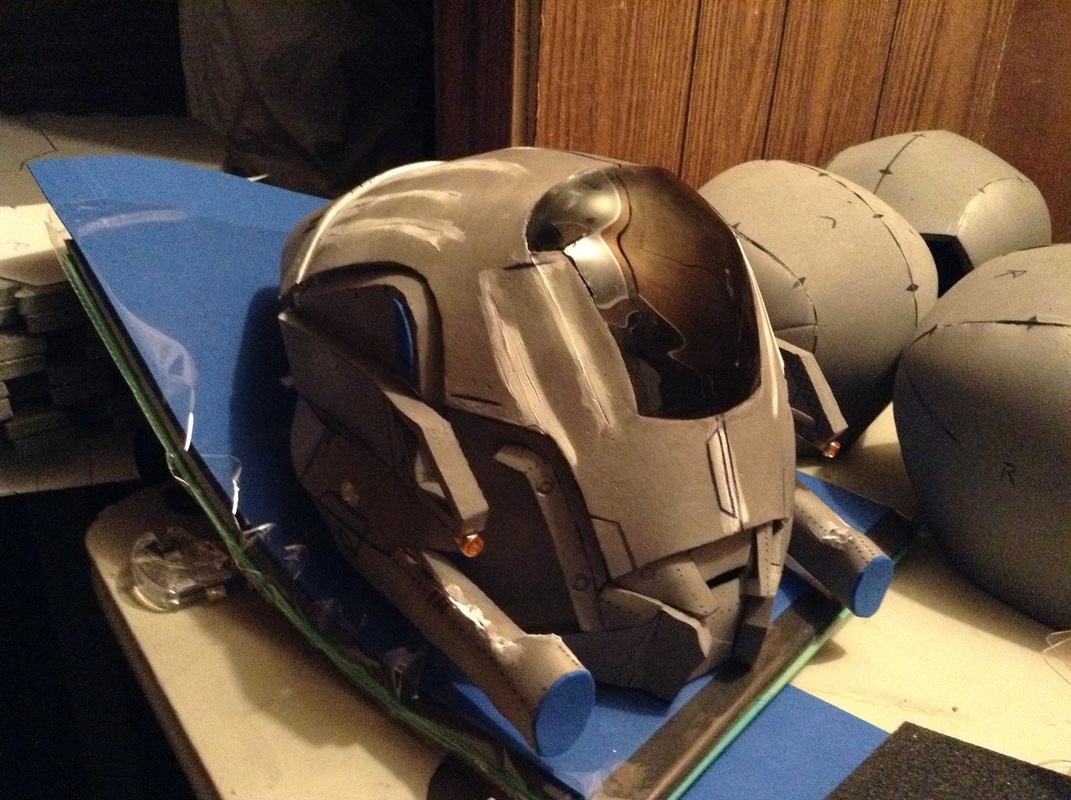
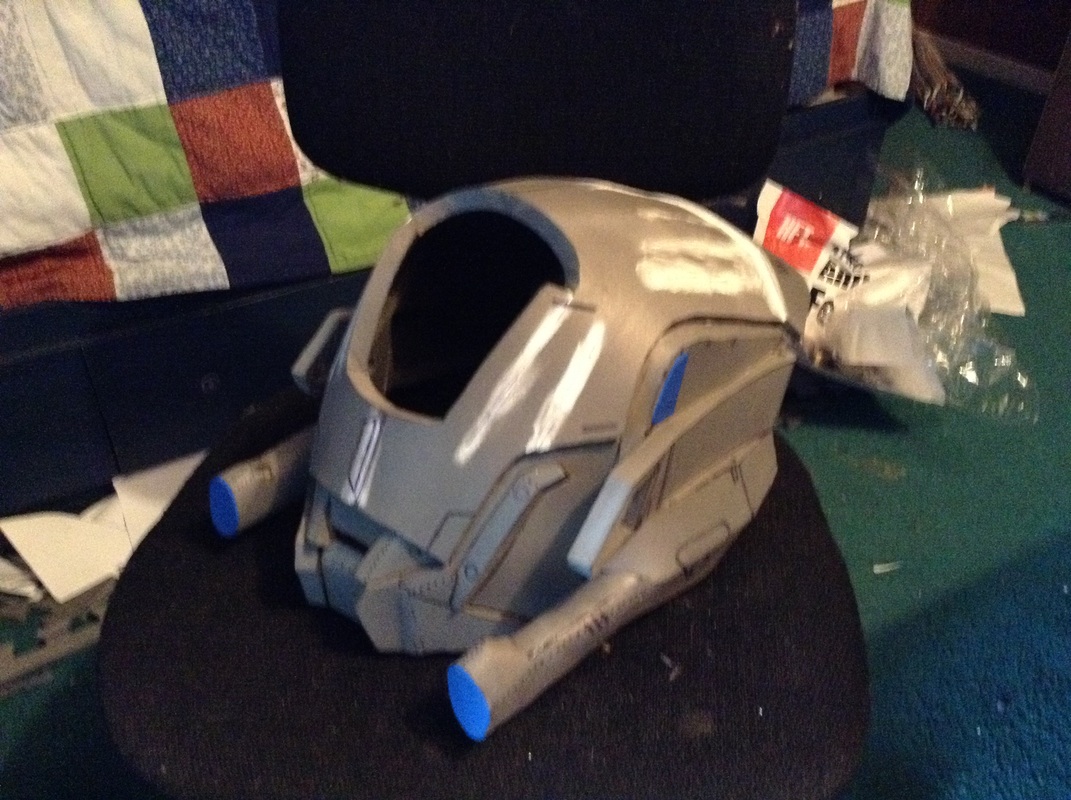
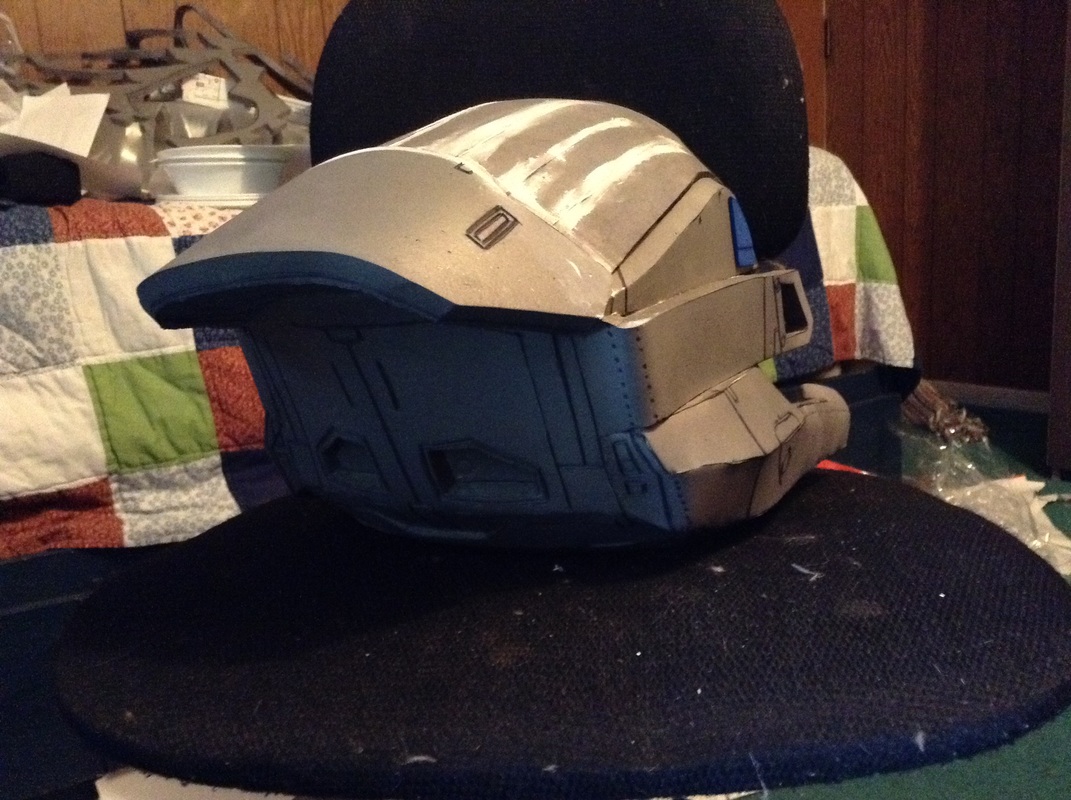
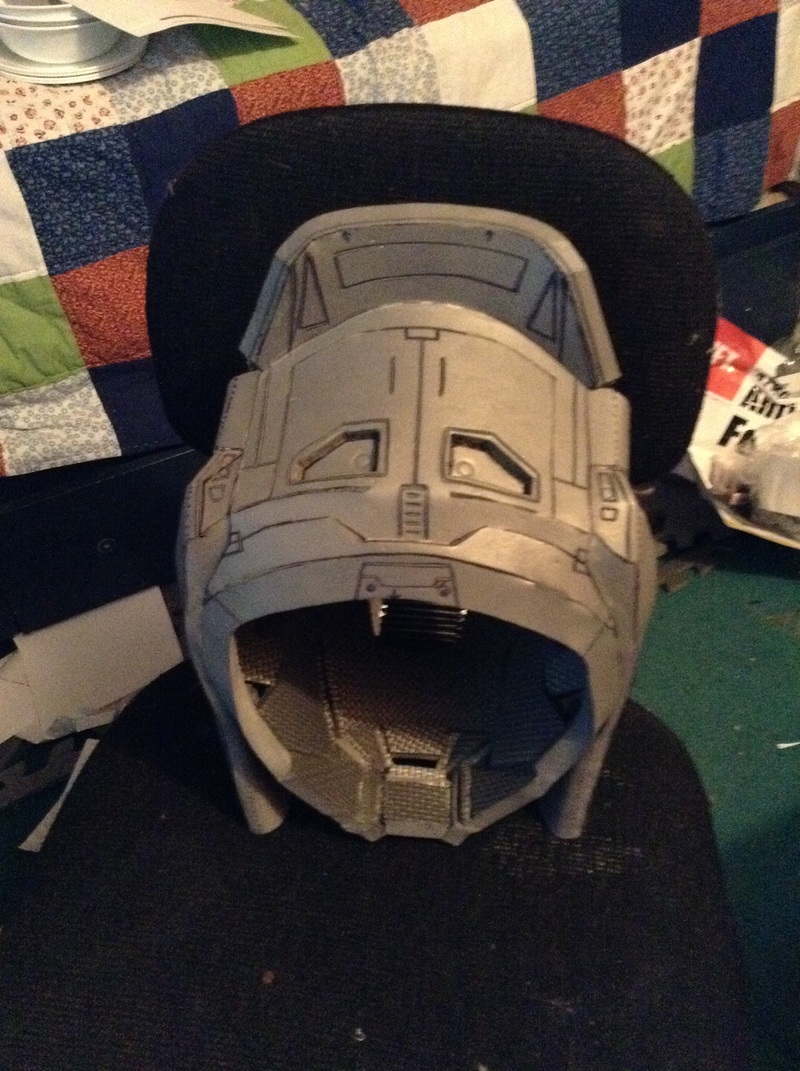
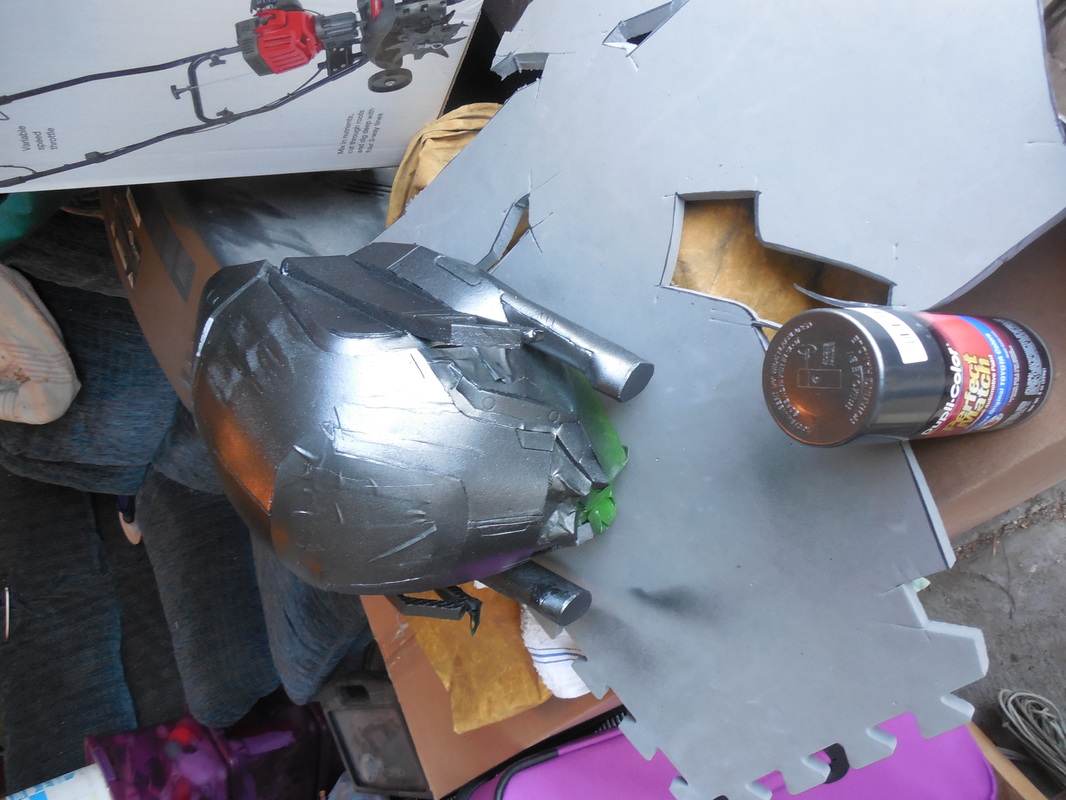
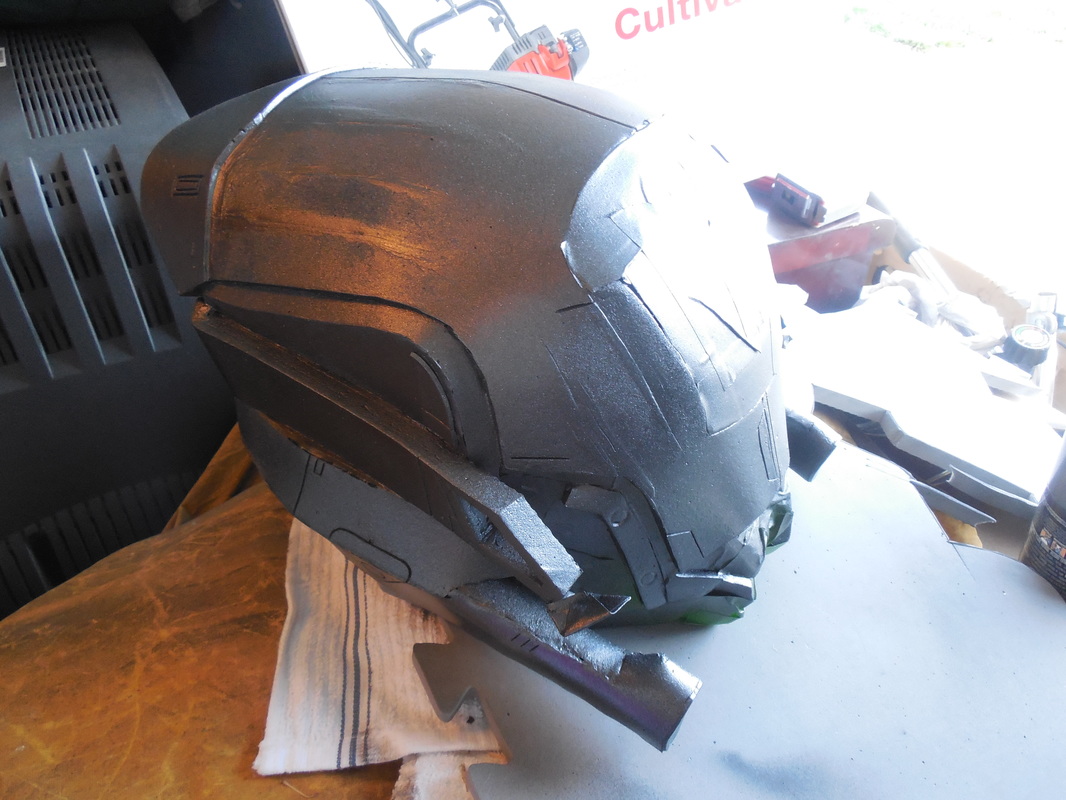
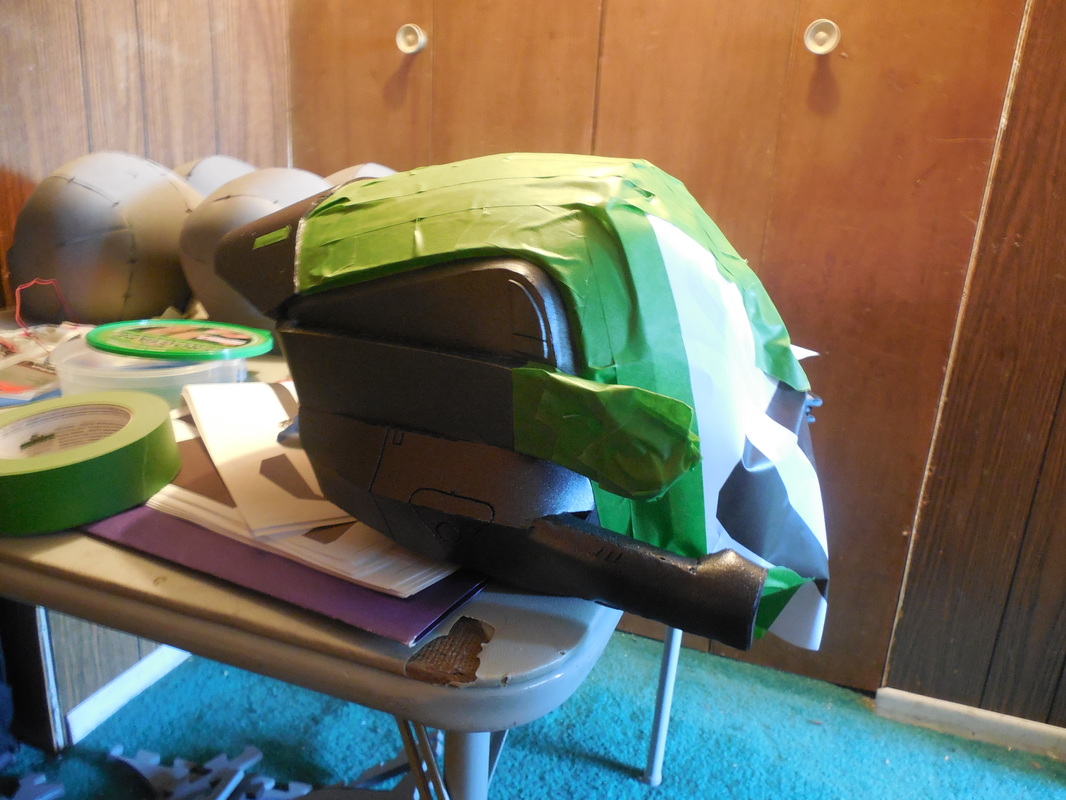
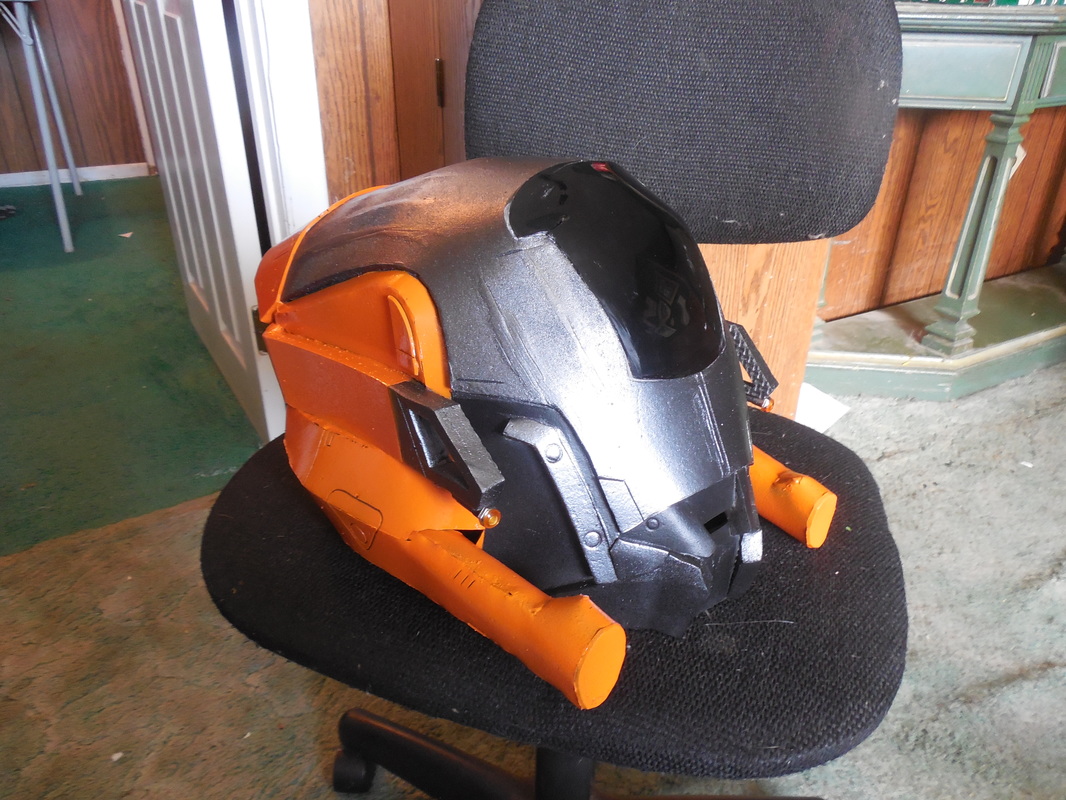
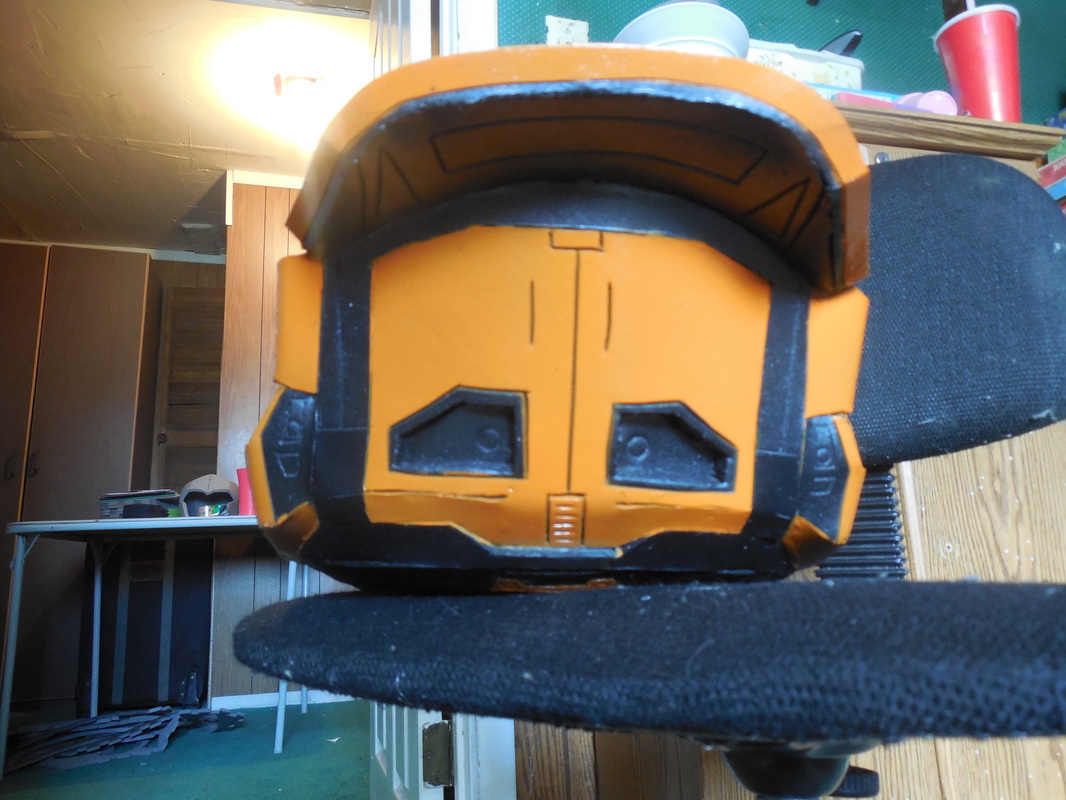
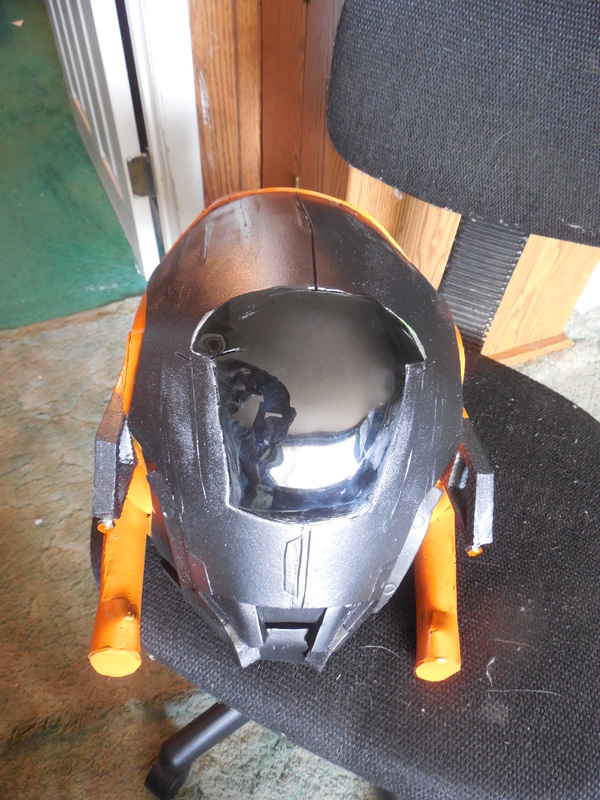
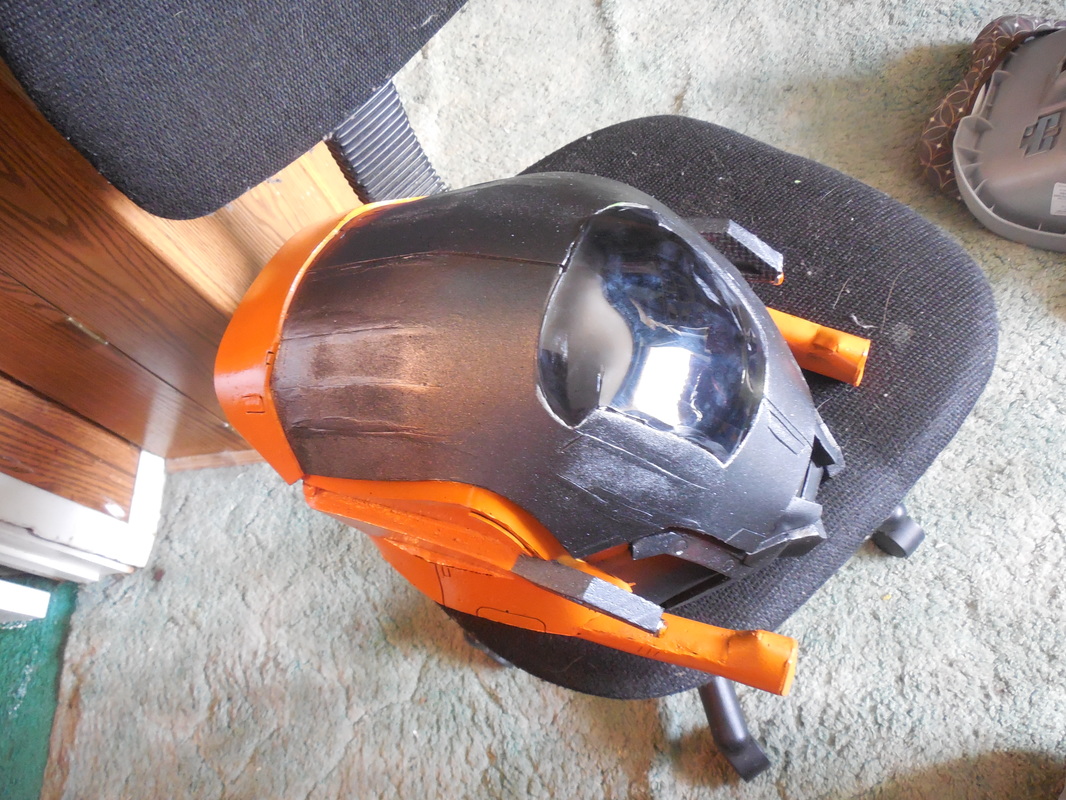
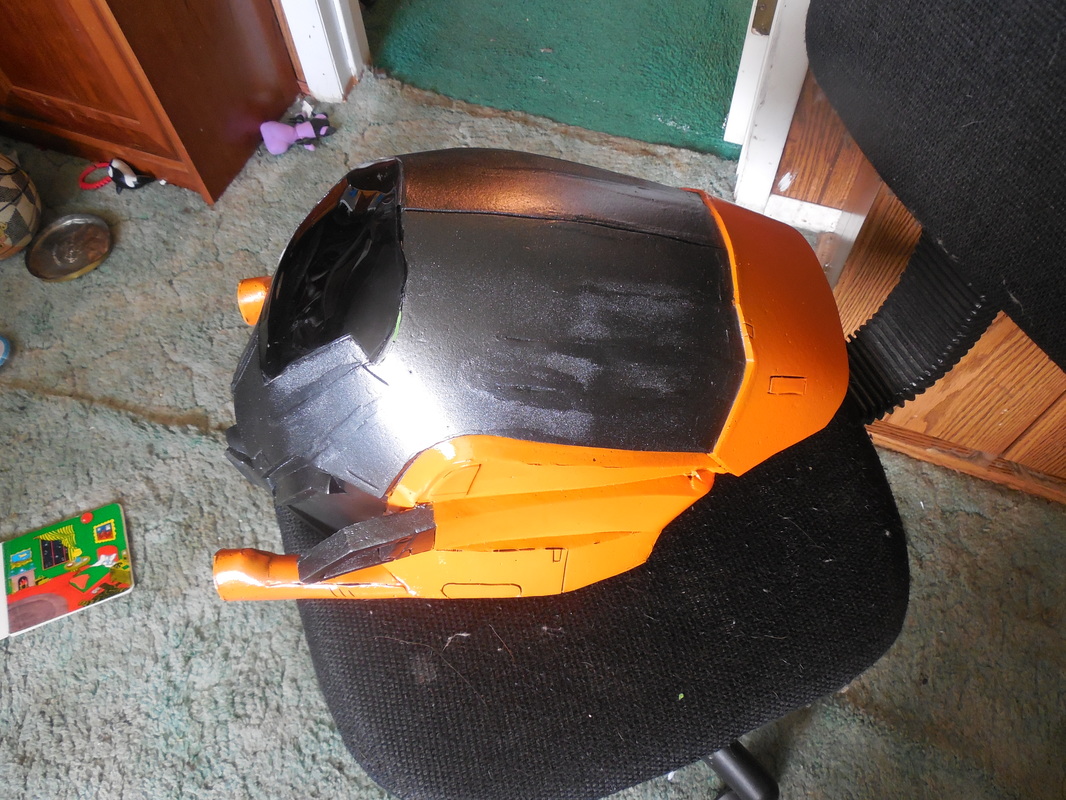
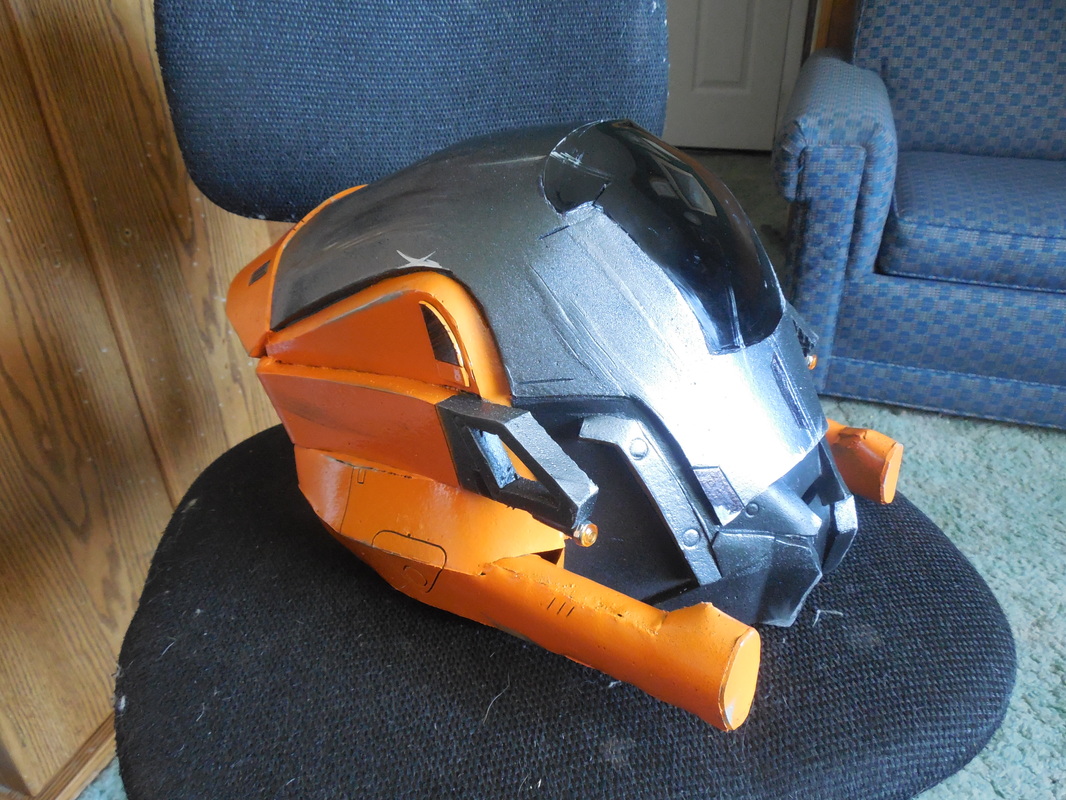
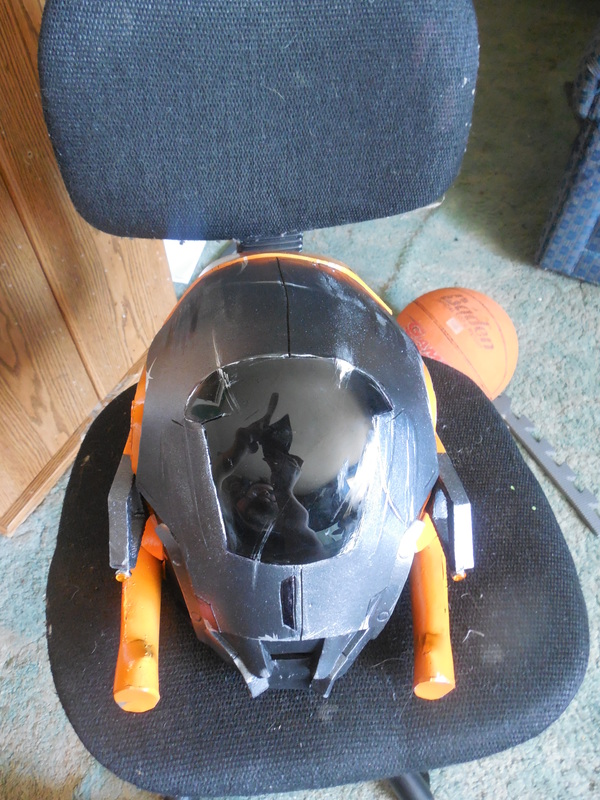
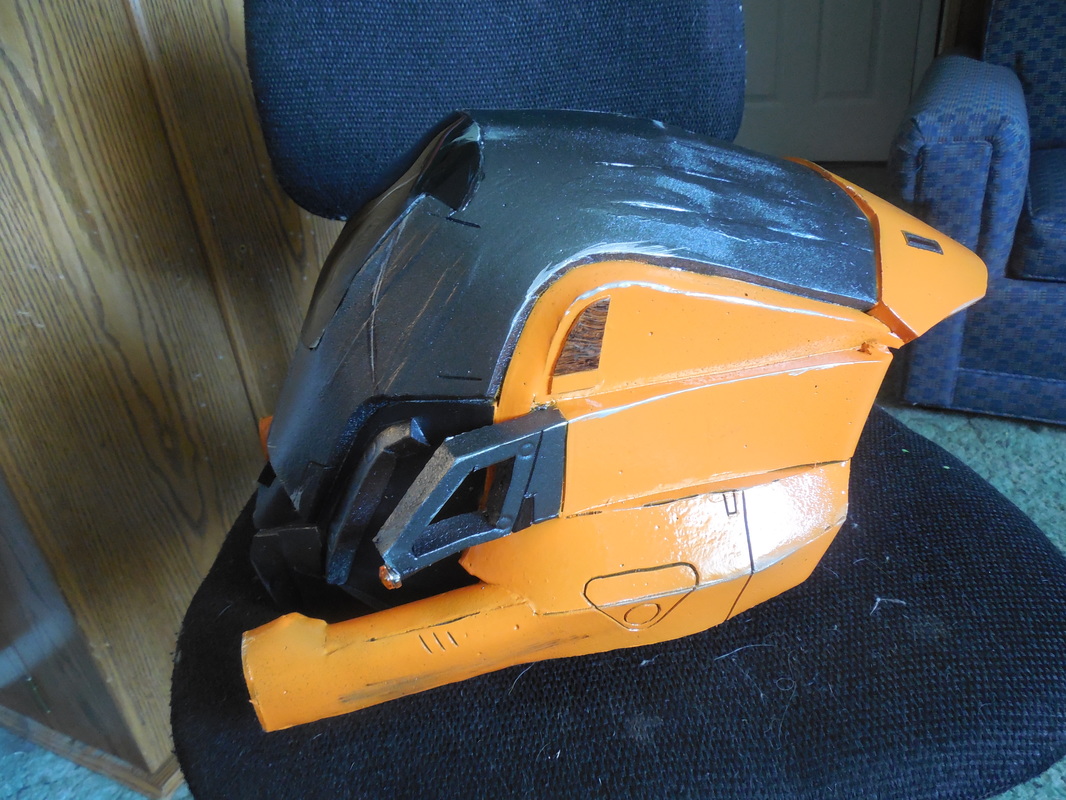
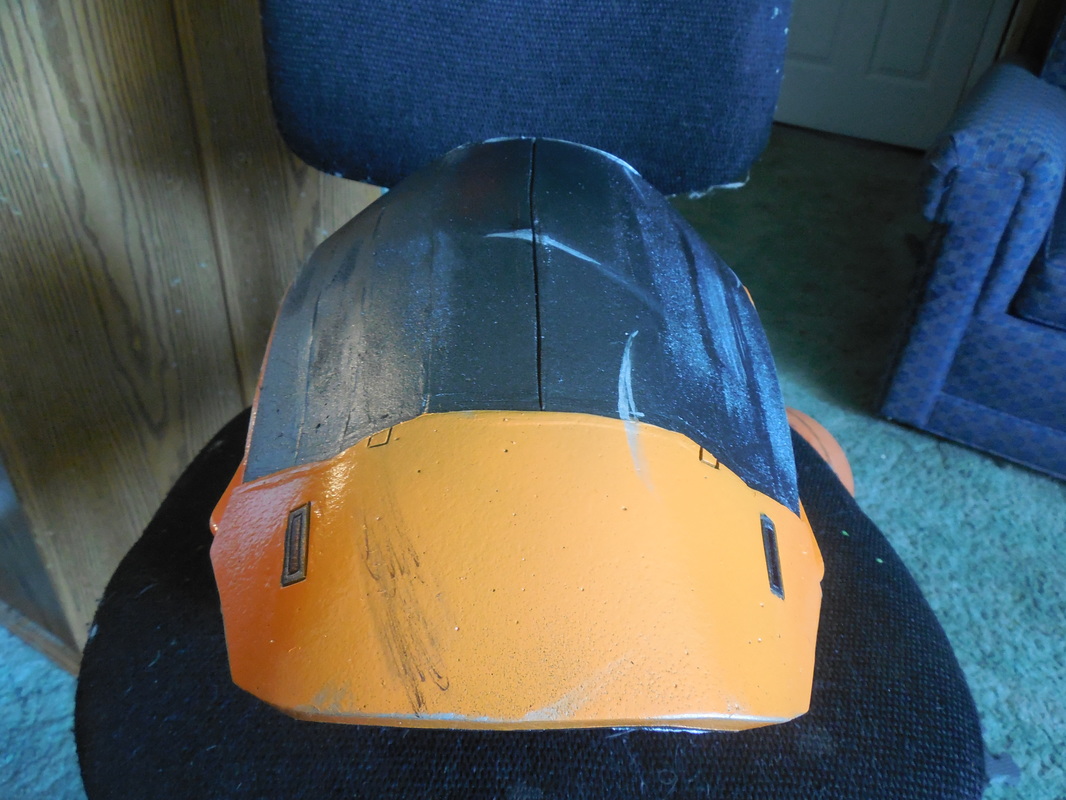
 After building the foam Titan helmet for Extra Life ATX, they came to me for a second helmet. This was a special helmet for one of their game casters, who plays a Warlock and really liked the Chroma Vow helmet her character was wearing at the time. For this one, I did a lot of the same things as the rest of my builds, though I started off in a different direction since I couldn't find any proper patterns online anywhere (lack of time meant pep files, but there weren't any out there yet for this one). So, using a standard Warlock helmet file, I opted to attempt to modify it on my own, freehanding the front half. Unfortunately, I didn't have very much experience freehanding, and should have done something similar to the Original Helmet series I made, and it ended up being misshapen and uneven. By this time though, someone had finally made a proper pep file, and I was short on time so I adapted it to foam and started again. (Remember that Titan helmet. It'll be important later!) Already things were looking much better. I was kind of disappointed that my attempts at making the patterns/freehanding had failed, but glad that the redo worked. Sooooooo much better! Attached the last of the visor section pieces, then glued everything down. After that, did the hobby knife/heat gun trick to add the finer details. Did a terrible job at filling the seams with Kwik Seal, then opted to cover the whole thing with Mod Podge since I was out of Plasti Dip at the time. 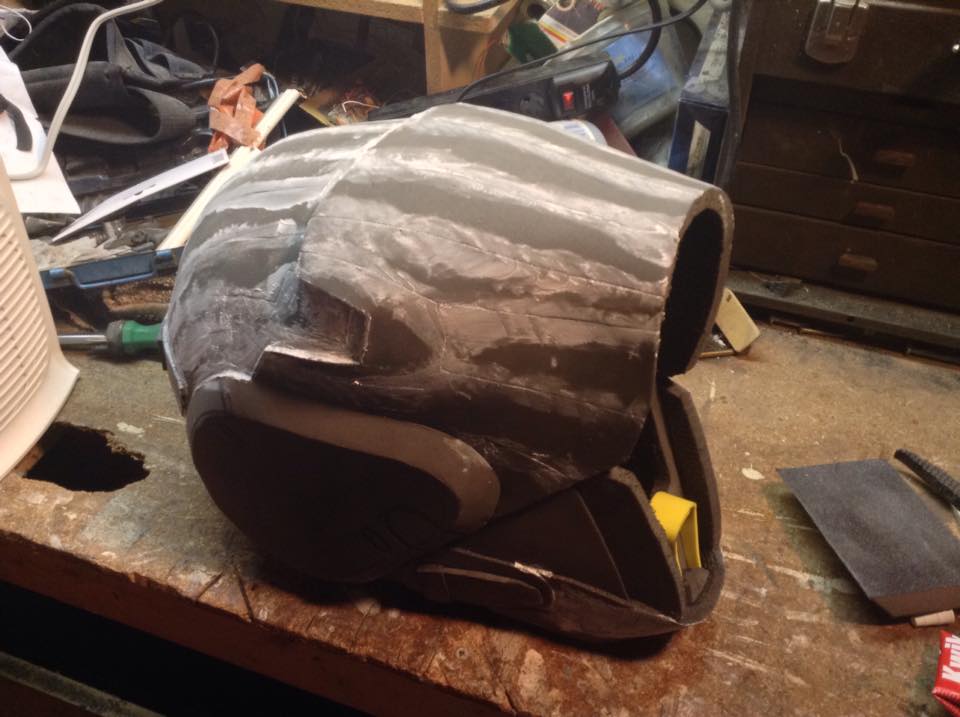 Painting it was a whole new level of interesting. First with the Mod Podge instead of Plasti Dip, then with a few coats of blue primer, since I was out of any black. 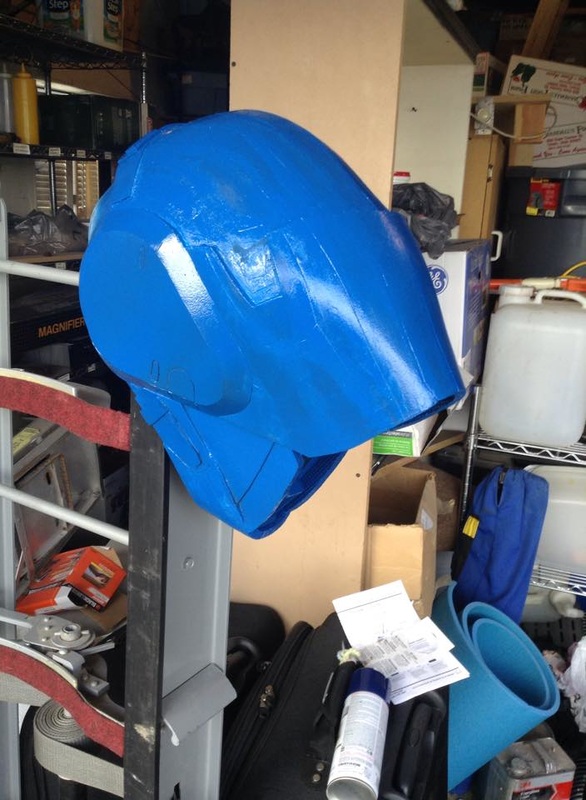 The rest of it was pretty normal, once I could start on the reds. Did the lowest level color first, let it dry, then masked it off and did the next level up with a darker red. After that, more masking, followed by the same gunmetal for the inner visor area and cheek things - what is it with buckles and cheek things, Bungie? Once that was all set, I masked off the top to do the pattern. The orange went on splendidly; the white not so much. I wasn't expecting it to come out as fast as it did, nor as watery, and as a result it bled a ton. Not a *huge* deal, but it really bugged me at the time. Also painted the fine detail areas. Then came the final step: weathering! Black washes with acrylic to start off, then I went over spots a bit heavier with black, dark grey, and silver drybrushing. Worked it into the bleeds around the white, to blend it in a bit better. After all that, a few clear coats to seal it all in. 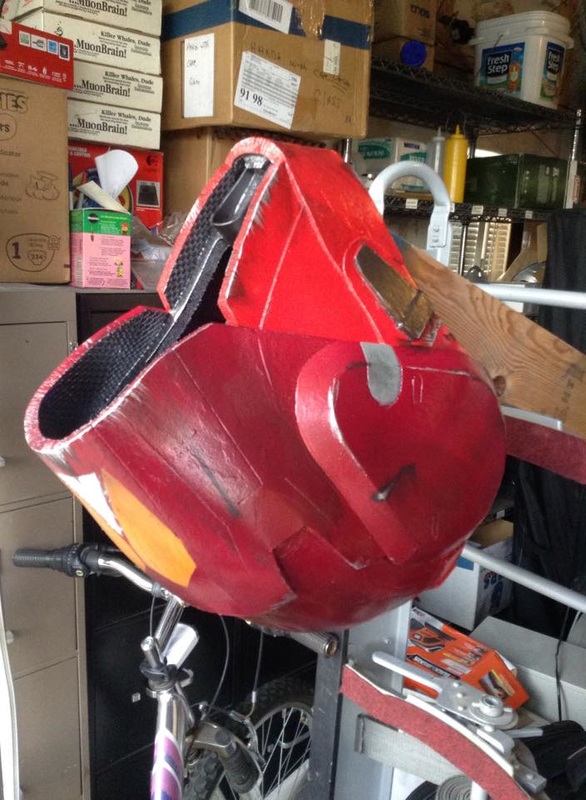 Installed a sheet of smoke grey acrylic inside, so that she could see out of it while she was streaming, and with that I was done! Hope you guys enjoyed this build, it was definitely a learning experience.
2 Comments
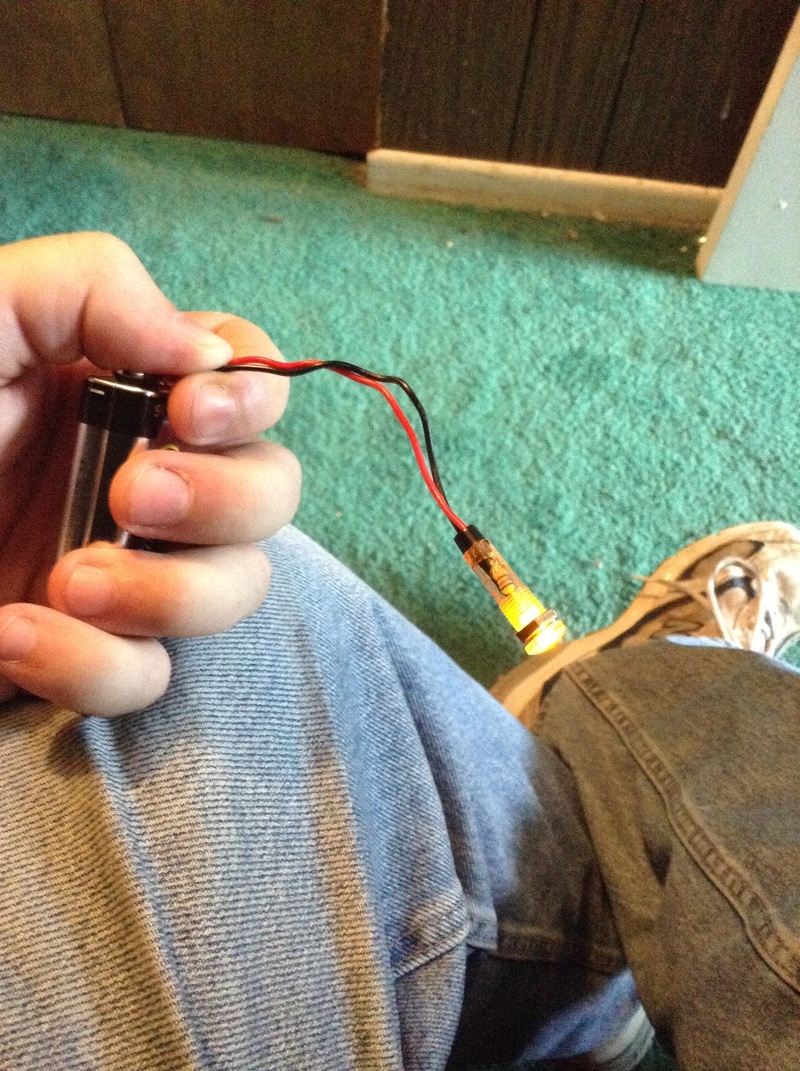
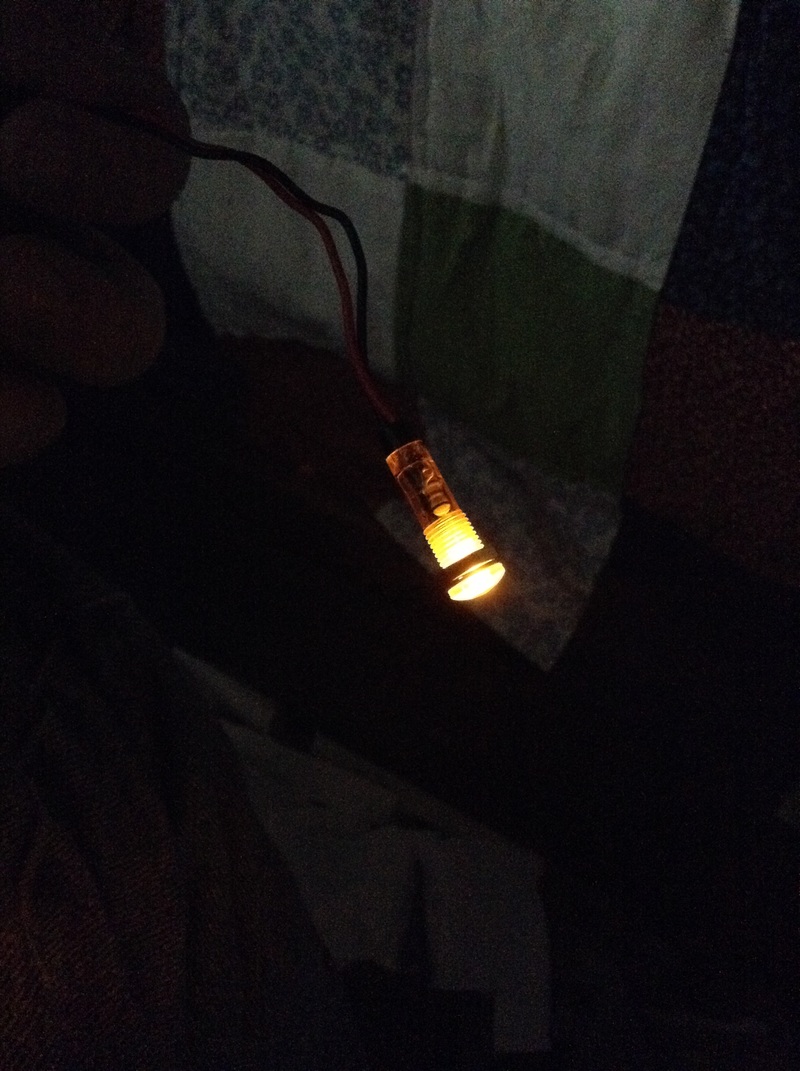
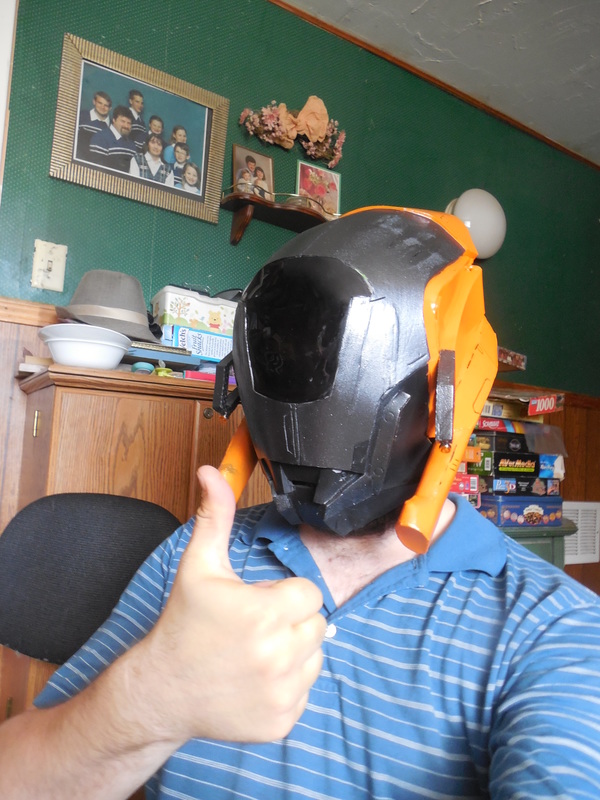
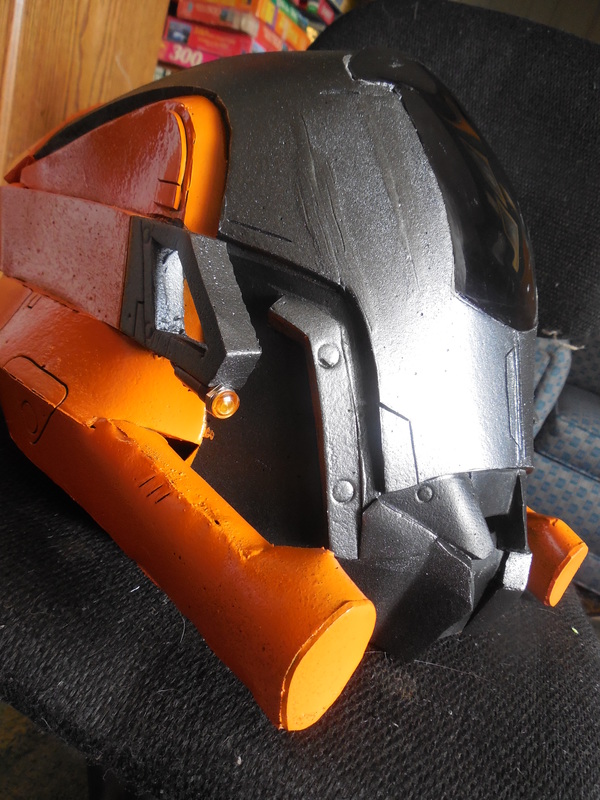
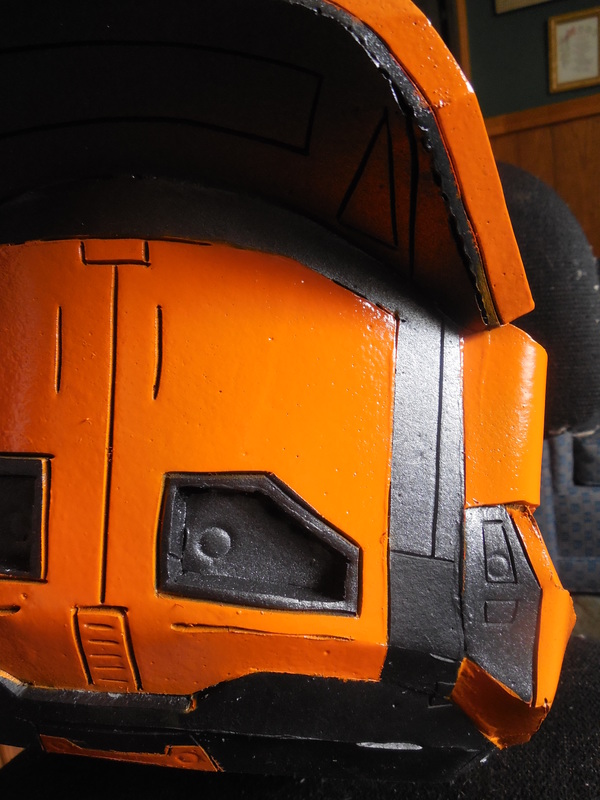
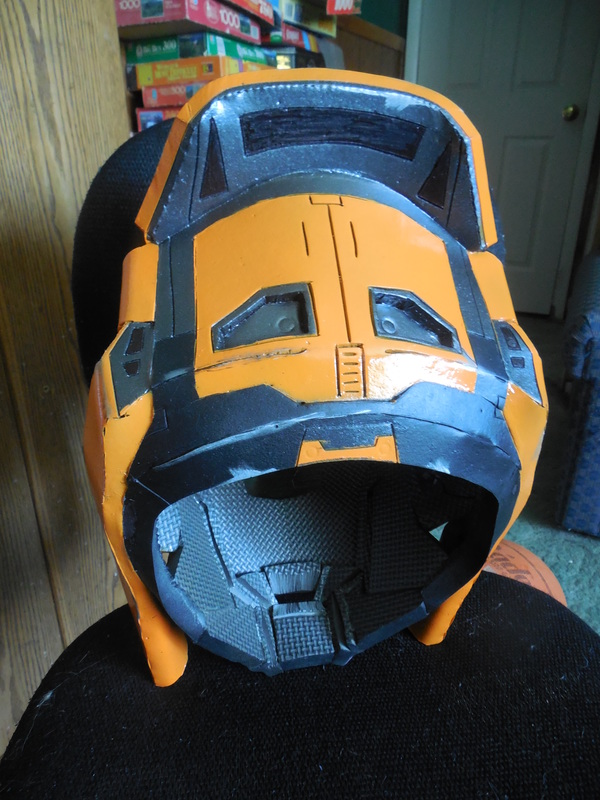
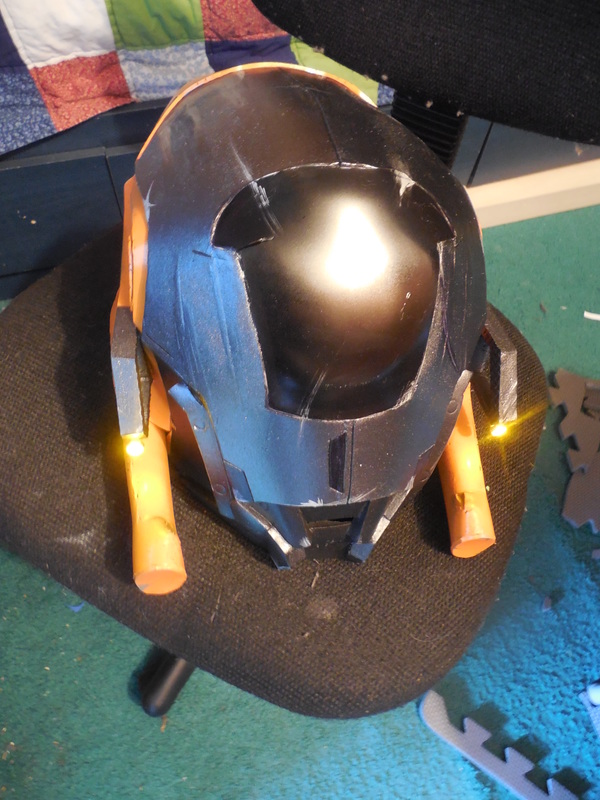
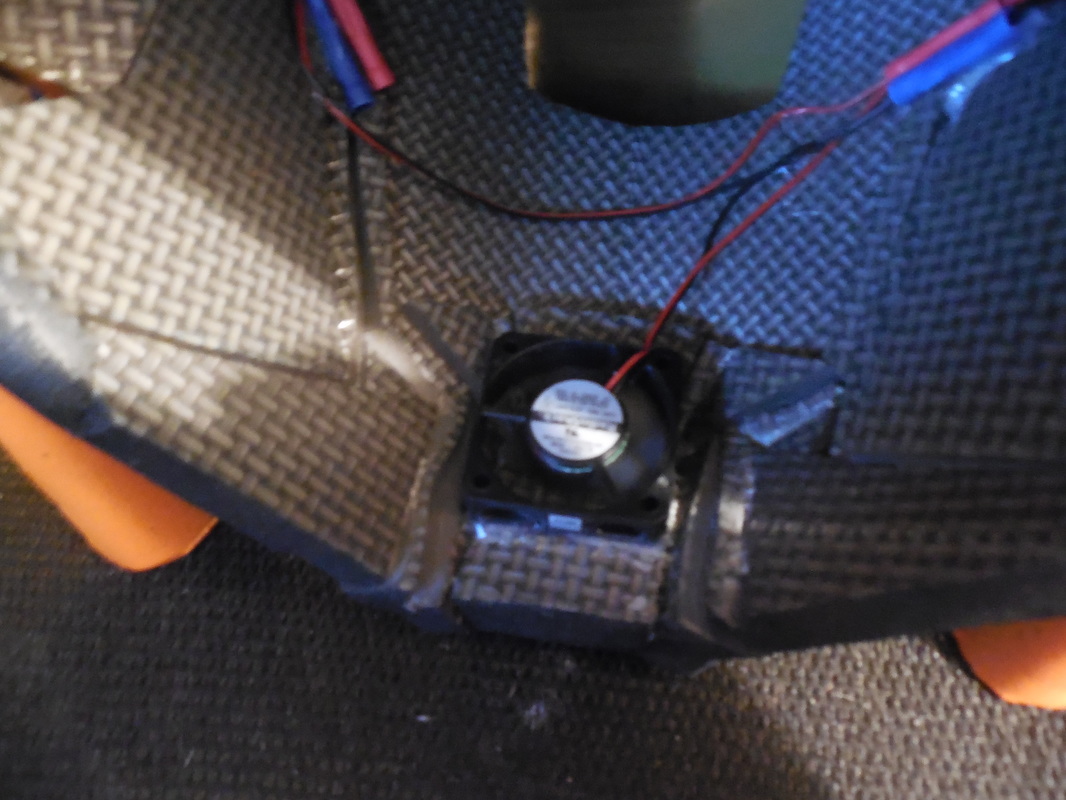
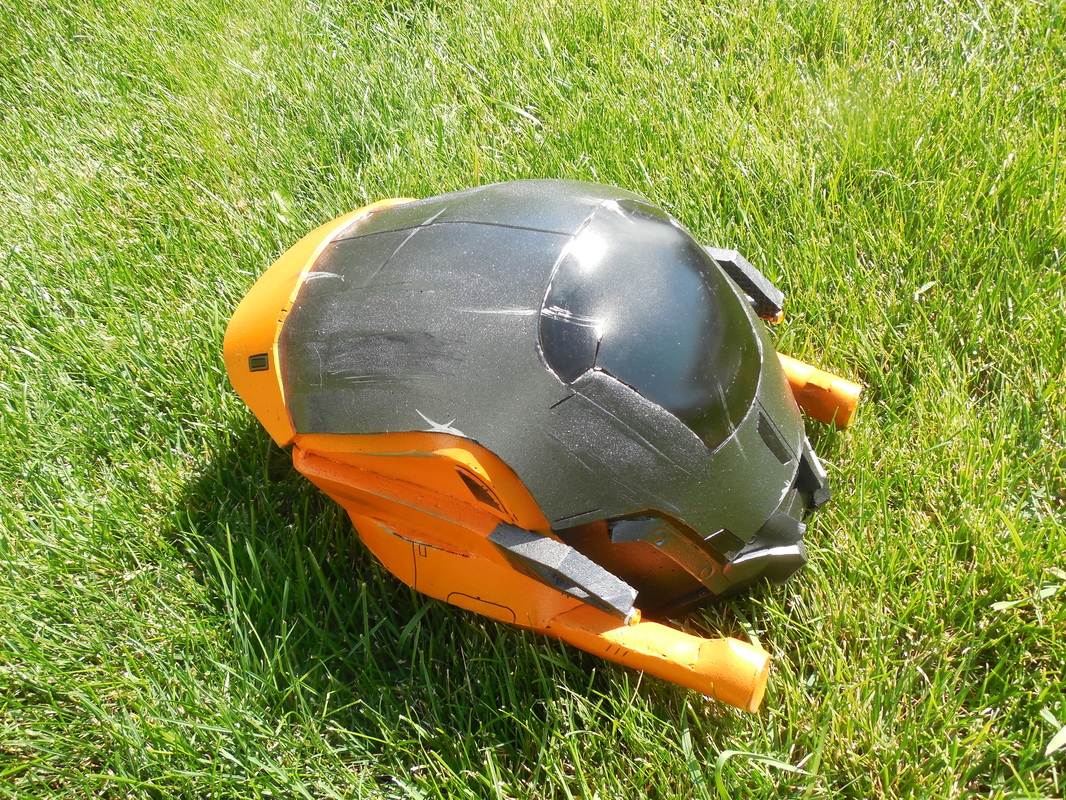
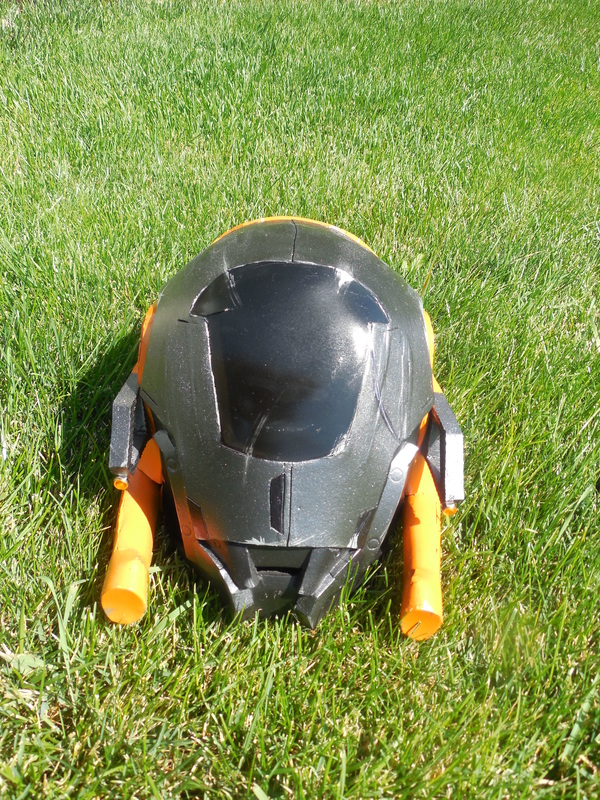
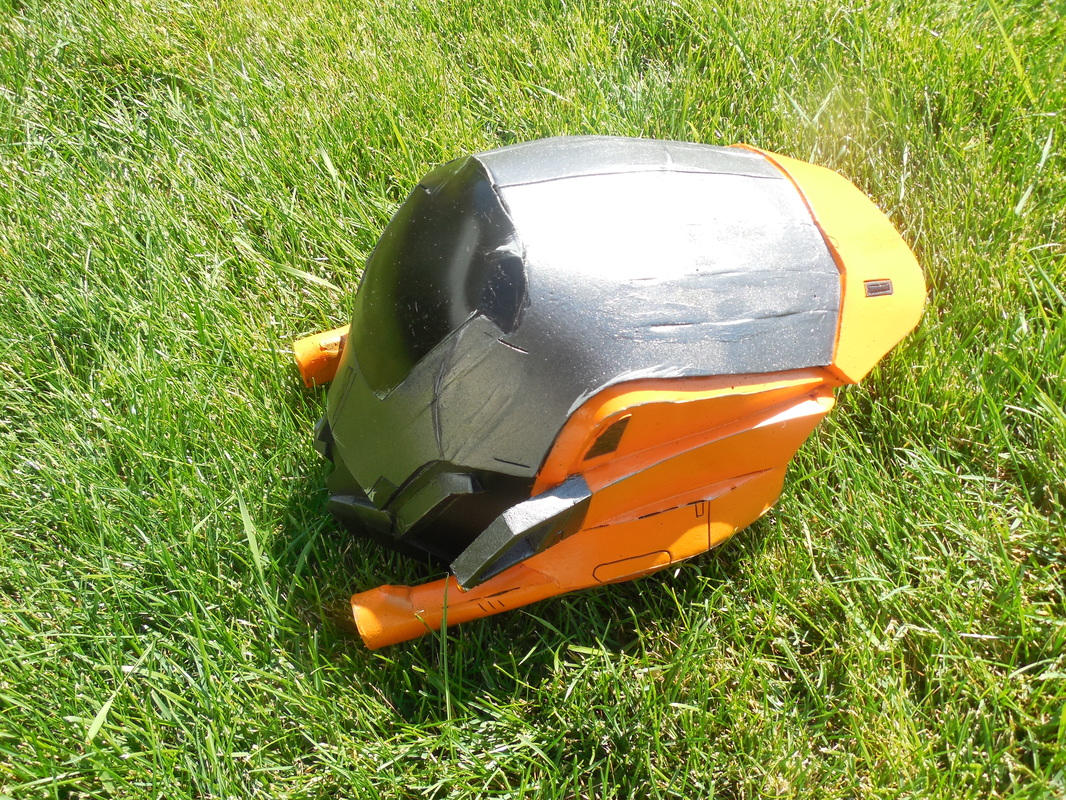
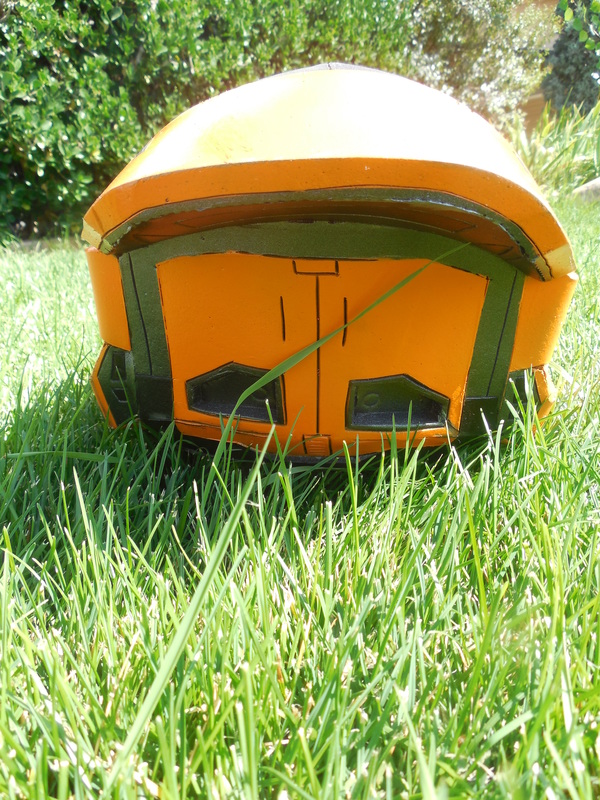
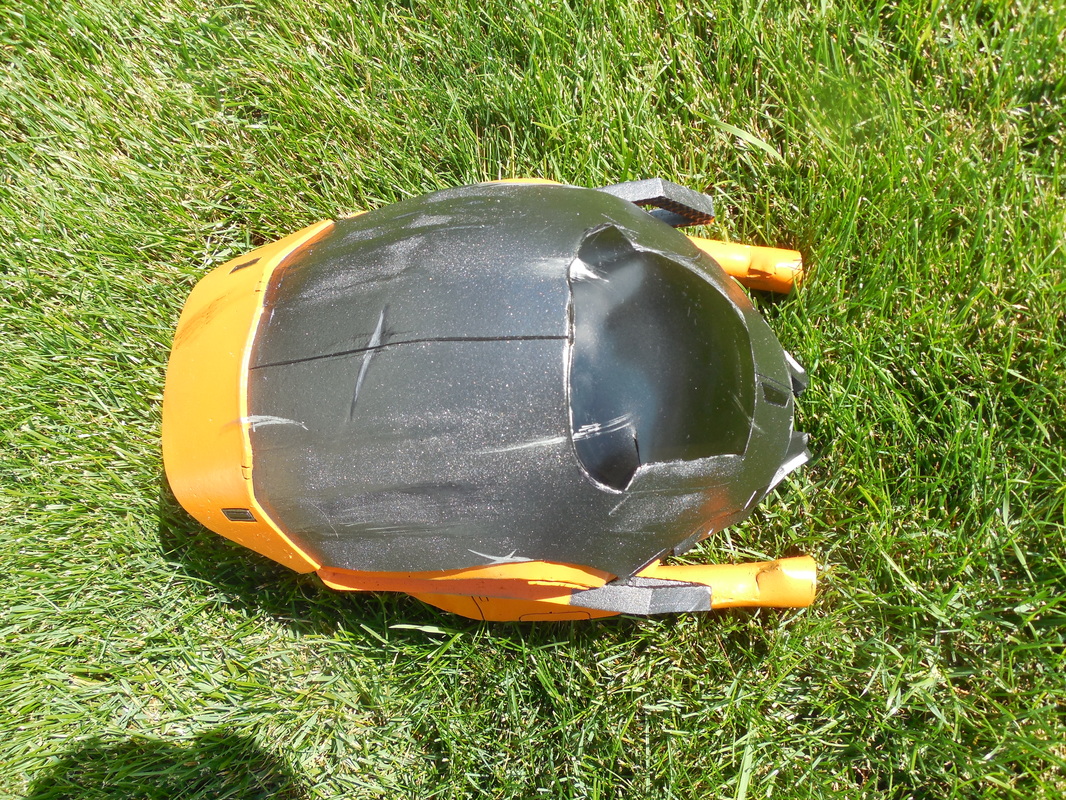
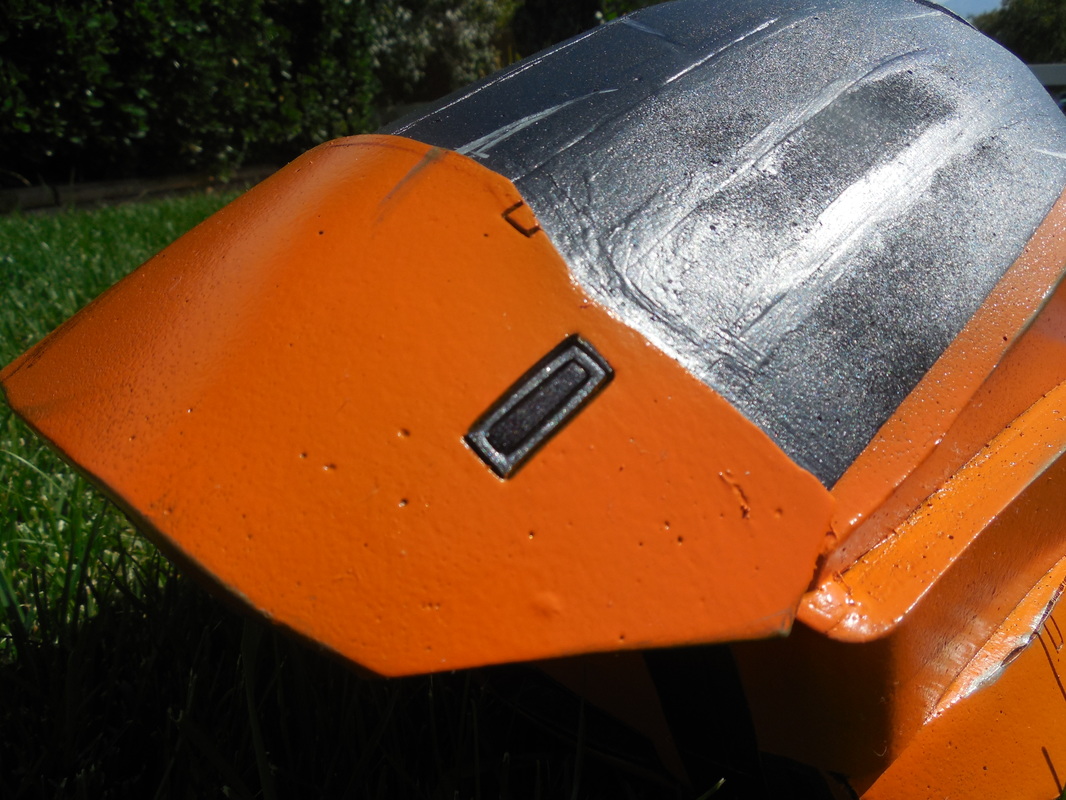
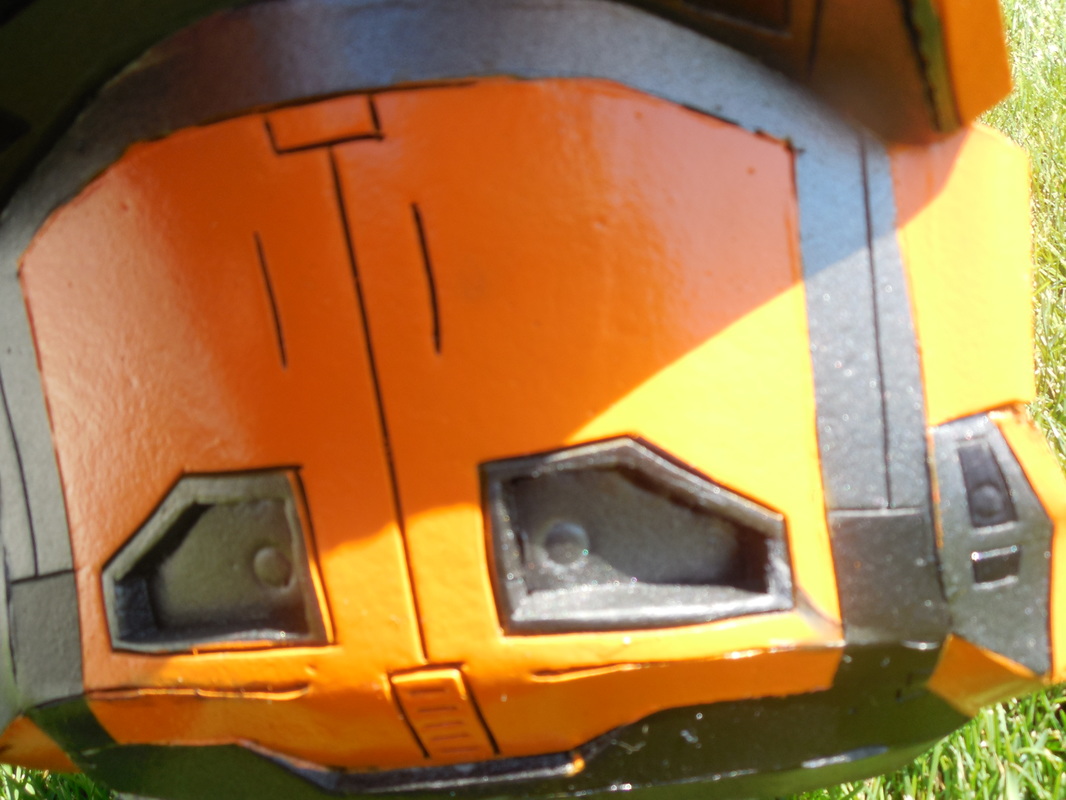
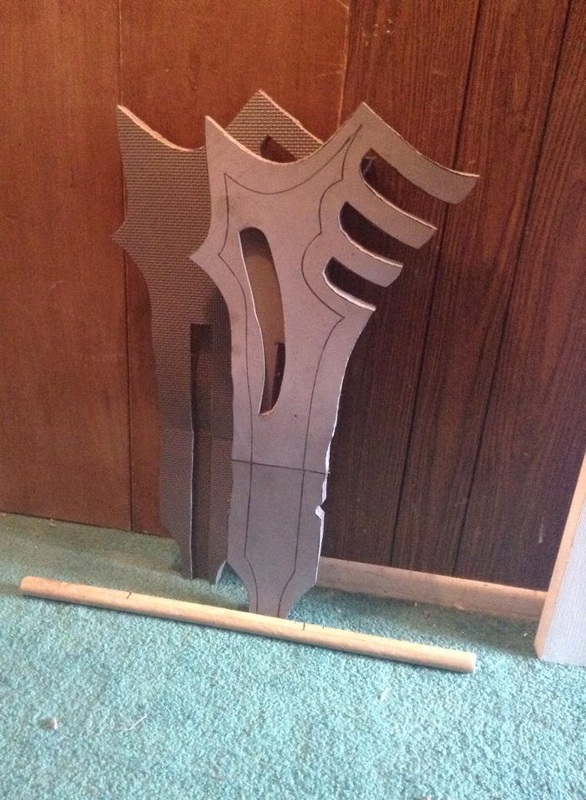
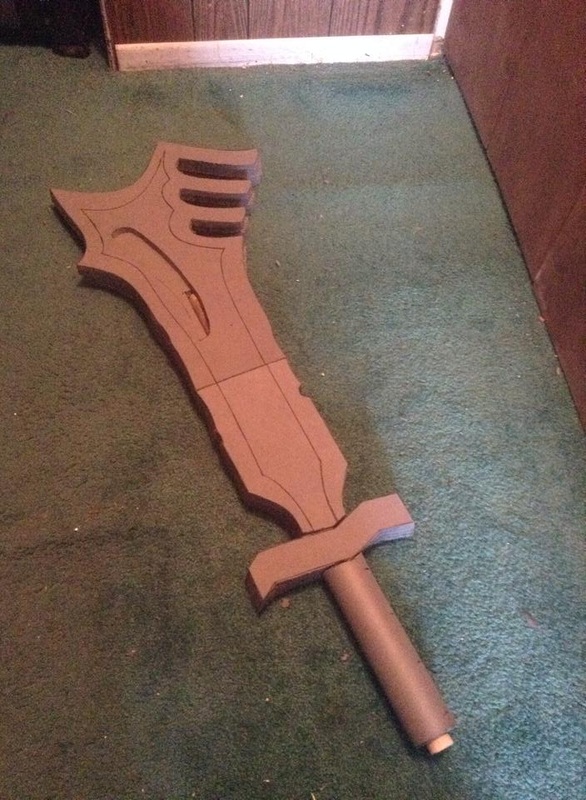
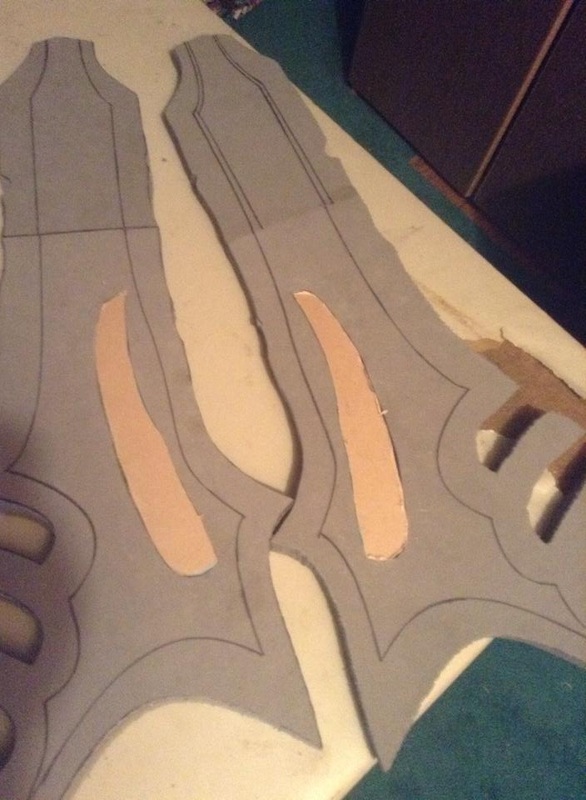
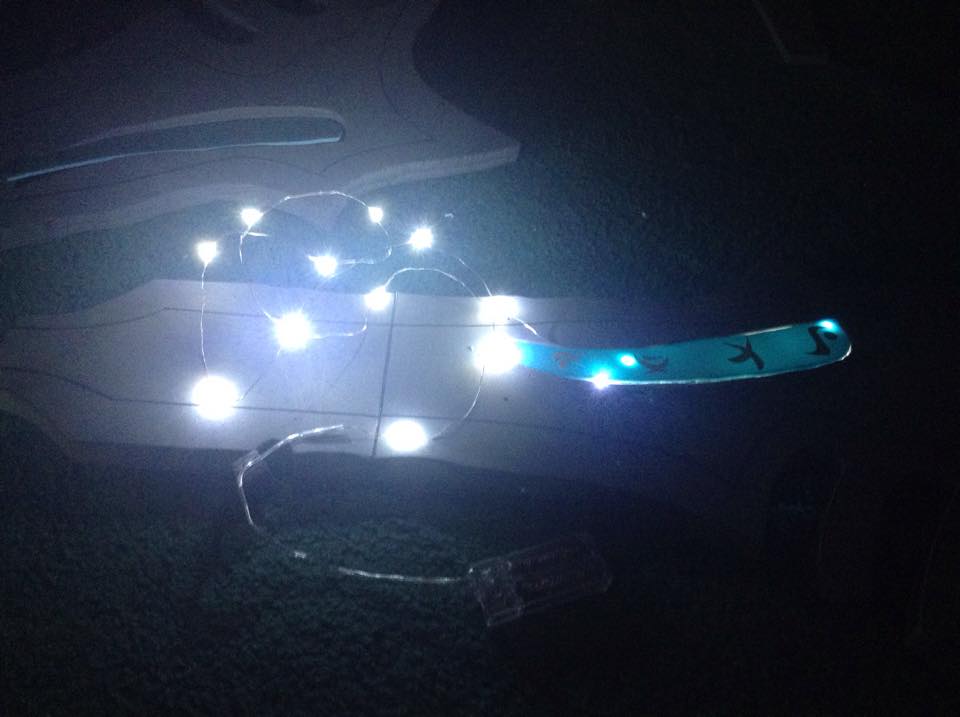
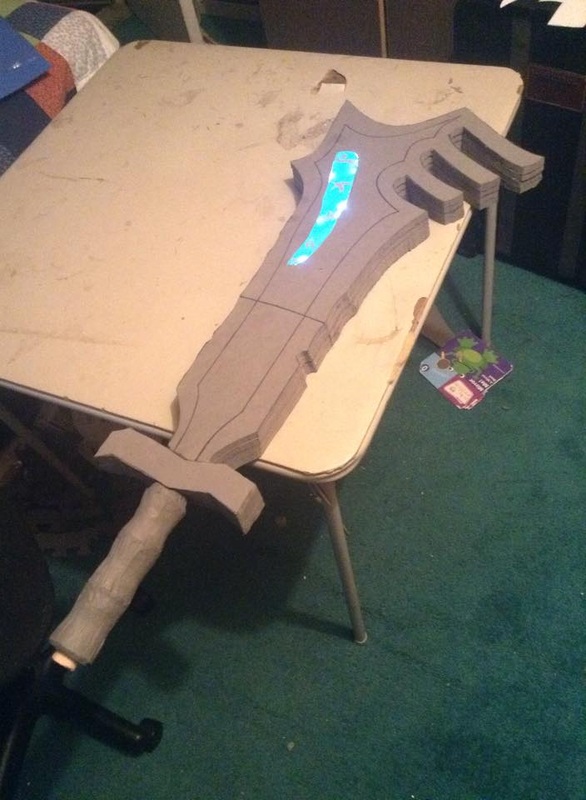
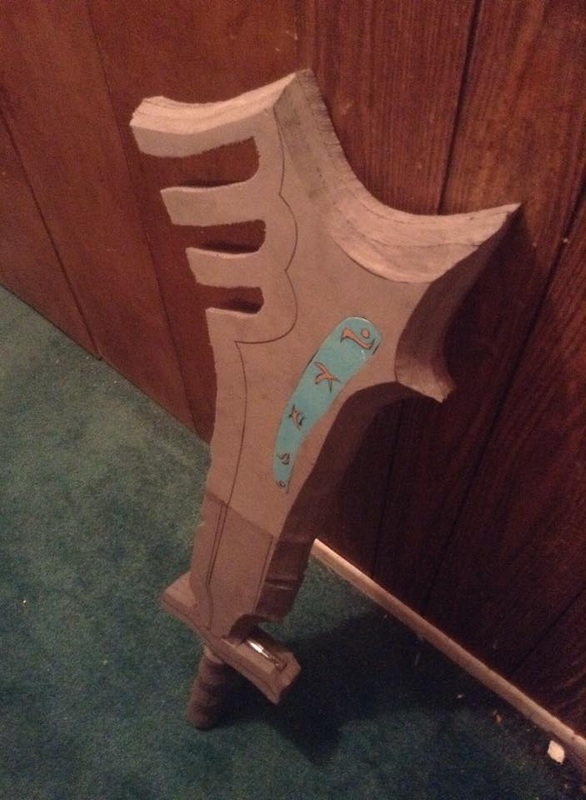
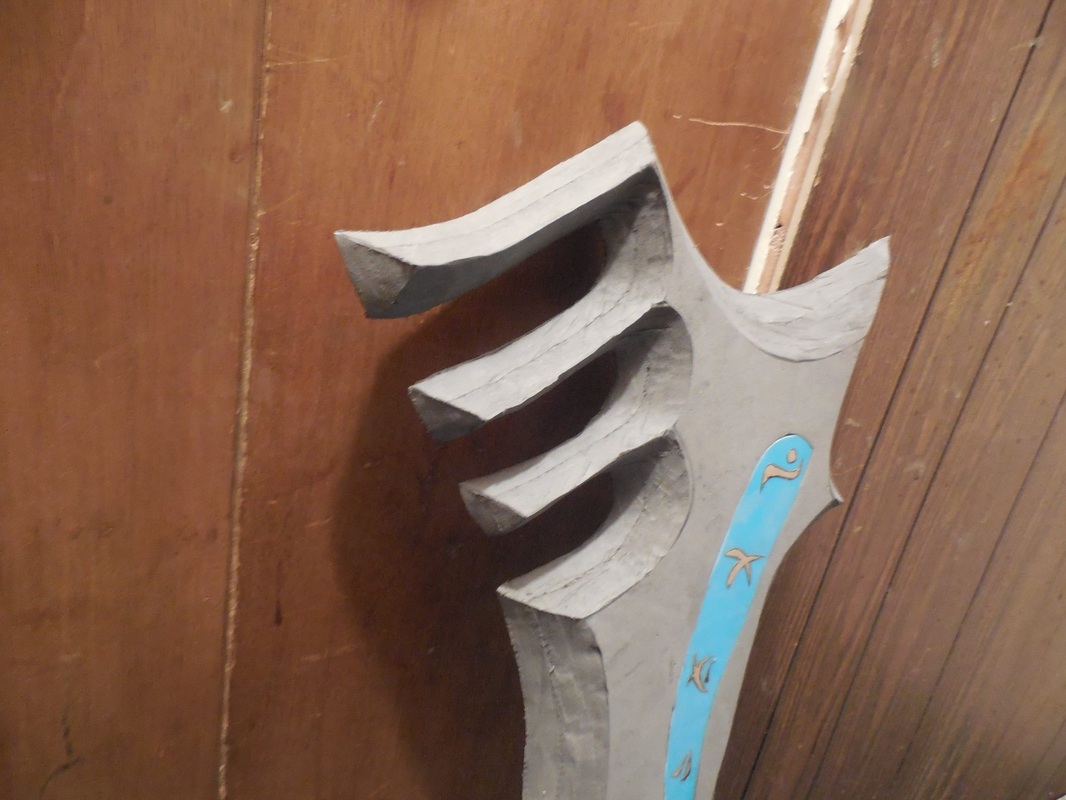
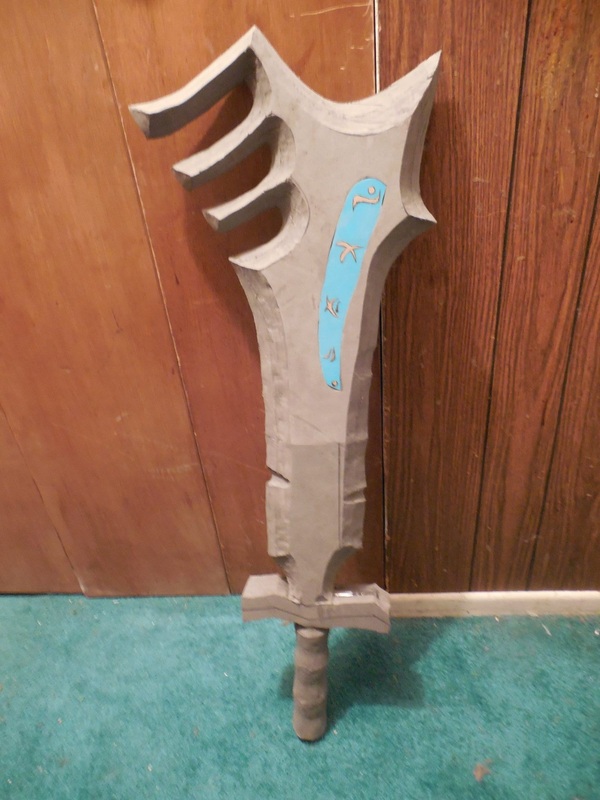
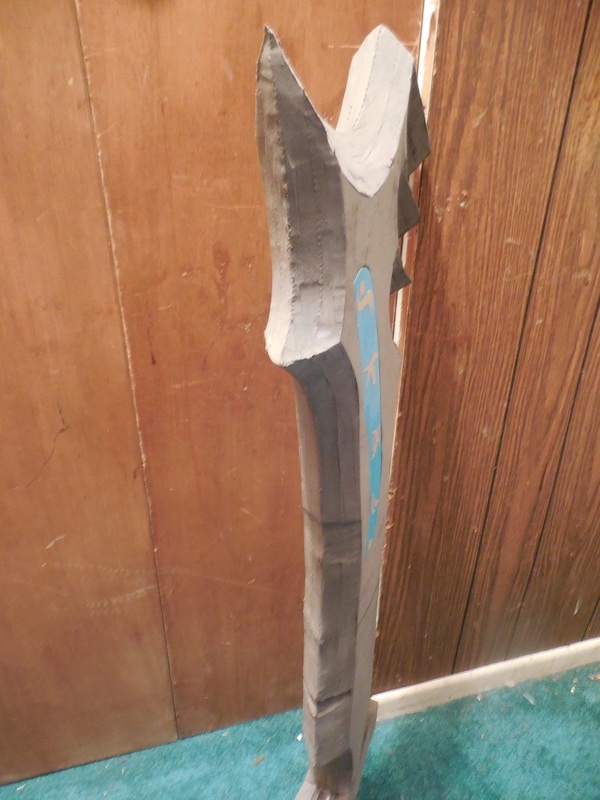
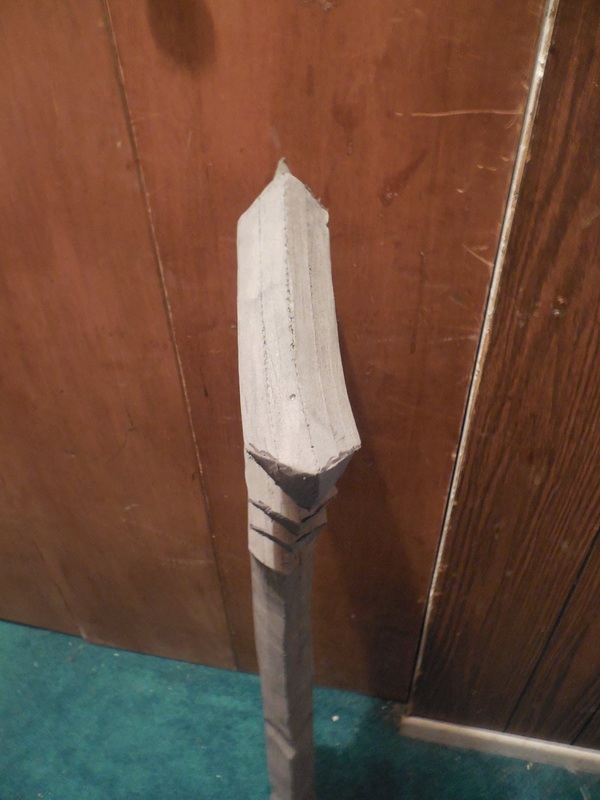
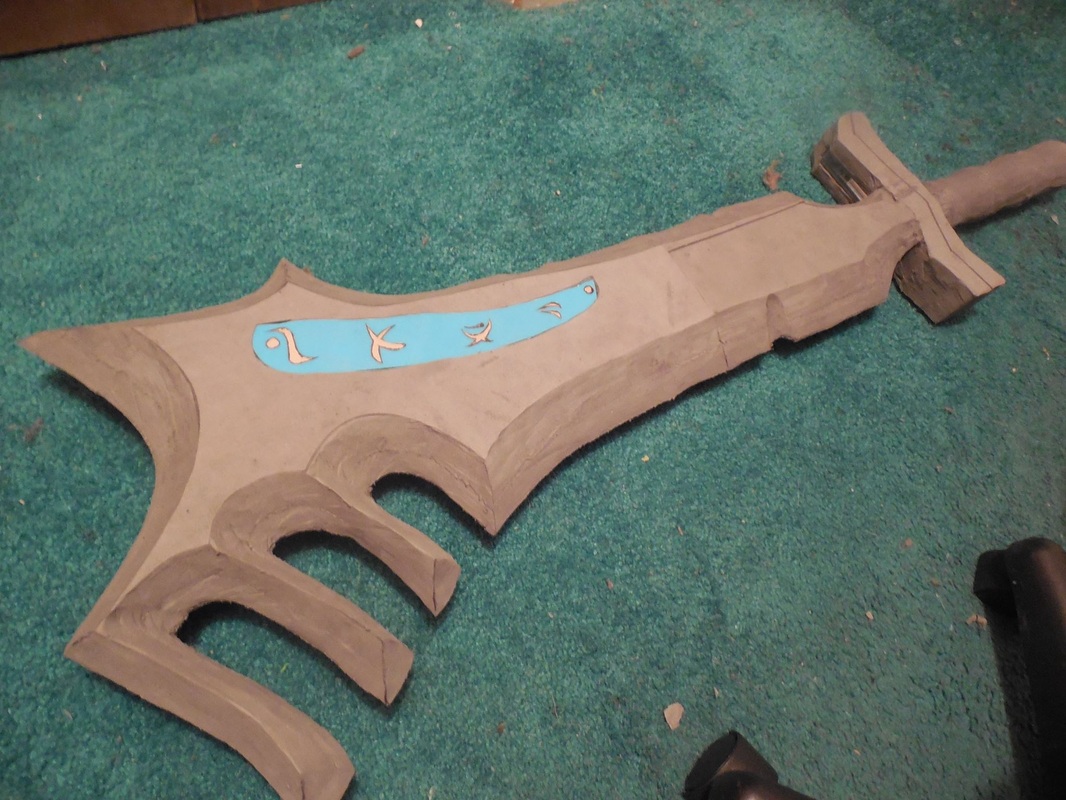
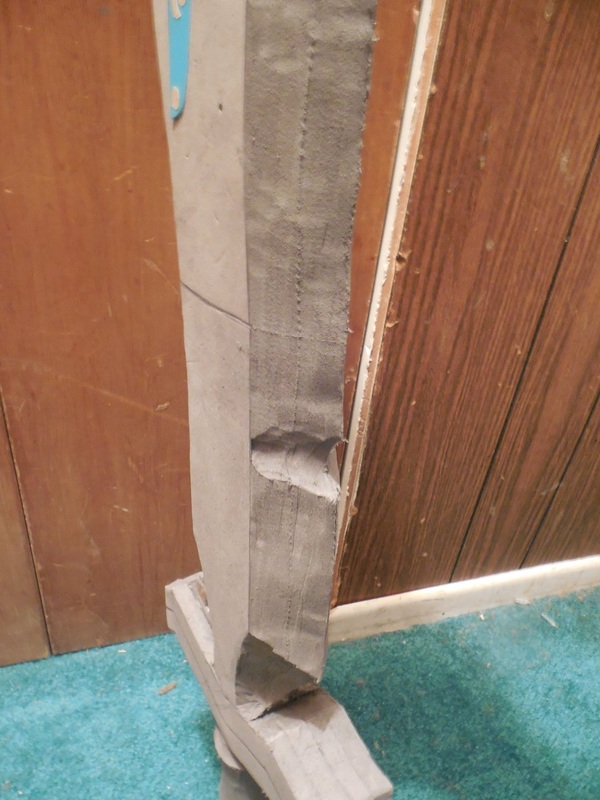
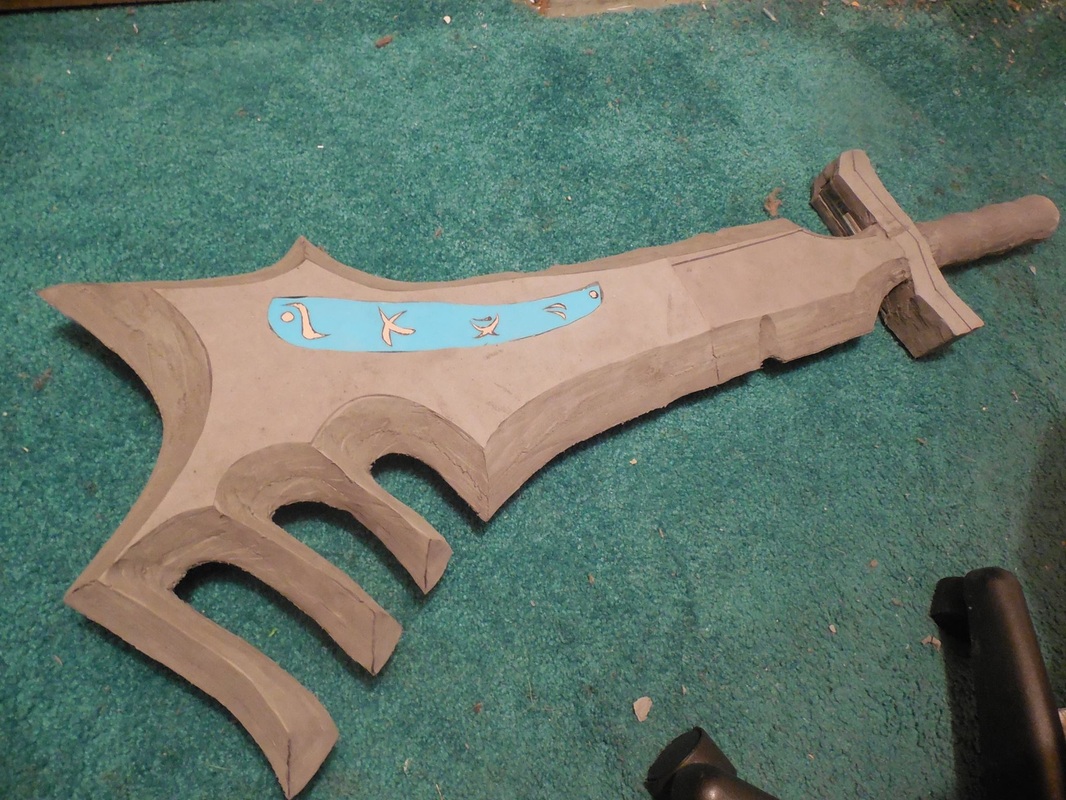
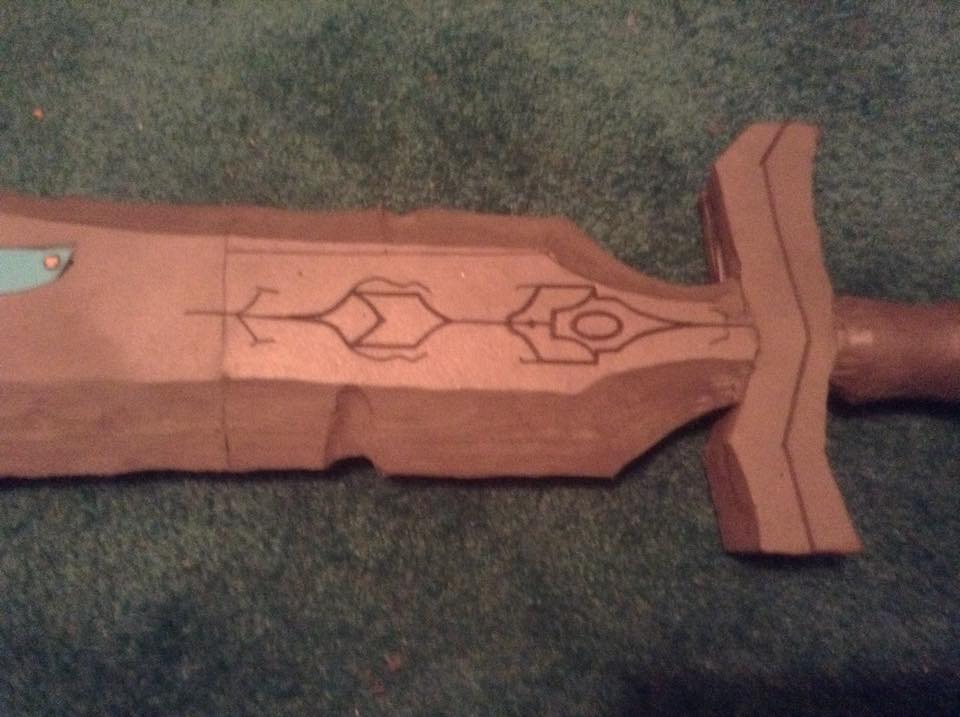
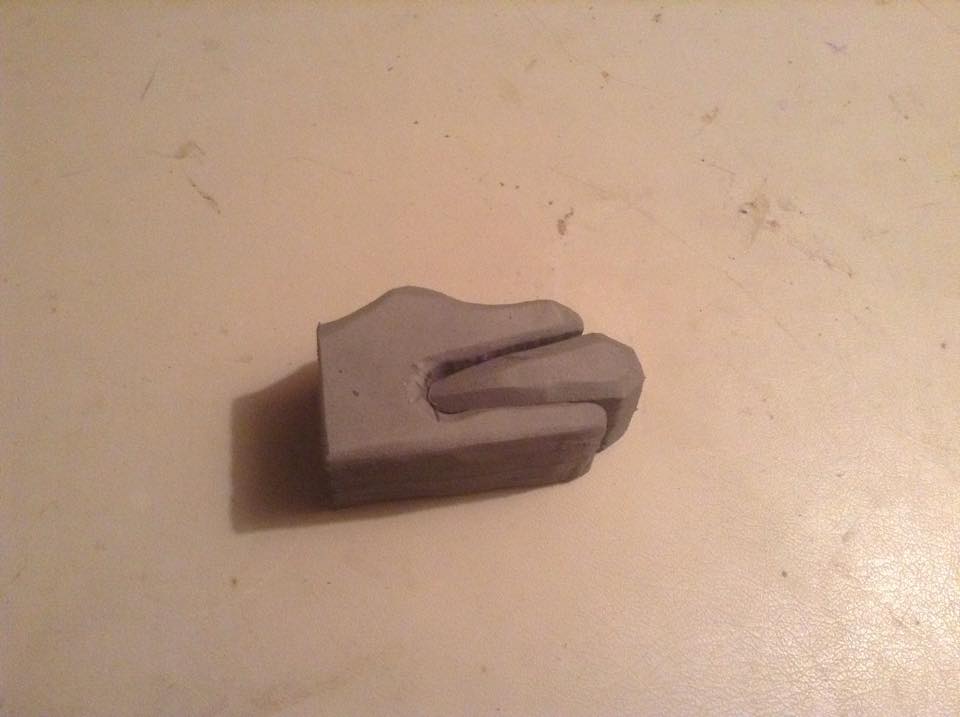
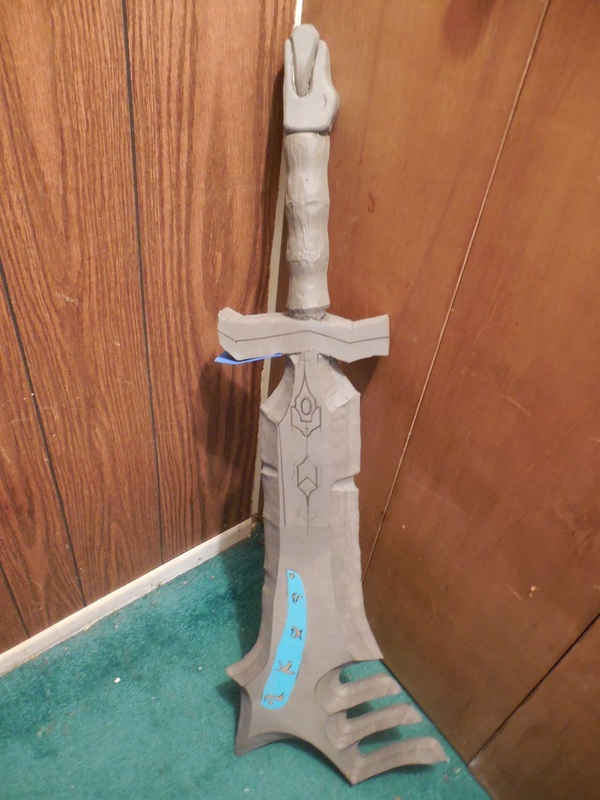
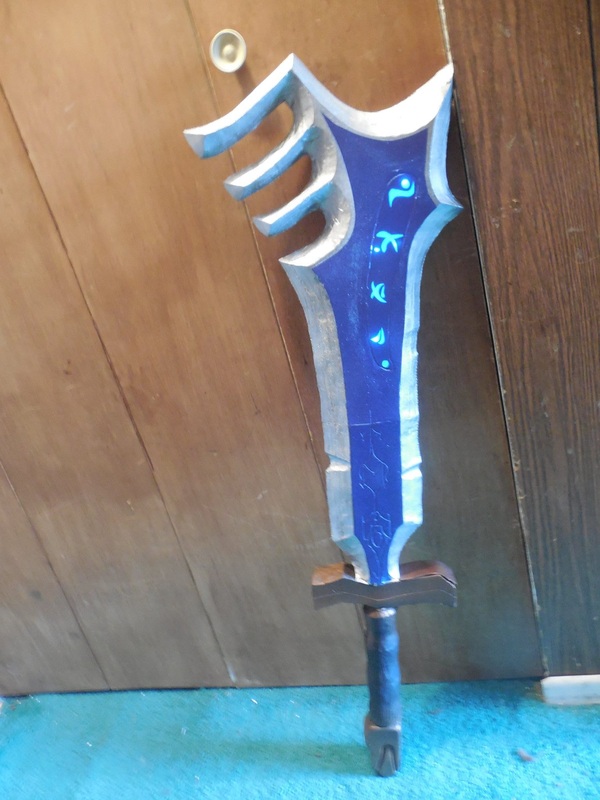
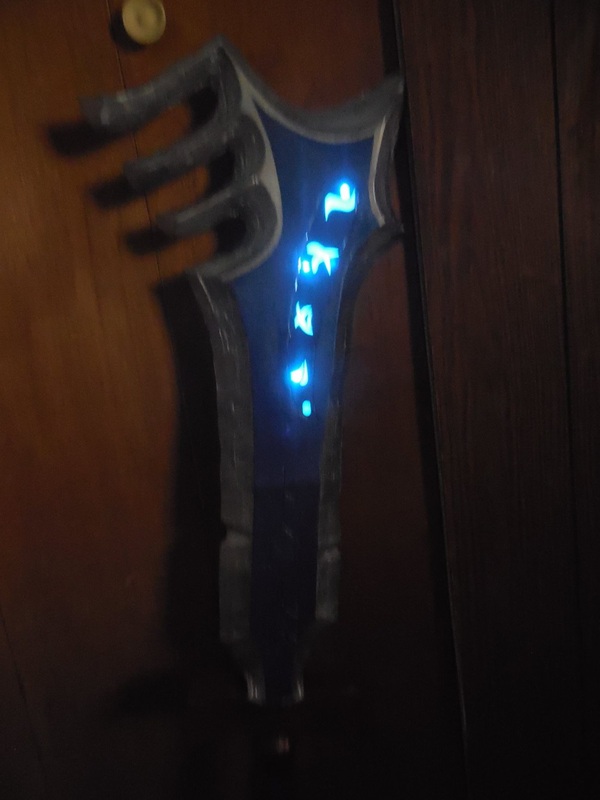
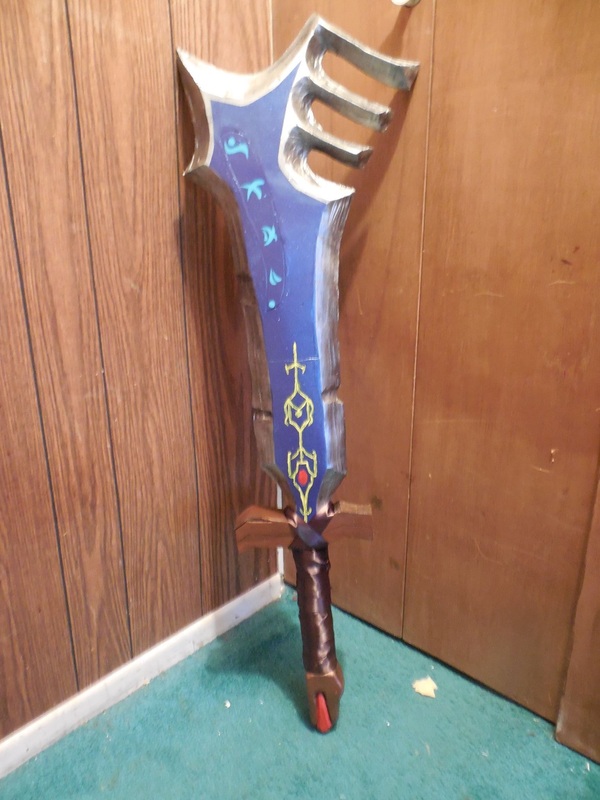
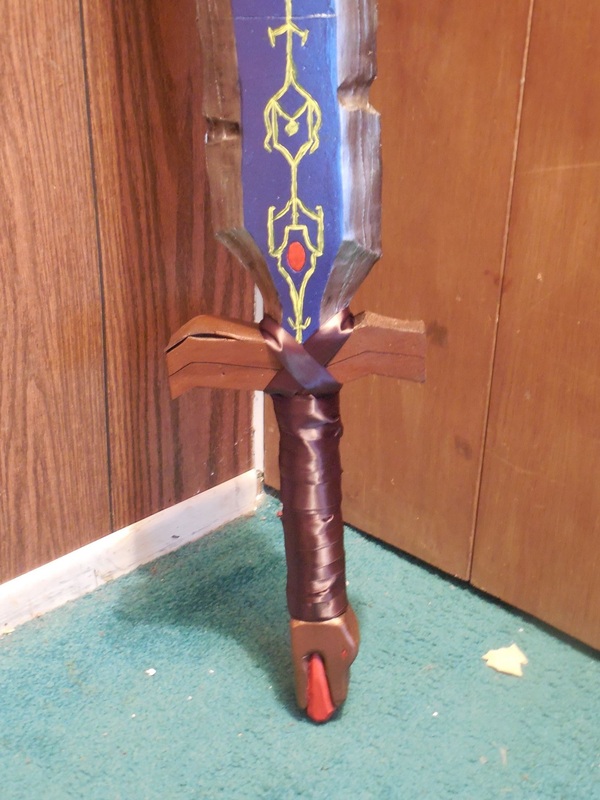
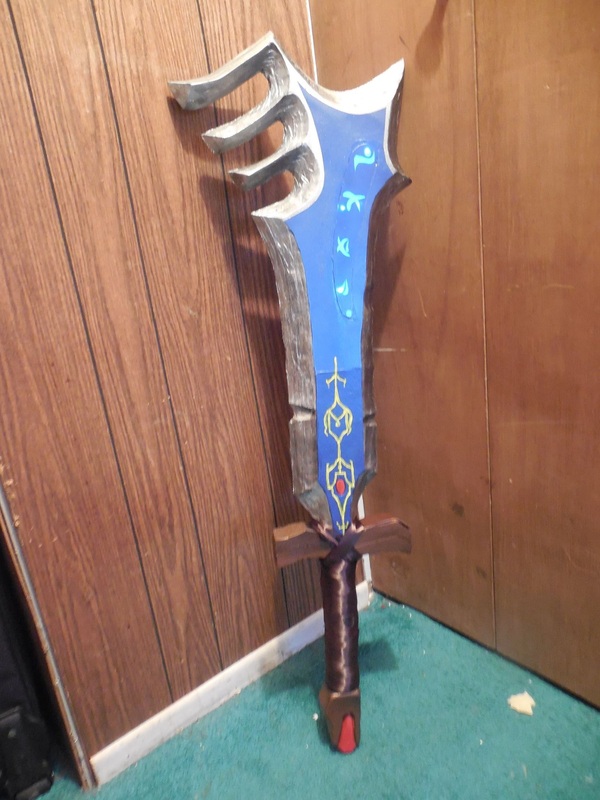
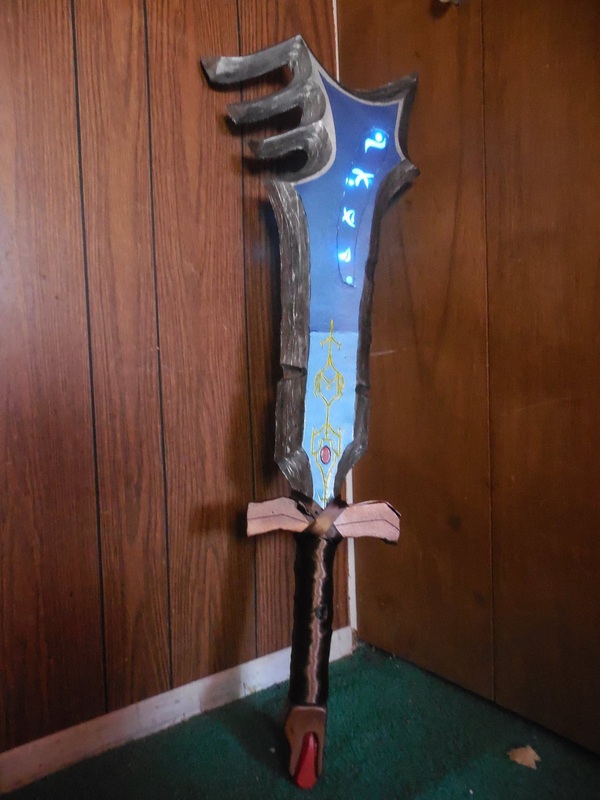
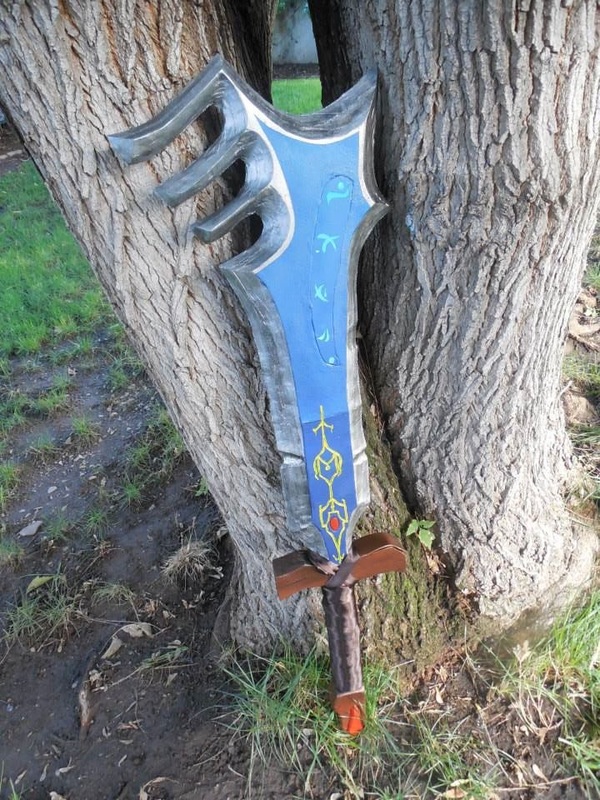
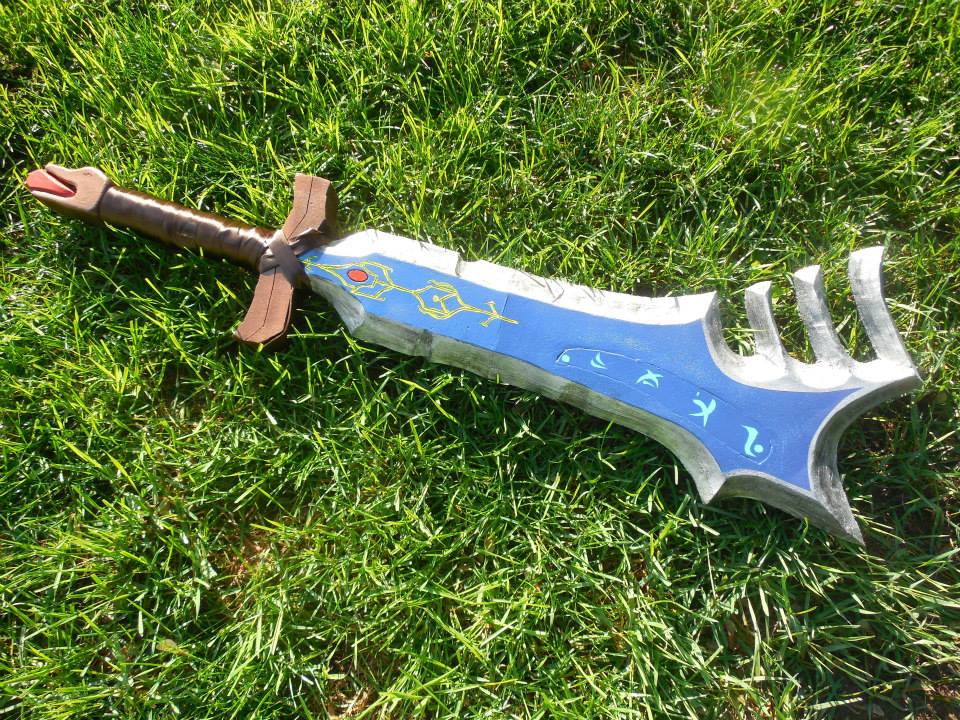
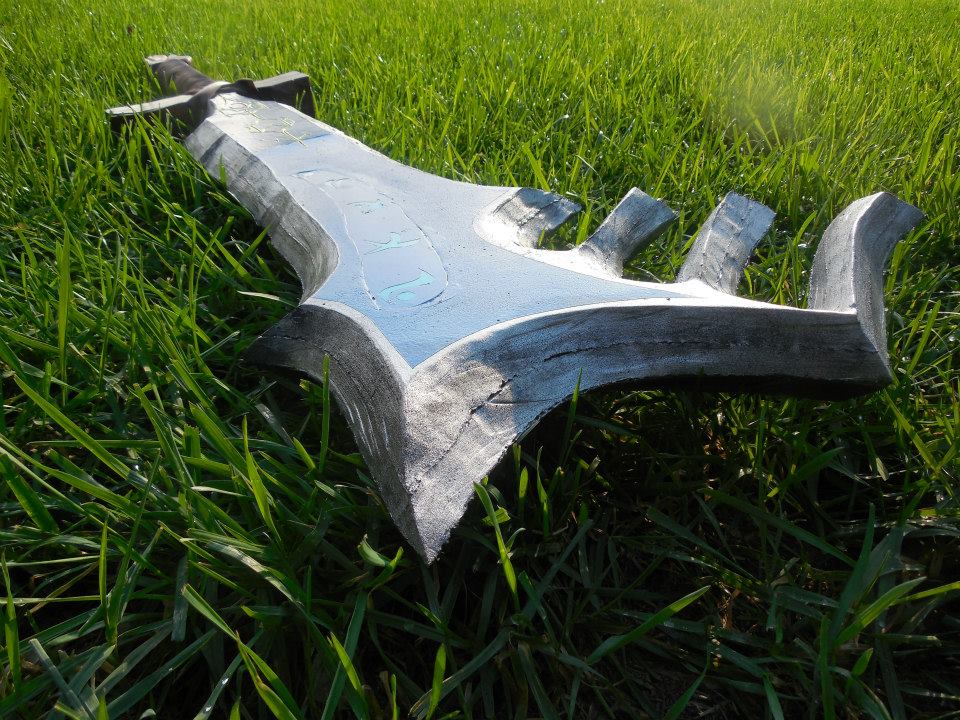
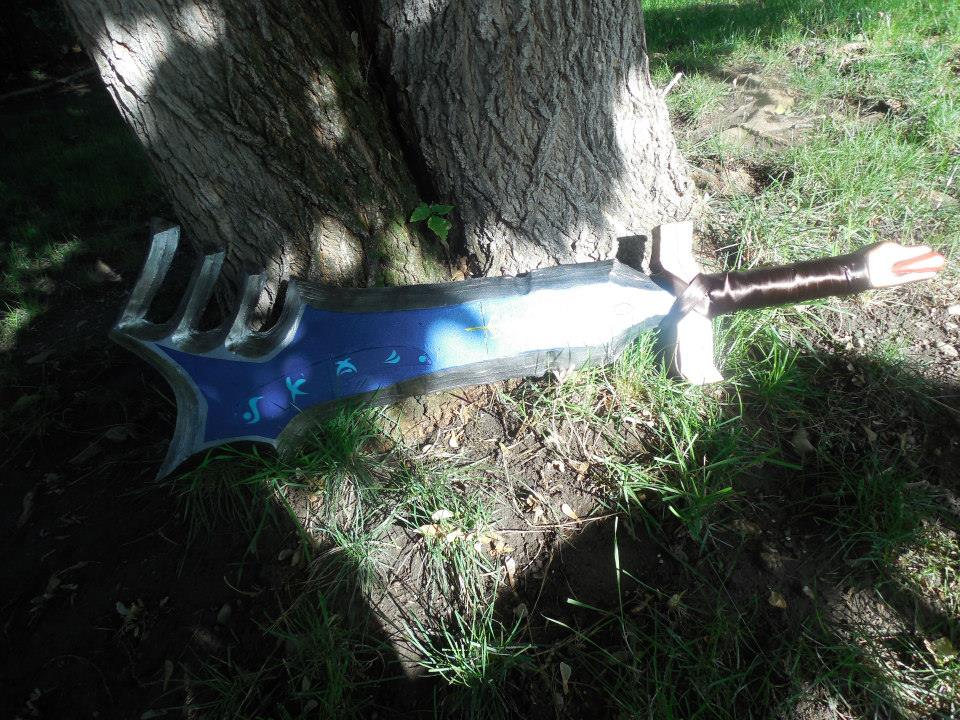
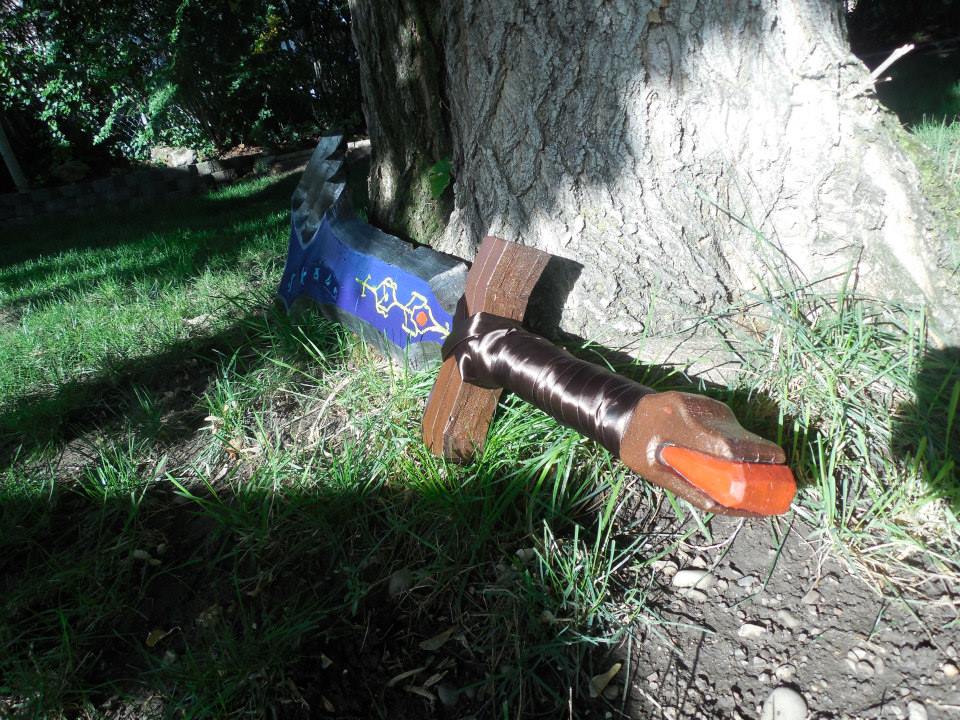
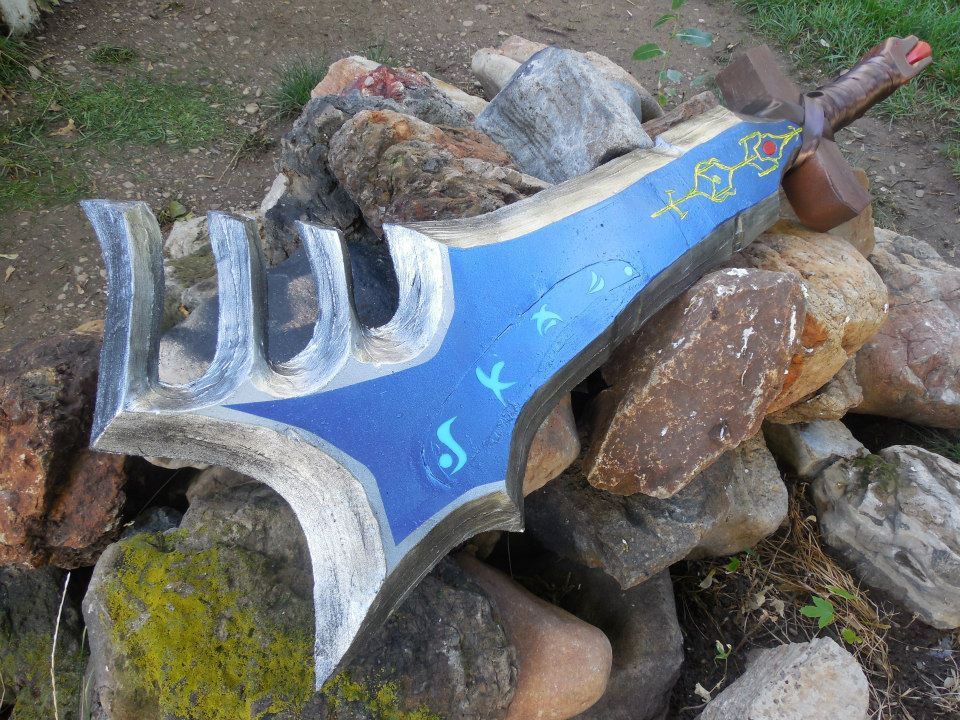
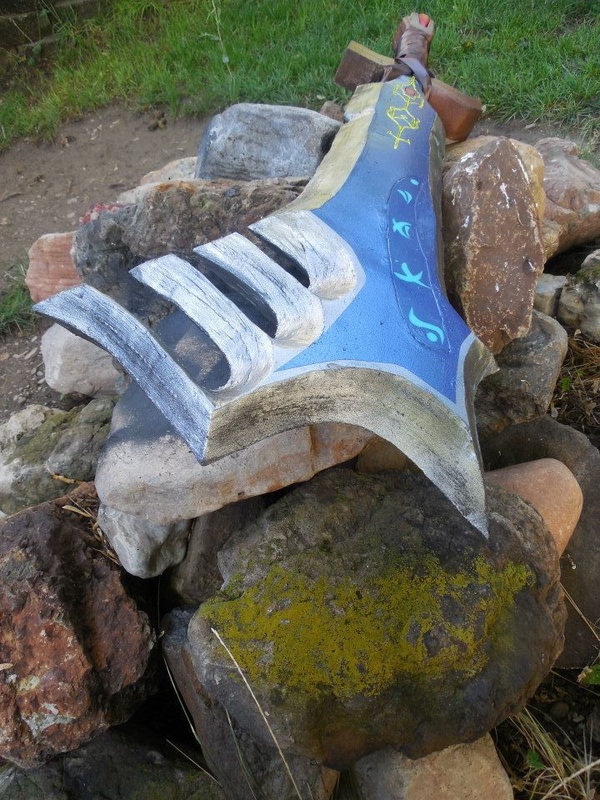
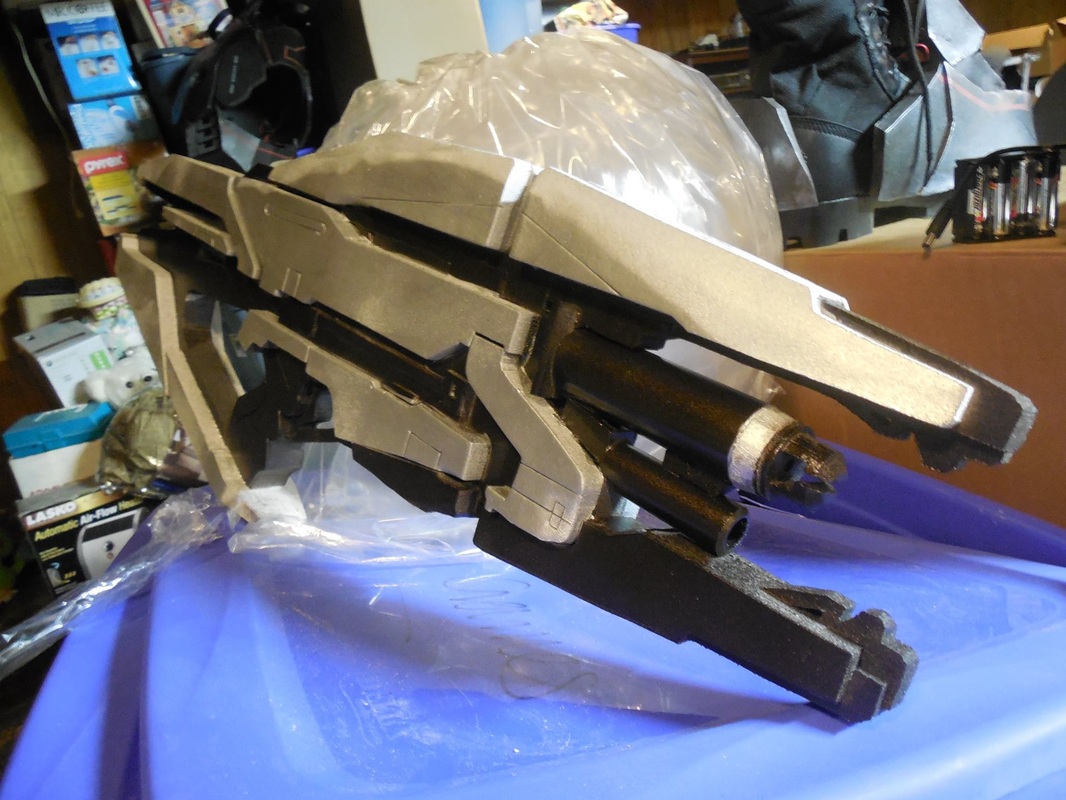
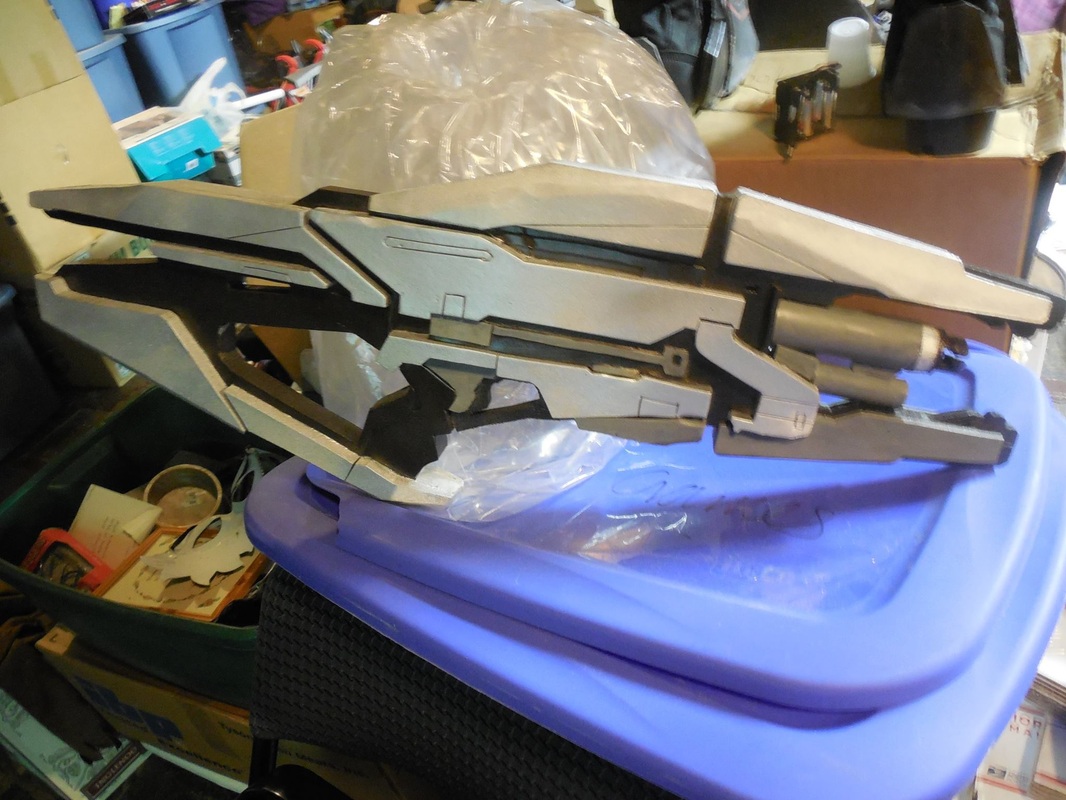
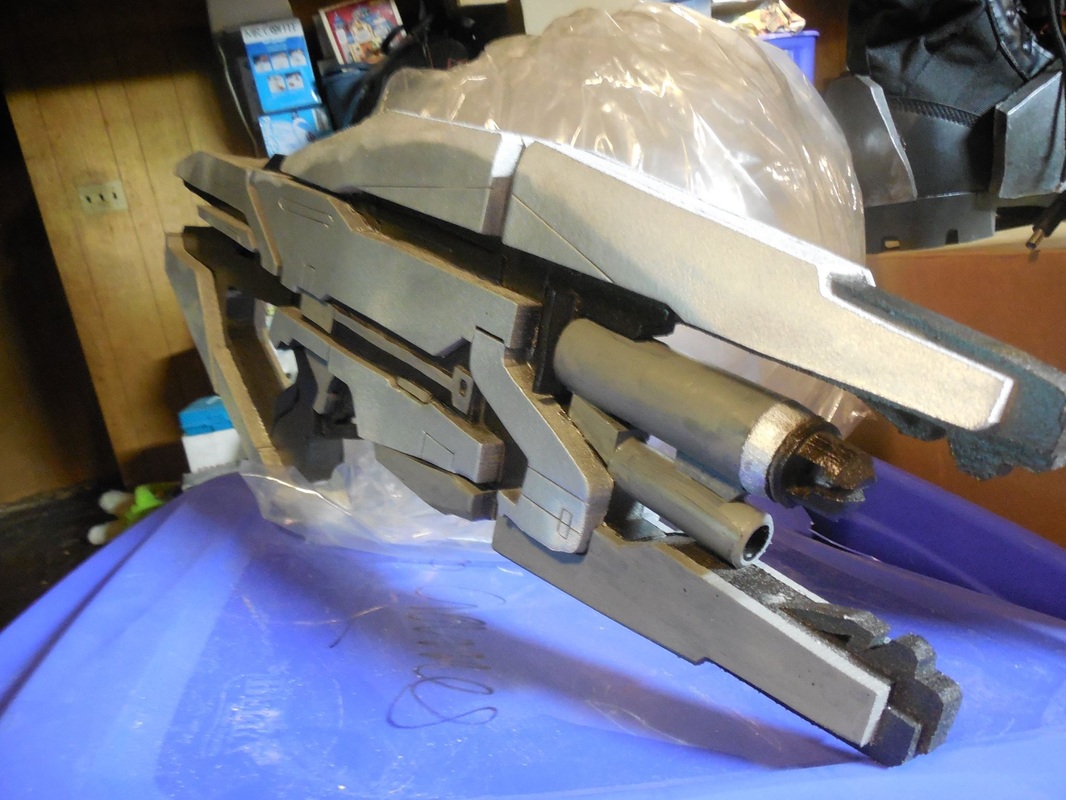
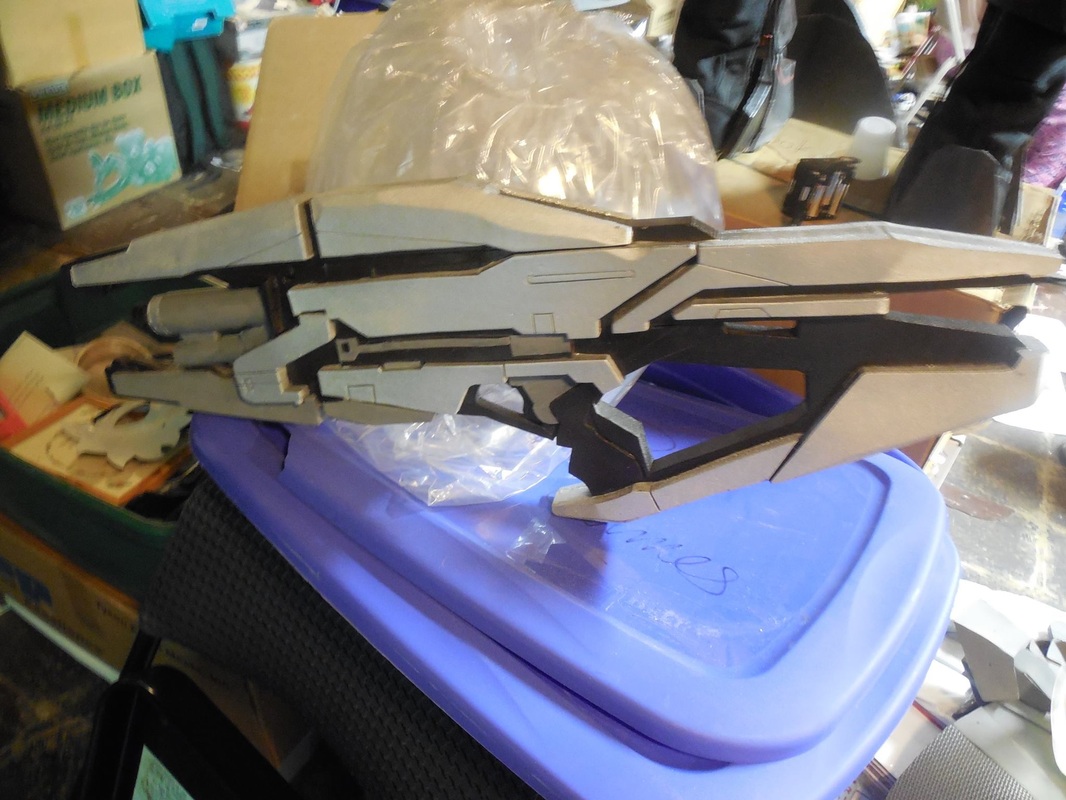
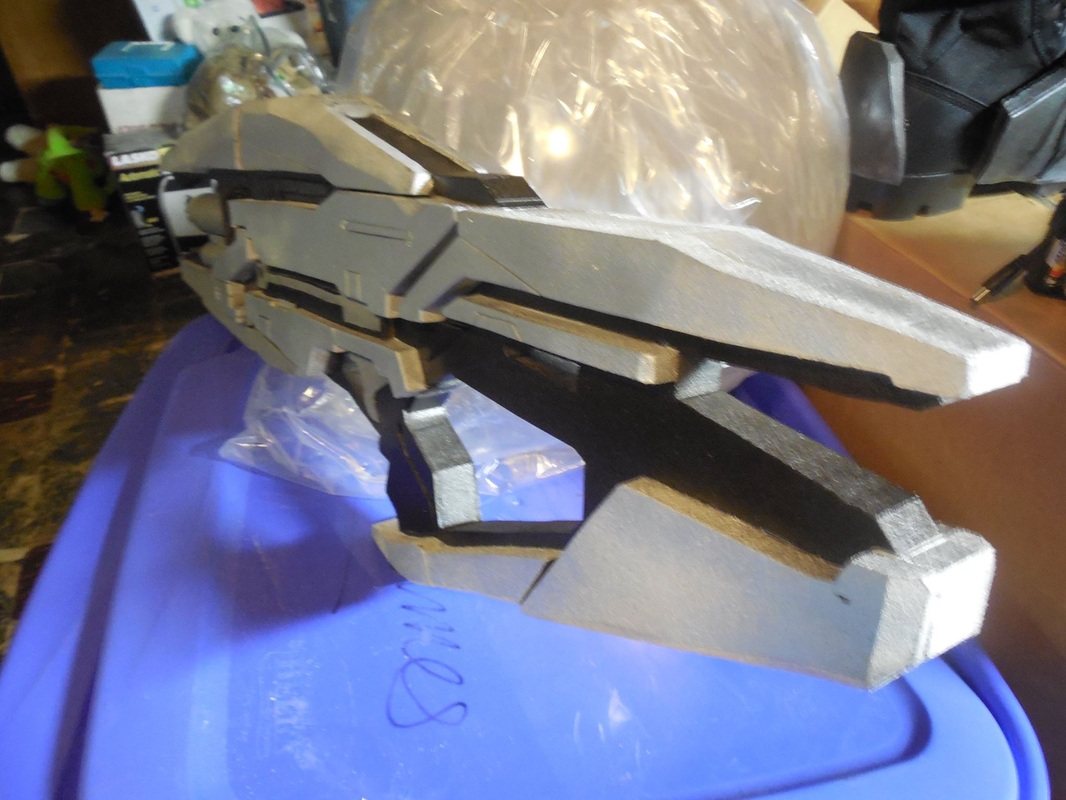
 Around the same time that I was working on the Sword of Ahrah, I was pumping out a bunch of different helmets. The first of these helmets was the Titan helmet from Destiny, for the awesome guys at Extra Life ATX. I opted to make it out of foam, like I do, but mostly because they wanted it light and durable since lots of people would end up wearing it at events and they wanted to cast games in it as well. This turned into a very interesting build, so let's get started! 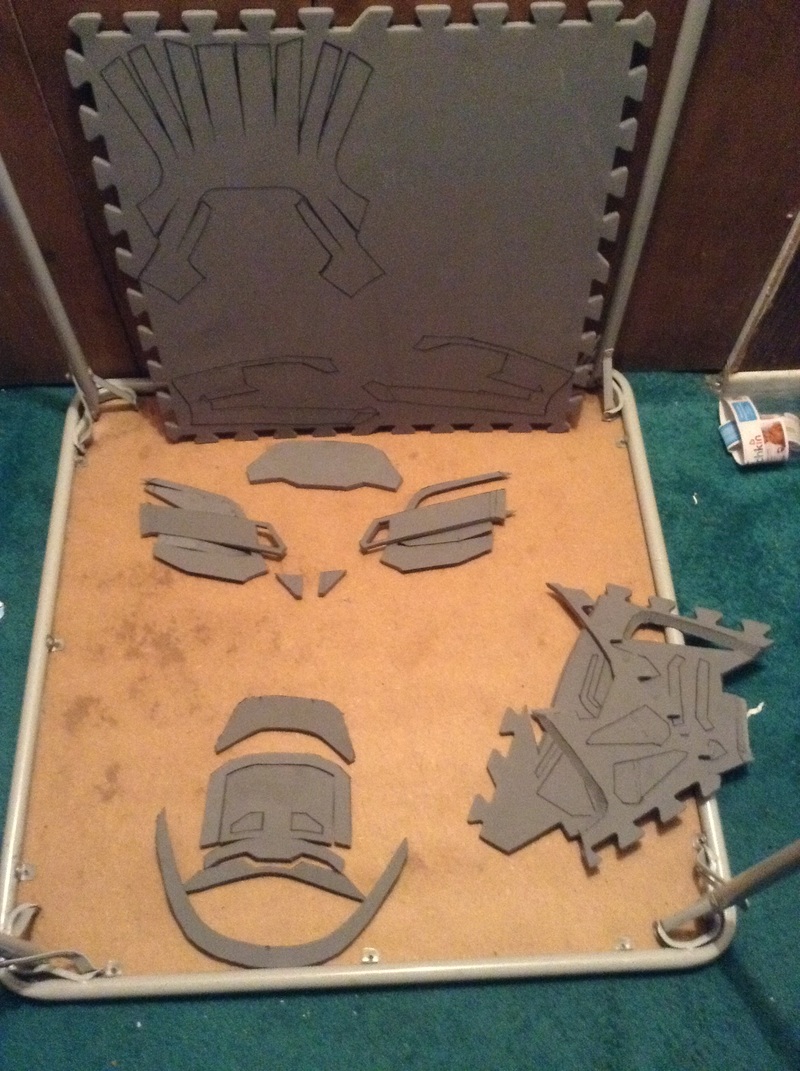 Started off as normal: prep the pieces, trace them to foam, cut them out, the glue them all up with contact cement. I had to do some major work on a few of the pieces, like the crest at the back. The underside piece needed a heavy angle cut, and the turkey legs (as I affectionately call them) needed huge trenches and grinding down to even fit together. Eventually, however, I prevailed! Got it all cleaned up, took it outside, and filled the seams as best I could with some sandable, paintable caulk. 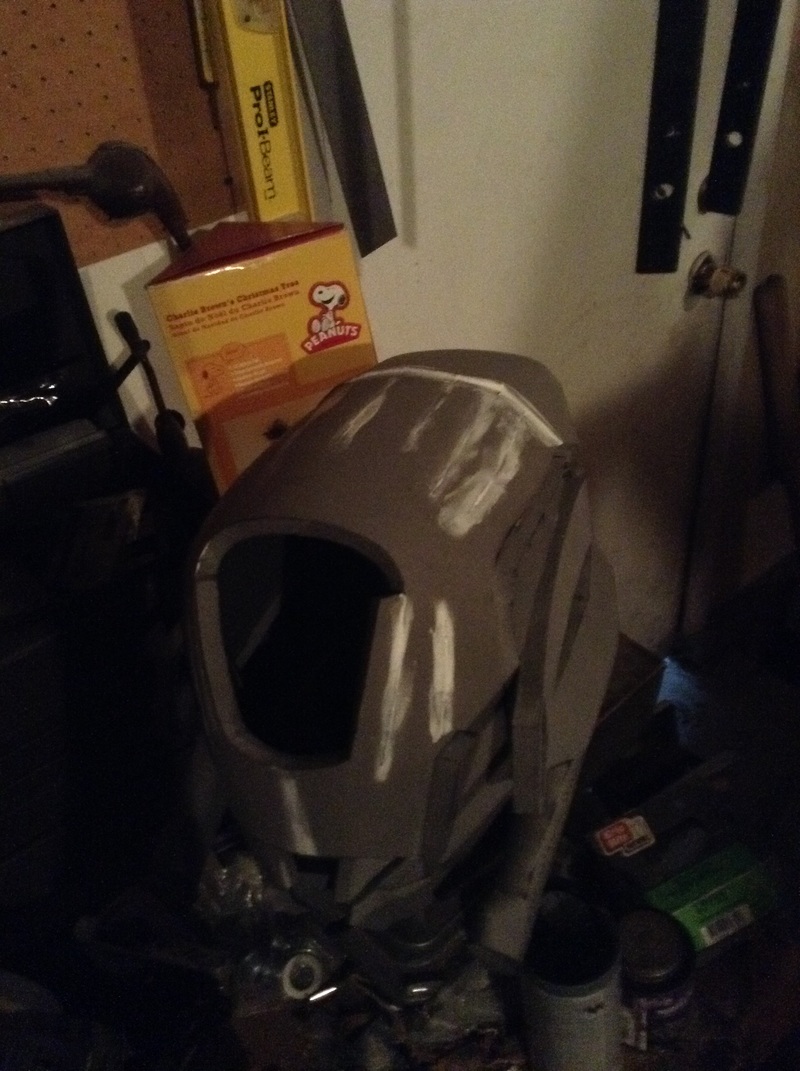 Once that set, I sanded it as smooth as I could, then brought it back in and used some craft foam to fill the front holes in the turkey legs. I also grabbed some smoke grey acrylic from my local supplier, used my heat gun over a ceramic bowl to stretch it to shape, and cut a visor out. I also used the xacto knife/heat gun trick to etch in all the detail lines. A light scoring and some quick passes make excellent and clean etchings! After that I grabbed a couple orange lights from my local Radio Shack (this was long before they closed down), and wired them up, along with a fan for later. Now it was time for paint! Wrapped up the fronts of the lights, leaving the back to be painted over. Also taped up the visor. Then, threw on my favorite foam sealer, Plasti Dip! 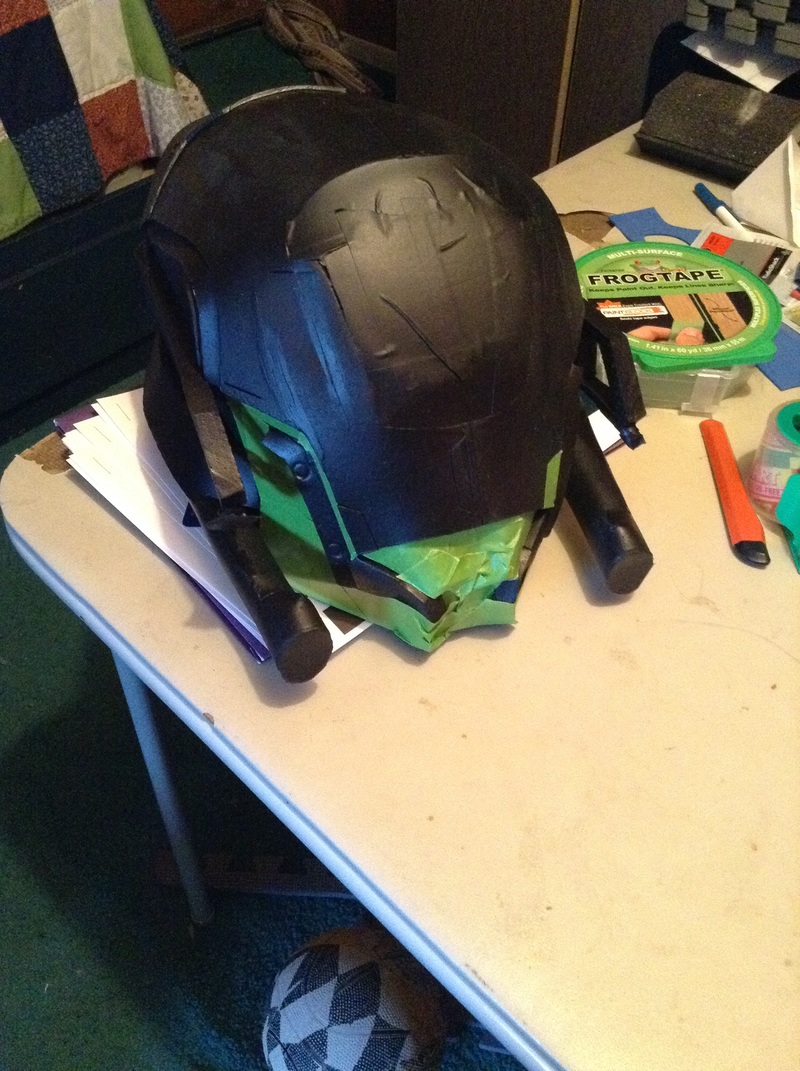 Taped up the areas I wanted to keep black, as you see above, then grabbed an automotive gunmetal grey and went to town. More tape, and then came the primary color: orange! Cameo of my son, as viewed from the inside of the helmet. Looking great so far! Next came everyone's favorite part, weathering! I did a variety of things, from dry brushing to a dark acrylic wash, and added some color to a few of the details to highlight them better. I also finished installing the fan behind the hole in the front, so that the wearer could have some better air circulation and keep the visor from fogging too much. Threw on a final clear coat to seal it all in, which was unfortunately my folly as I forgot to tape up the visor again. It ended up being really hard to see out of, but I was so excited to get it to them I didn't test it before I shipped it. Looks awesome, but I failed on the end result of them being able to stream games wearing it.... Still, they loved it, and I loved making it so much I decided to make another one! But that's a tale for another blog! Here's some final shots of the Titan helmet. Hope you enjoyed!  Time to recap this most interesting of builds I've done thus far: the Sword of Ahrah, from Dust: An Elysian Tail! First things first, I made a blueprint after scouring the interwebs for pictures. I would have taken them myself, since I own the game, but my system was (and still is) packed away in the moving pod. 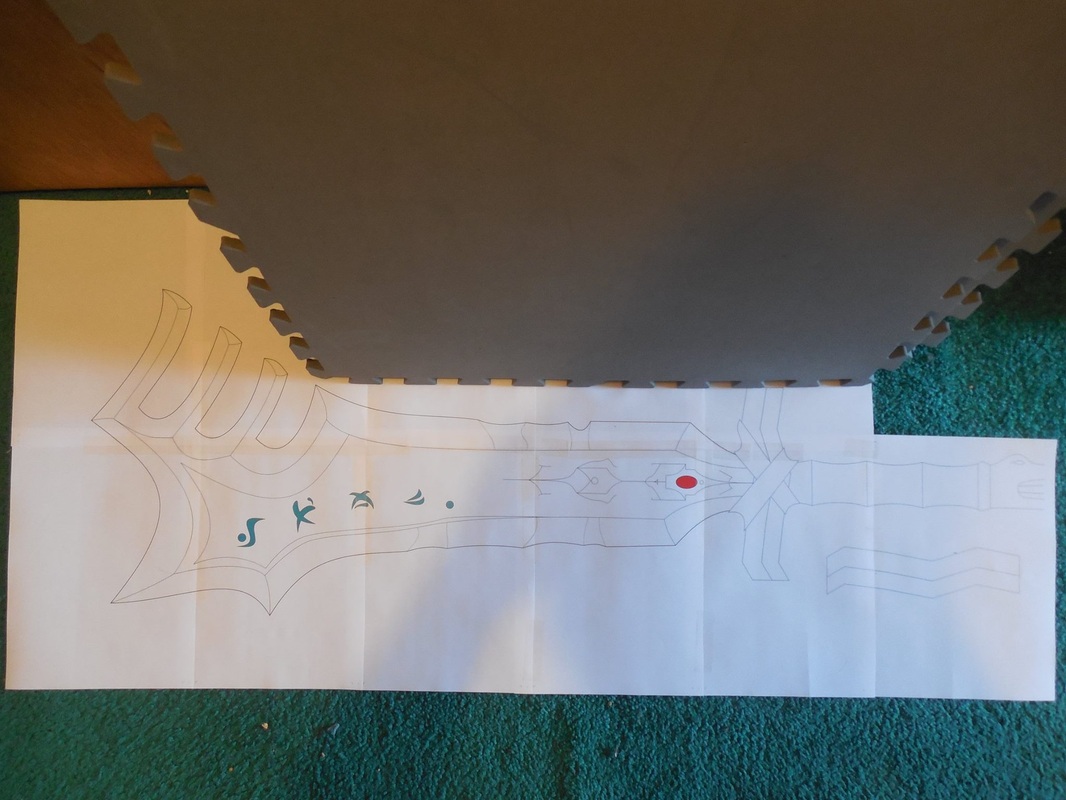 I scaled the sword at three and a half feet long, both for the size of my client and because anything larger than that would have been too unwieldy. Even then, though, the blade section was longer than the foam I have, so I had to make it in two parts. 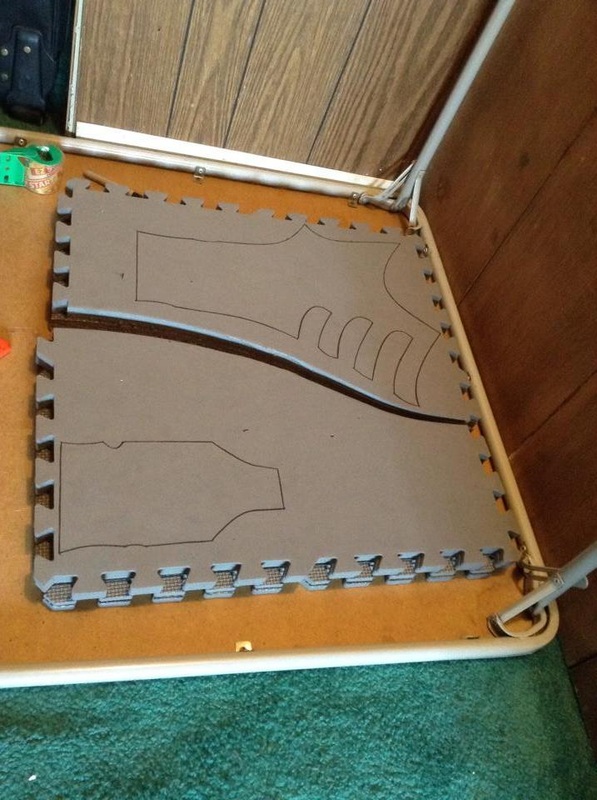 Now we come to the first of many conundrums for this build. Because it's so bulky, I decided on 4 layers of foam. That meant a lot of cutting at once. Since I needed to do work on the inner layers as well, I needed to keep them all separate from each other. Since I am no good cutting by hand exactly straight, and since I would have to do each piece as identically as possible, box cutters and xacto knives were out of the question. Normally I would reach for my band saw at this point, but guess what? Remember how my console is packed away? Yeah. Every single one of my tools/power tools is too. No band saw, no scroll saw, no belt sander, no nothing. So, I went and got a cheap electric knife, something I could use and throw away when it's done because I knew the torture I was about to put it through would kill it utterly. What I didn't anticipate was how quickly it would die. 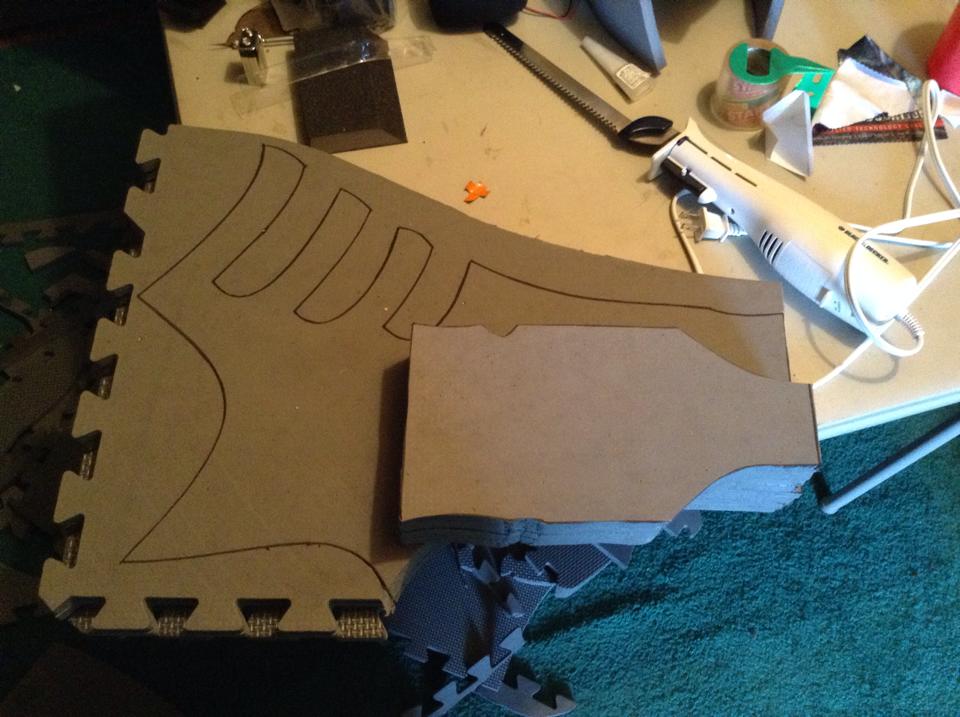 Yep, that's right: cut out the bottom bit of the blade, and a small part of the upper bit, and gave out on me. Thing still turned on, but the blades wouldn't move. After trying to figure out what else I could do, I splurged a little and grabbed a coping saw, along with the cheapest dremel I could get since I knew I needed it soon. Not pretty, but the saw got the job done finally. 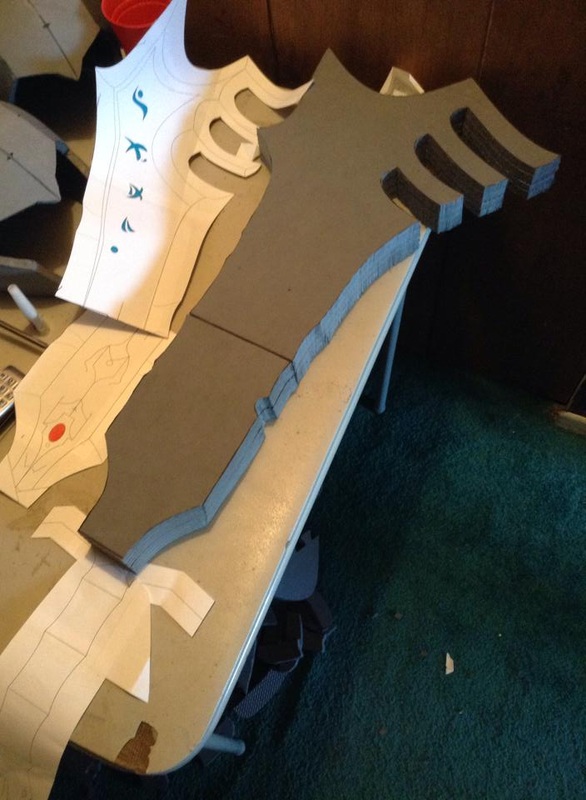 Now I could start on the inner workings. I grabbed a dowel that was lying around, cut it down, marked out where it would slide in and support as the blade's tang, and cut the trench out with a box cutter. 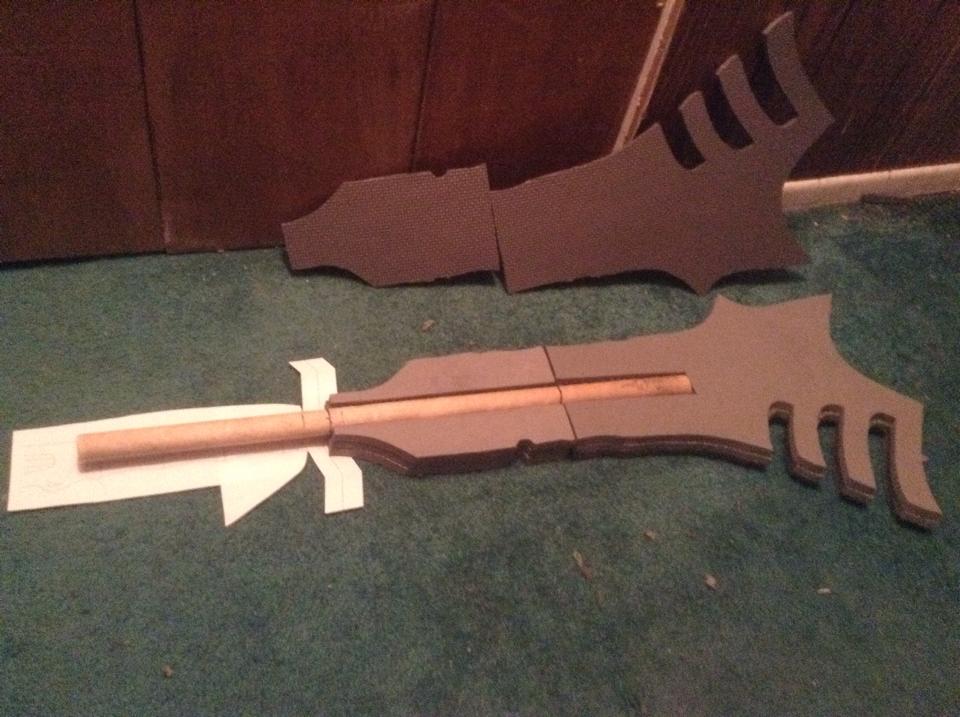 I then glued two layers of each side together, keeping the halves separate since there was still a little more work to do inside. Since the client wanted it to light up, I went out and got some turquoise acrylic, then traced a small section out for where the runes would go. 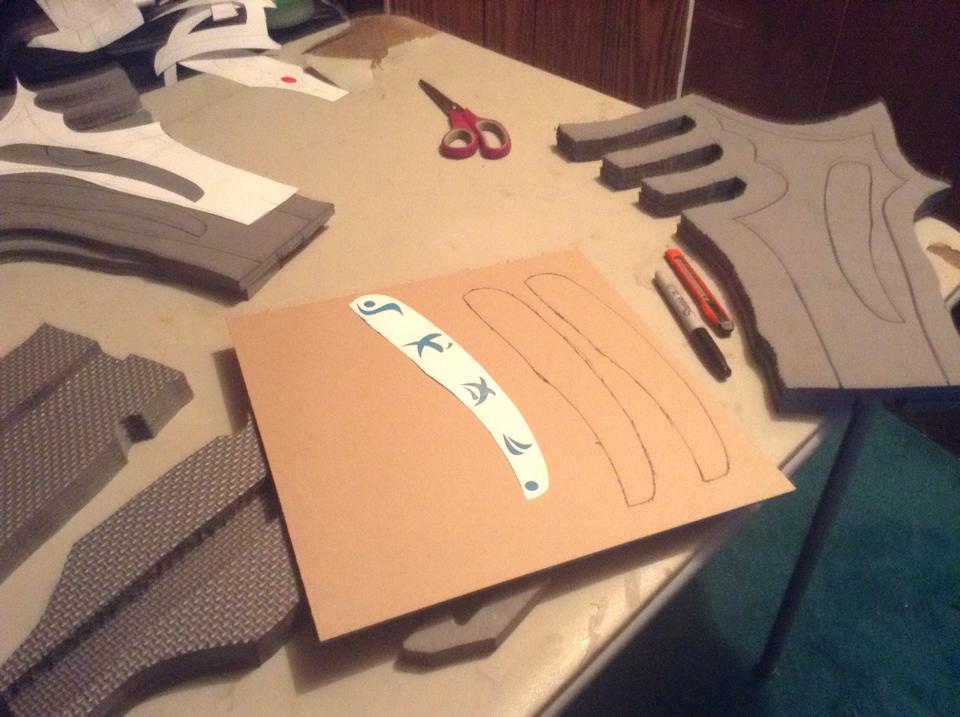 I would have preferred to cut out each rune and install them that way, but I don't have access to a laser cutter, and there was no way I could hand cut such intricate details out of two layers of foam - twice - to install them. Not only that, but the foam is malleable, whereas the acrylic is not, and given that this was a big sword going to an anime convention I didn't want to risk them popping out. So, I opted to cut a larger section out with the coping saw, to give it more surface area to glue. I traced that larger piece onto each half, and cut them out. Part of the dowel stuck out into these sections, which would make things easier for the lights. I also cut out the cross-guard, and wrapped the end of the dowel in foam for the grip. Once the fit was right, I made a stencil for the runes and cut them into the protective sheet on the acrylic. Once I removed the larger area, this left behind the rune shapes, which saved me from having to re-tape them later just to do the same thing. 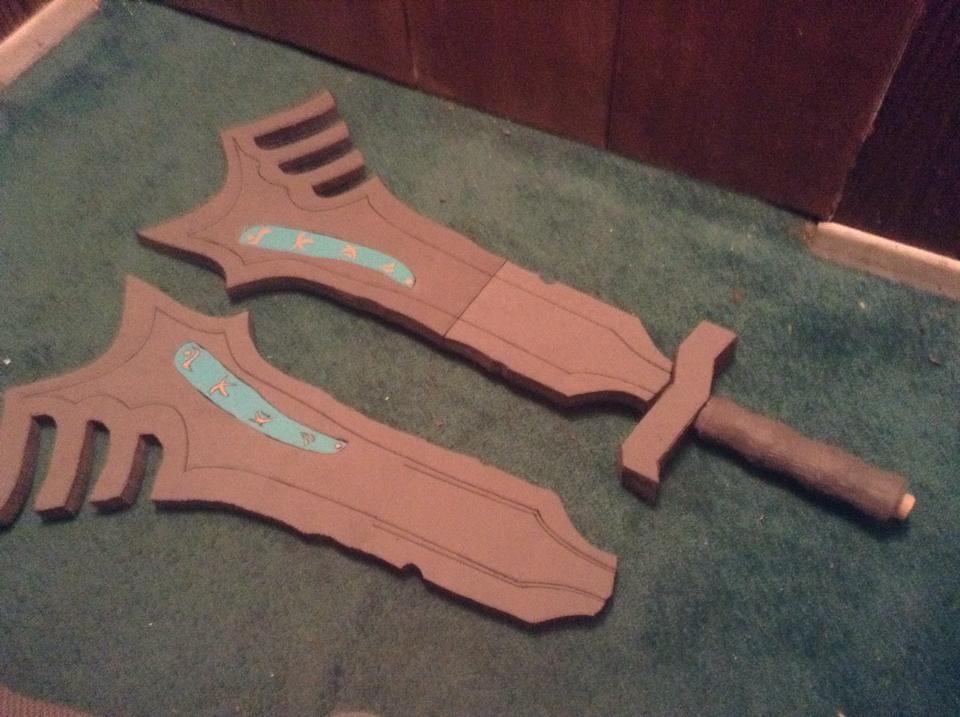 Since I didn't want to replace all my soldering stuff, I decided to get a string of prewired LEDs attached to a battery pack, which had an on/off switch. Made things simpler, and man those lights were bright! Glad of it though, since I needed as much light as possible to make it through the opaque acrylic to be seen. Secured the lights and acrylic panels in with hot glue, then glued the blade together along with the hilt/dowel. In hindsight, I should have waited to install the hilt, but there it is. Now the real fun begins! Remember those lines on the blade? I marked those out so I knew exactly how far I had to bevel it down. This took ages with the dremel, and literally covered me head to toe in foam dust. Thank goodness for goggles and a respirator! Now it's reeeeeally starting to look like a proper sword! You can see that I also took the dremel to the grip, to give it the wavy look of the game model. From here, I took my xacto knife and scored in the pattern at the base of the blade, then took a heat gun to it to separate the cuts and make a nice etching. I also made the snake-head pommel, did the same trick to etch the eyes, and attached it. Finally, I took a bit of craft foam and used it to cover the battery pack in the hilt, accessible via a small bit of velcro. Home stretch! Time for one of my favorite parts: painting. Threw on several layers of black Plasti Dip, as a base. 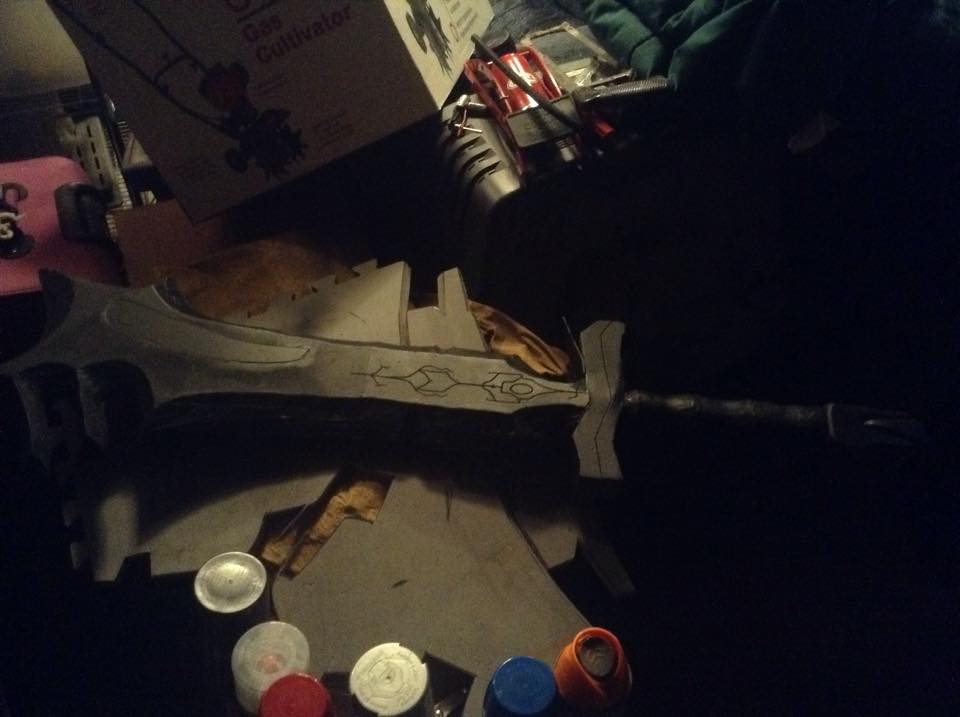 Then painted the cross guard and pommel a goldish bronze, let it set, and taped it up. Once that was ready, I covered the blade with an automotive silver paint, which gave it a nice shine. 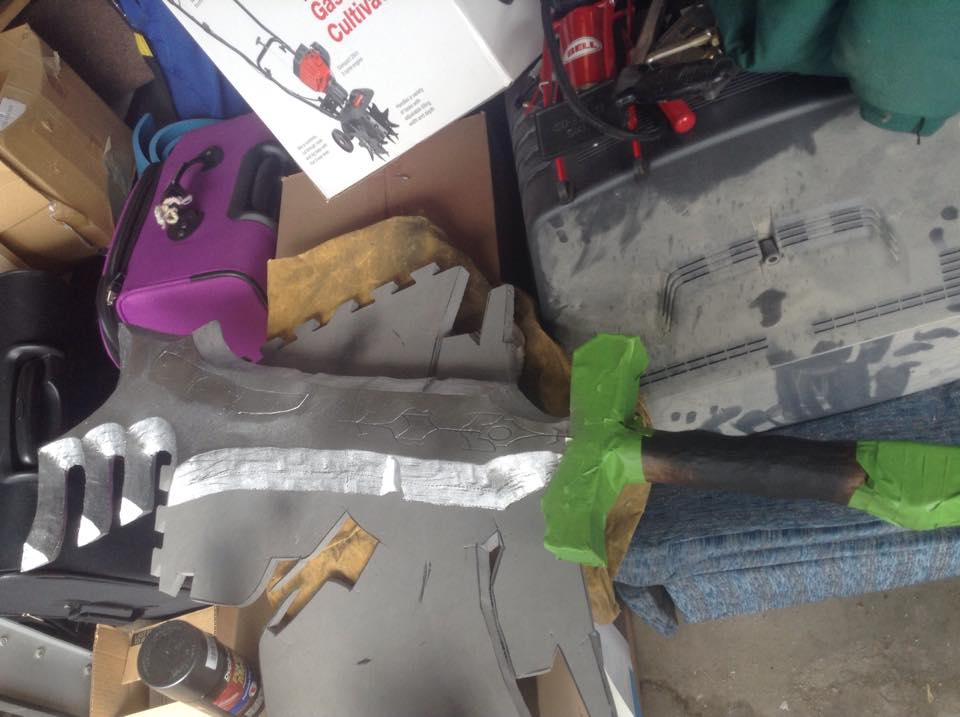 Taped it up some more, then covered the central part of the blade with a nice, deep blue metallic paint. Once that all set, all the tape came off, plus the rest of the protective paper from the acrylic! You can still see the seam where the acrylic meets the foam, which I tried to hide as best as I could but still never fully worked. The biggest issue was going from a solid piece of acrylic to the softer foam, but I also should have waited to put the two layers together until I had evenly glued in the acrylic piece. Oh well.... Hand painted in the yellow filigree on the blade, using the etched lines as a guide. Also did the red gems in the blade and pommel, and threw a basic black wash over the silver of the blade to give it a little bit of weathering. 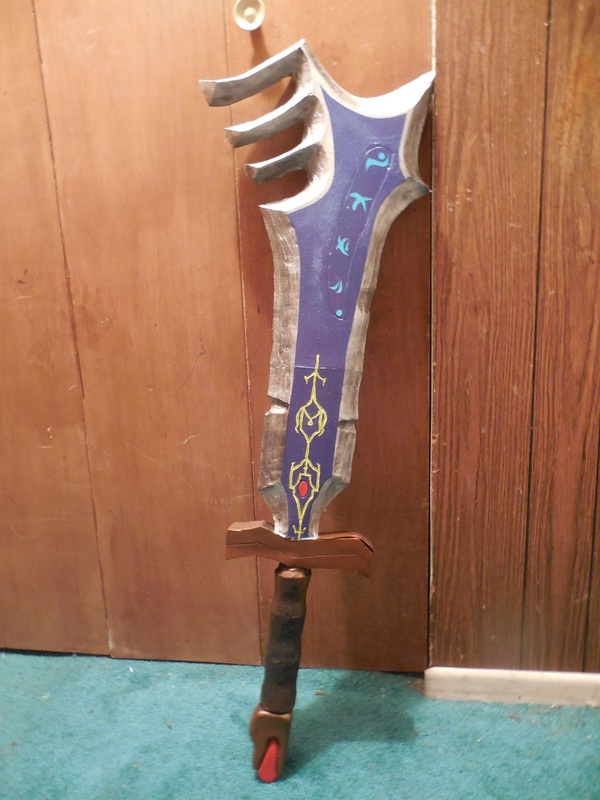 Once that was all done, I could add the finishing touches: the wrap. Got a simple brown lace from Walmart, glued one end down, wrapped the grip up to the top and wrapped the hilt, then went back down with the excess and glued it down too. Worked perfectly! Really happy with how this turned out, even with the visible acrylic edge and the craft foam cover that refused to stay down, and a seam on the top opening after everything was done. Given how I had to use tools I wasn't used to, having to go without the tools I would have liked to use, and still turning out how it did makes me feel really good about how my skills are improving. Hope you guys liked this build! Here's a send-off of some outdoor pics I took to show off the details a bit better. 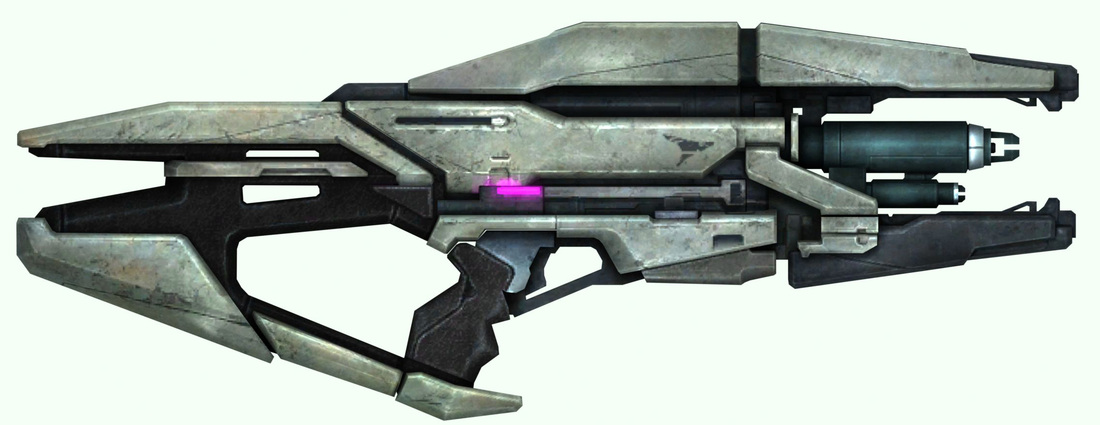 And now, back to the awesomeness that is the Turian Phaeston. I built this to go along with my Terminus armor, though unfortunately I ended up having to sell it to raise some money to move my family BACK to Utah, after having been in Pennsylvania only six months. Two moves in one year, both cross-country, have really done a number to our already drowning finances. :( Still though, it was a fun build, and I know it's gone to a good home. I'll make another one once I get all my stuff back from the storage pod everything is living in. Onward! Started this one, as always, scaling and printing a massive version to use as a template. 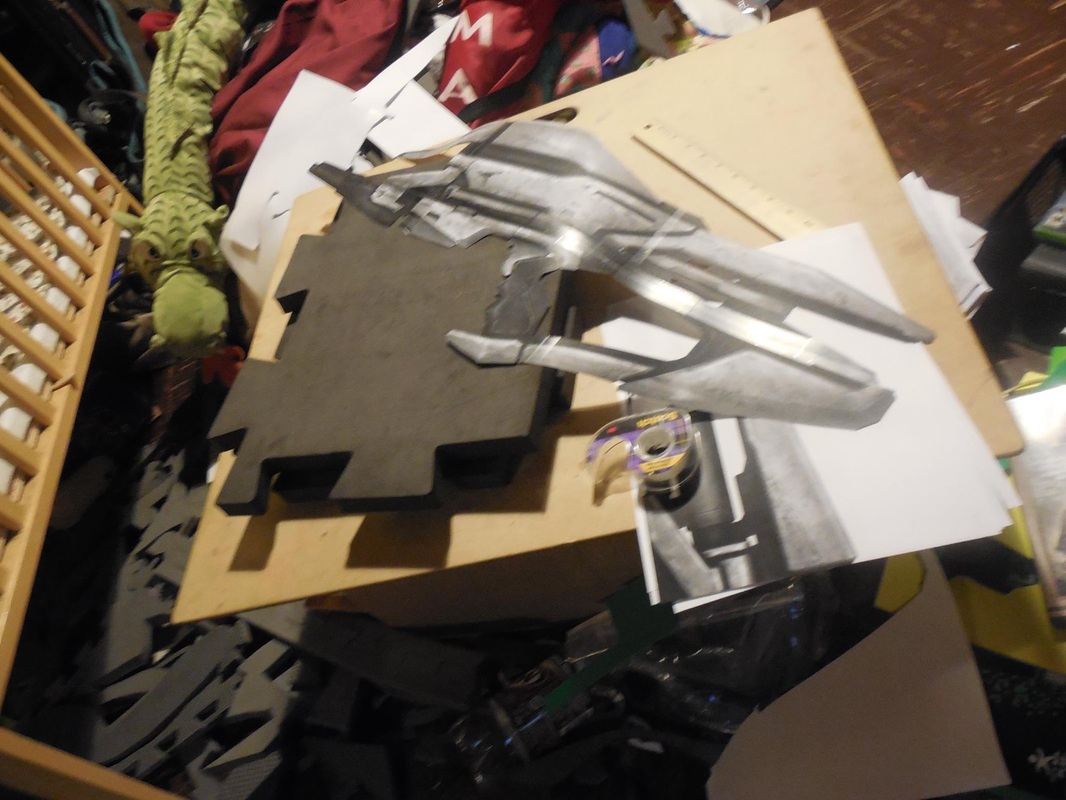 Decided to go the same route as I did with the M8 Avenger version 3, with the 1" thick foam as the core, and the other foam as build-up layers. Had to cut it out in three different pieces though, due to the small sheets of foam you can see above. Got it all cut out though, and used the contact cement to glue it all back together. 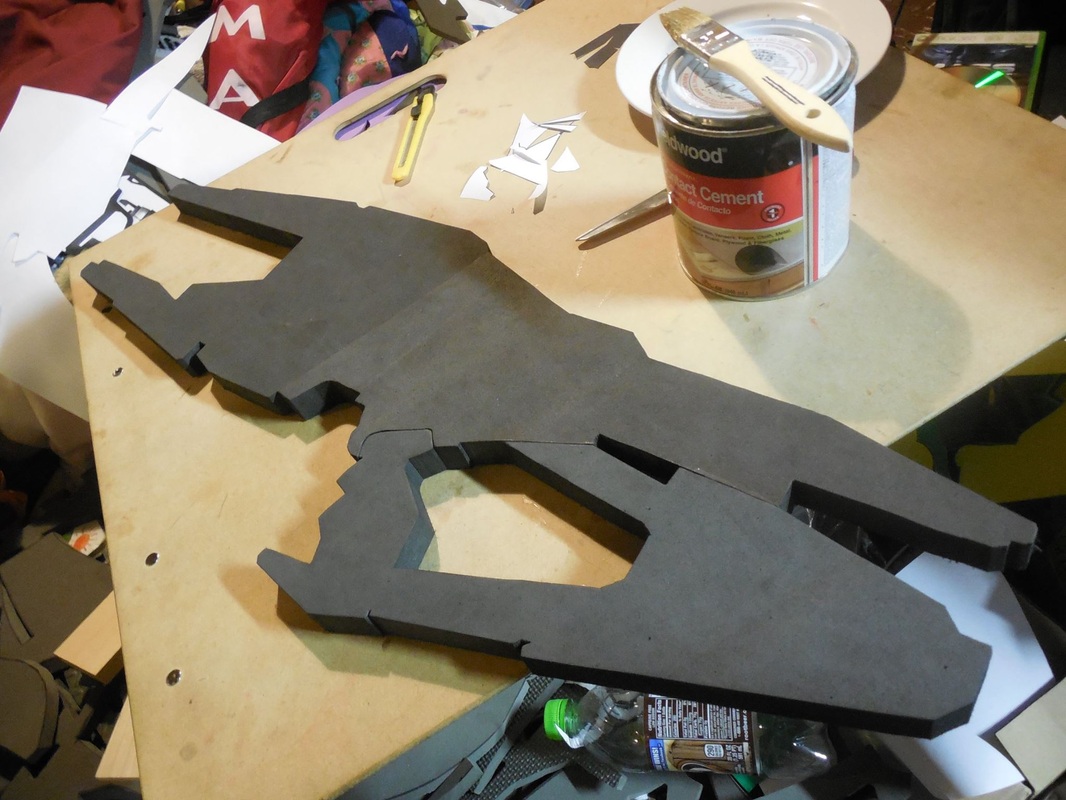 From there, I cut the paper template into smaller pieces, using them to prep the rest of the foam. I traced these onto 1/2", 1/4", and craft foam, to really give it a nice layered effect. The subsequent pile was quite a sight. 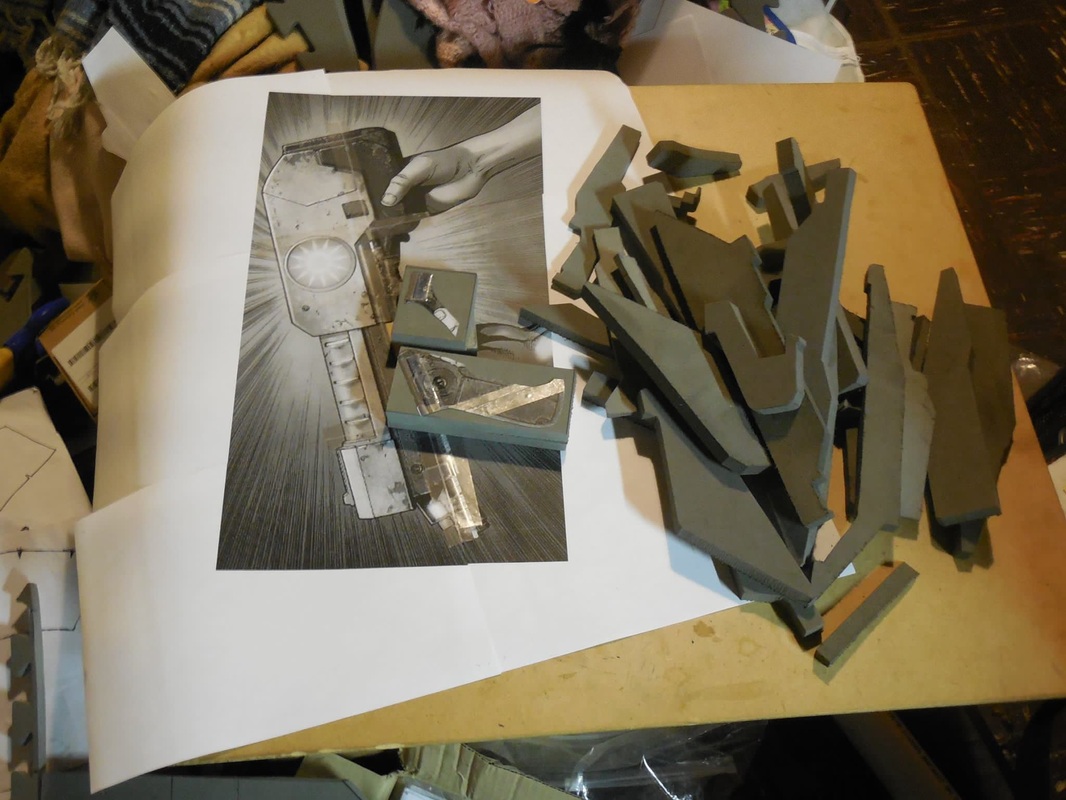 (Heads up - I did a lot of the Phaeston at the same time as Star Lord's pistol, seen on the left, so you'll see a bunch of pictures of them together as we go along. I'll write-up the pistol next, to help stave off any confusion if I can.) Once all the pieces were cut out, I arranged them to ensure they fit on the core, then slung contact cement everywhere and put everything together. 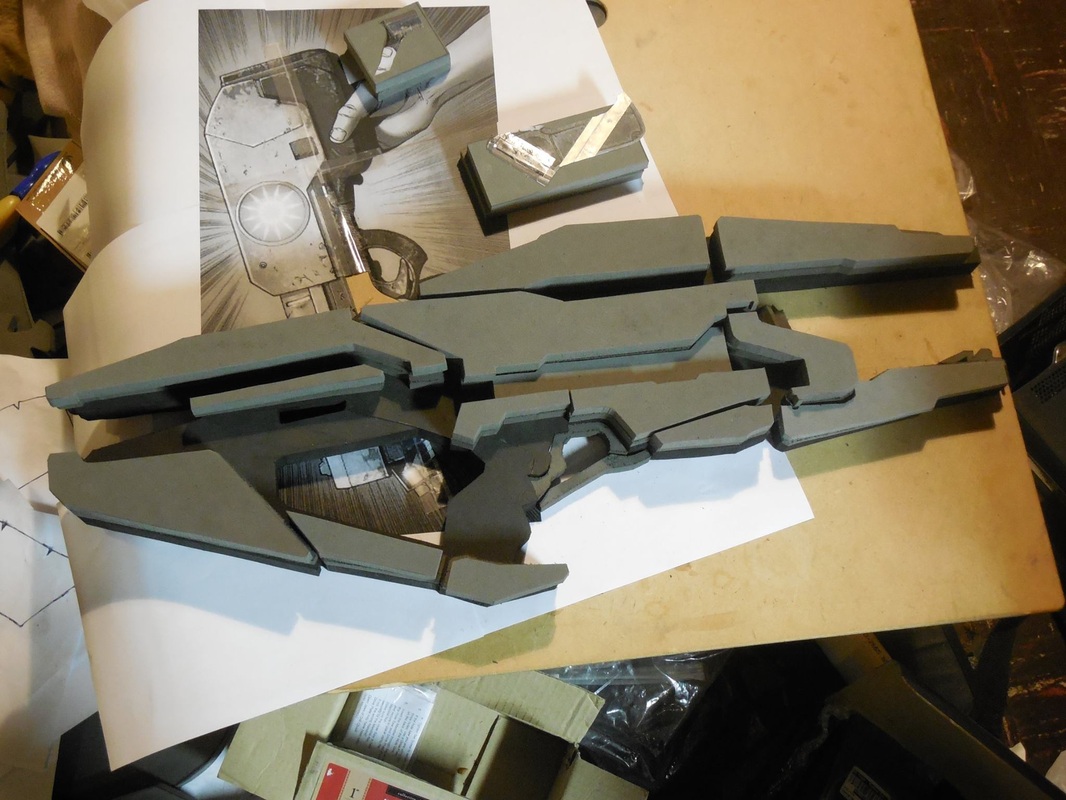 Then I threw on all the craft foam, to give everything the final feel. 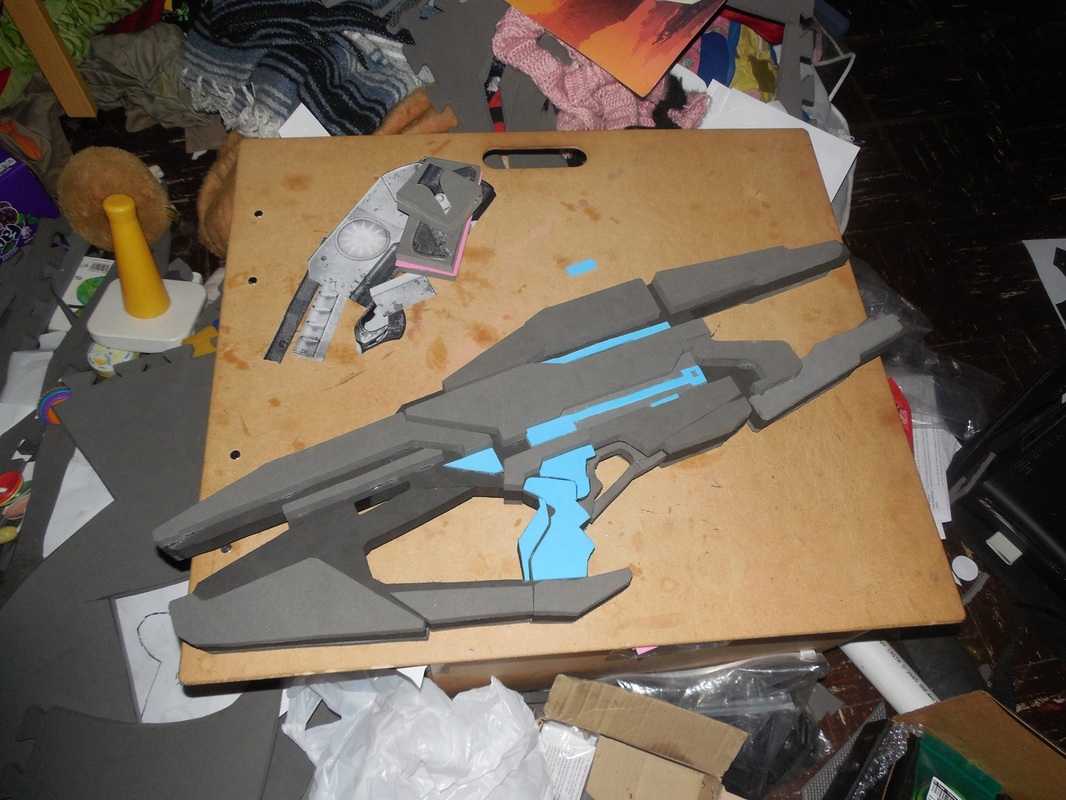 Next came the tricky part. I had to angle the top section, the rear of the stock, and the base of the grip, as well as bevel some of the edges. So, I took it out to the belt/disc sander, and got to work. While I was out there, I also cut out the barrels and final pieces, and used the puck left over from cutting out the hole in Star Lord's pistol to make the extended chunk of the Phaeston's main barrel. 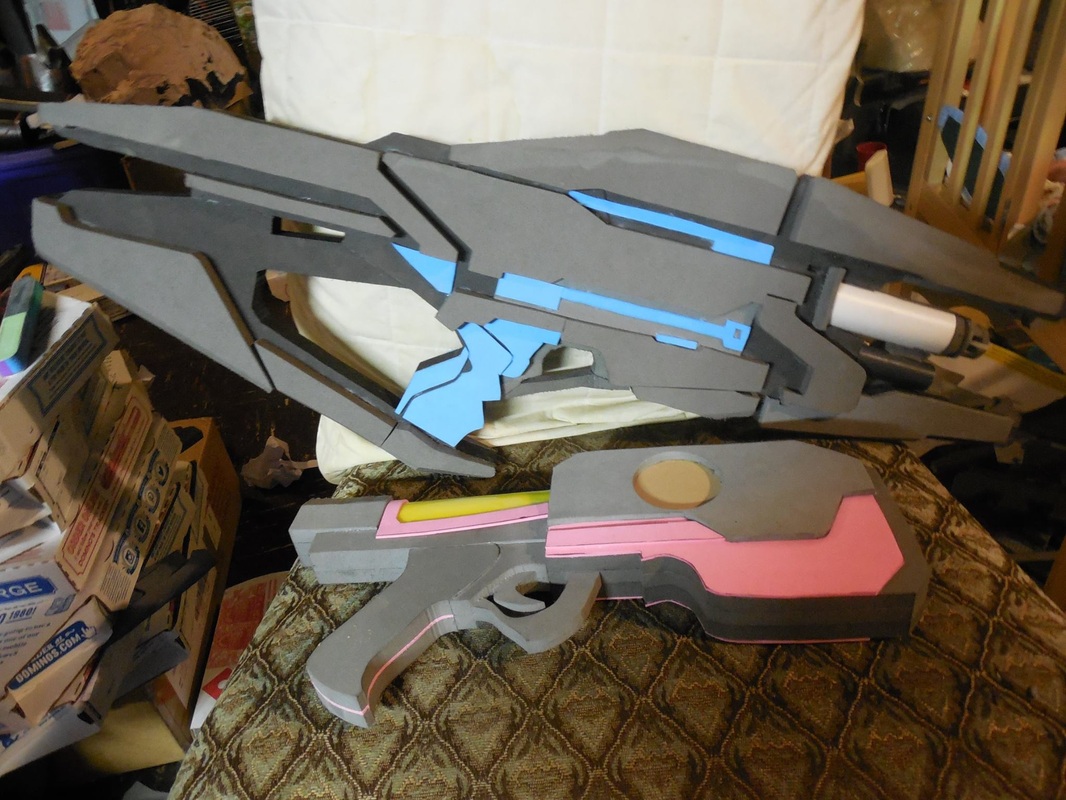 After some cleaning up, I then took my xacto knife and heat gun to it, and etched in all the detail lines. 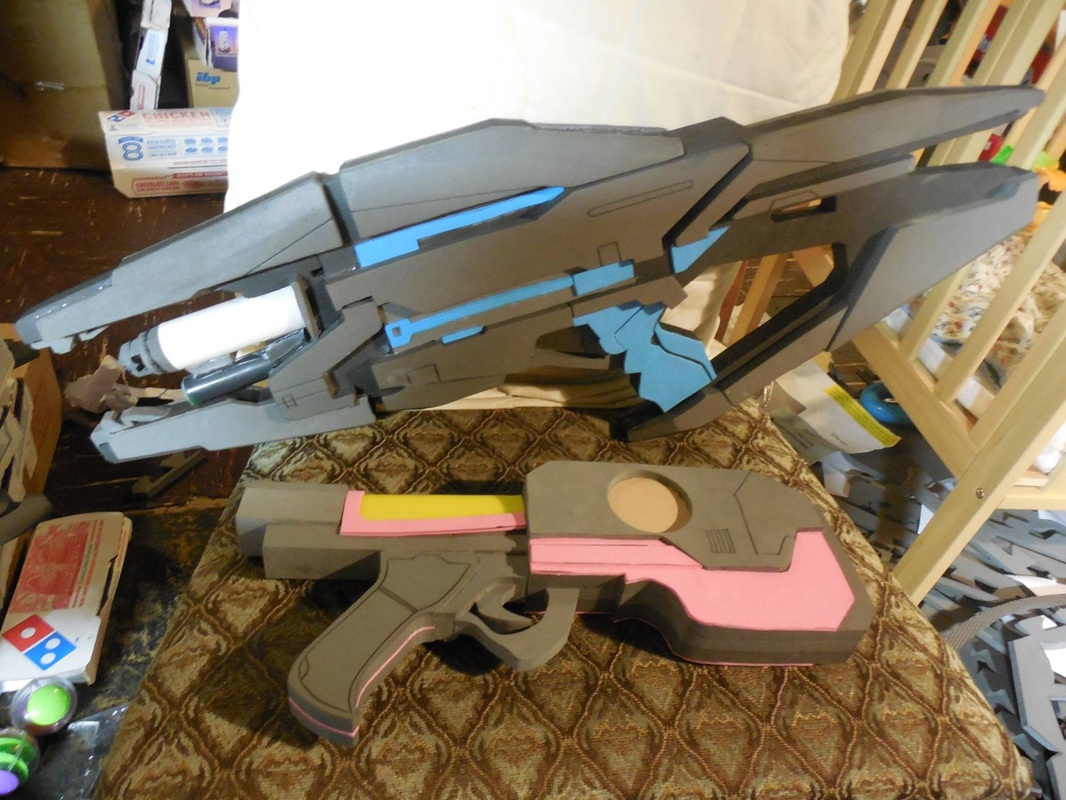 Once I was happy with everything, it was time for everyone's favorite thing, Plasti Dip! I followed that up with a coat of silver as well. Originally I was going to do a custom color scheme with it that was similar to the Terminus armor, but I was worried that it would blend too well with the armor and it would get lost in it. Instead, I stuck with the original coloring to have it stand out on its own and compliment the armor. 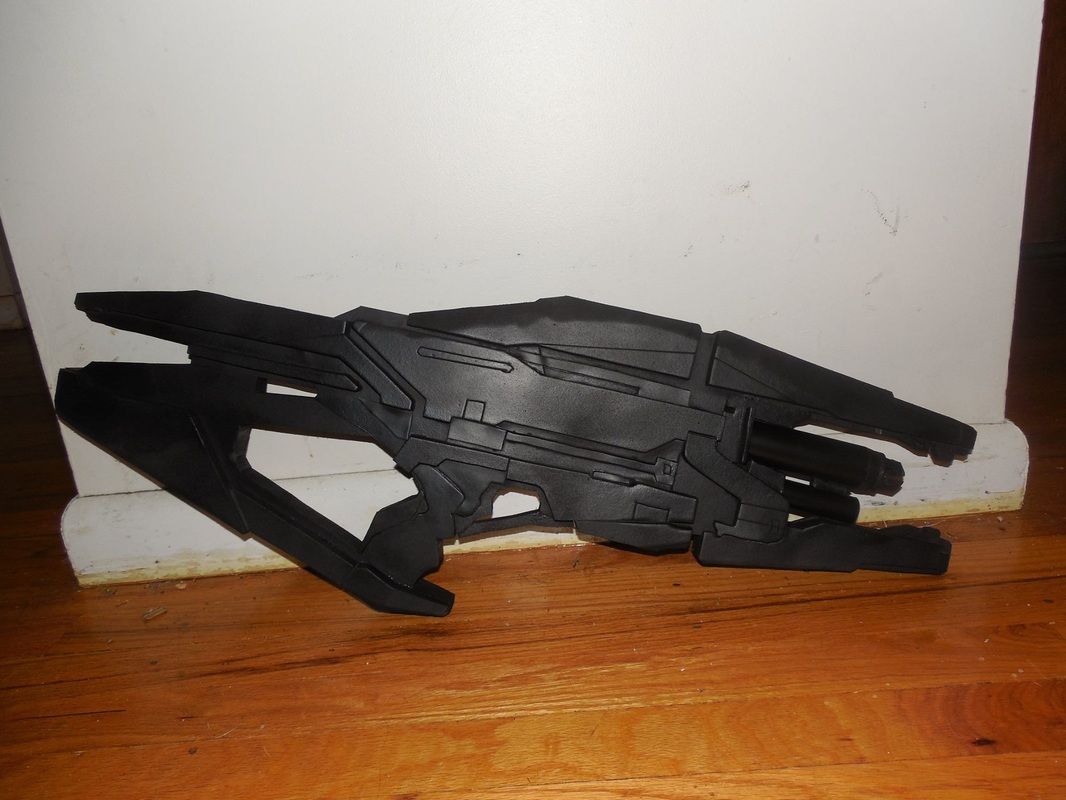 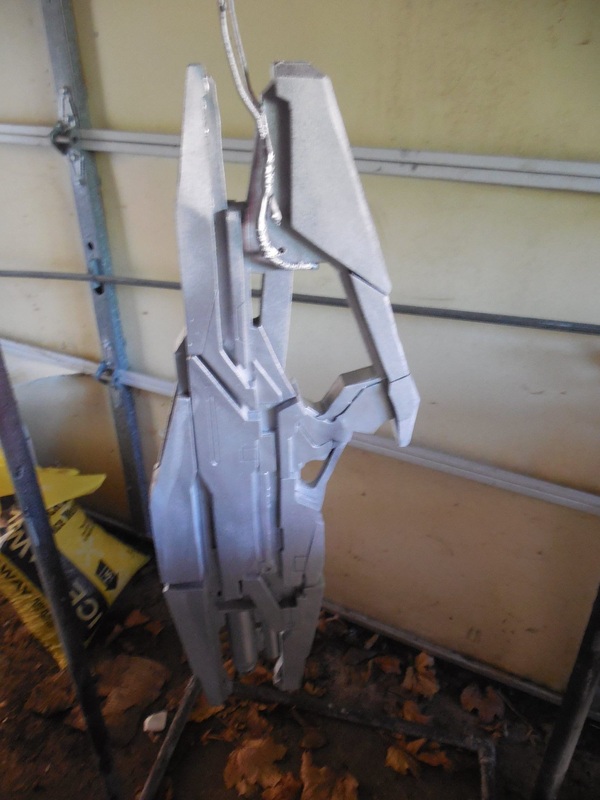 'Course, that ended up not mattering, since I ended up having to sell it, but oh well! Still looked awesome. Taped up everything, then threw on the same metallic black I used on the Terminus. After that I painted on an acrylic pewter, which is what I normally use on the M8. This helped give some contrast to a few of the lower layers and the barrels. And last, but definitely not least, came the weathering. As per usual with the silver, I did a black acrylic wash, with dry brushed highlights over everything else. 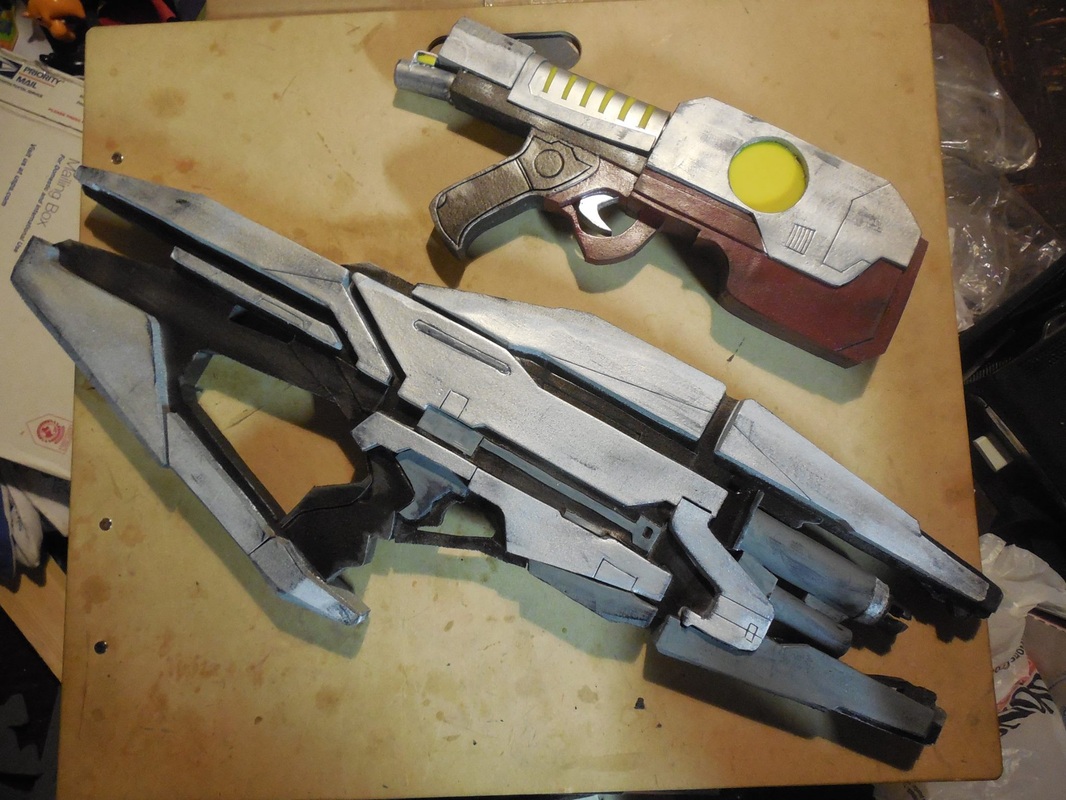 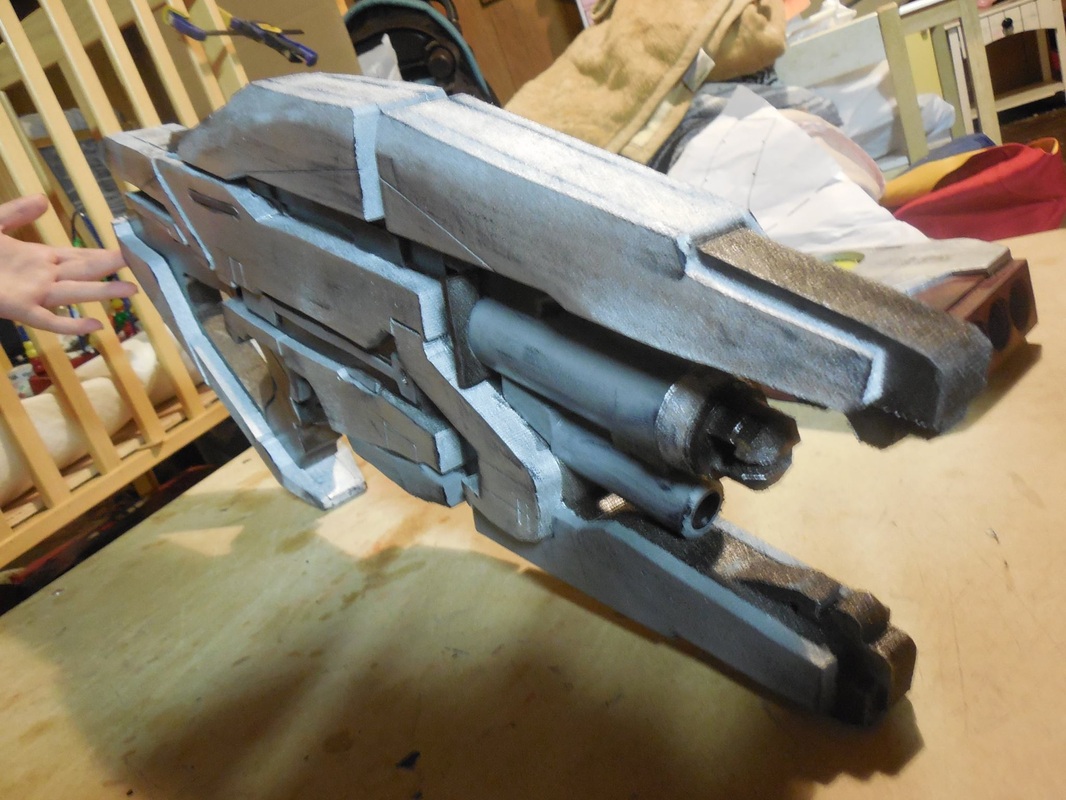 I'm really proud of this build, and sad to see it go, but such is the way of things. At the very least, I know what to watch out for when I make another one! :)
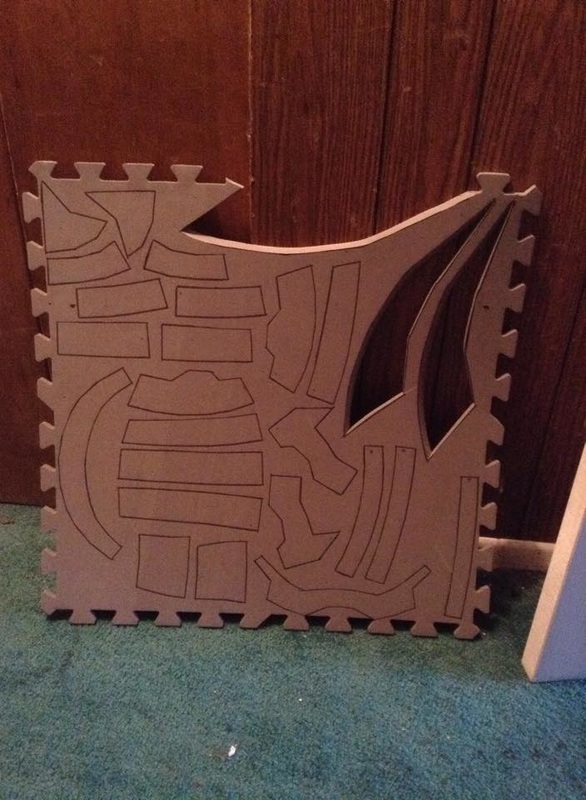
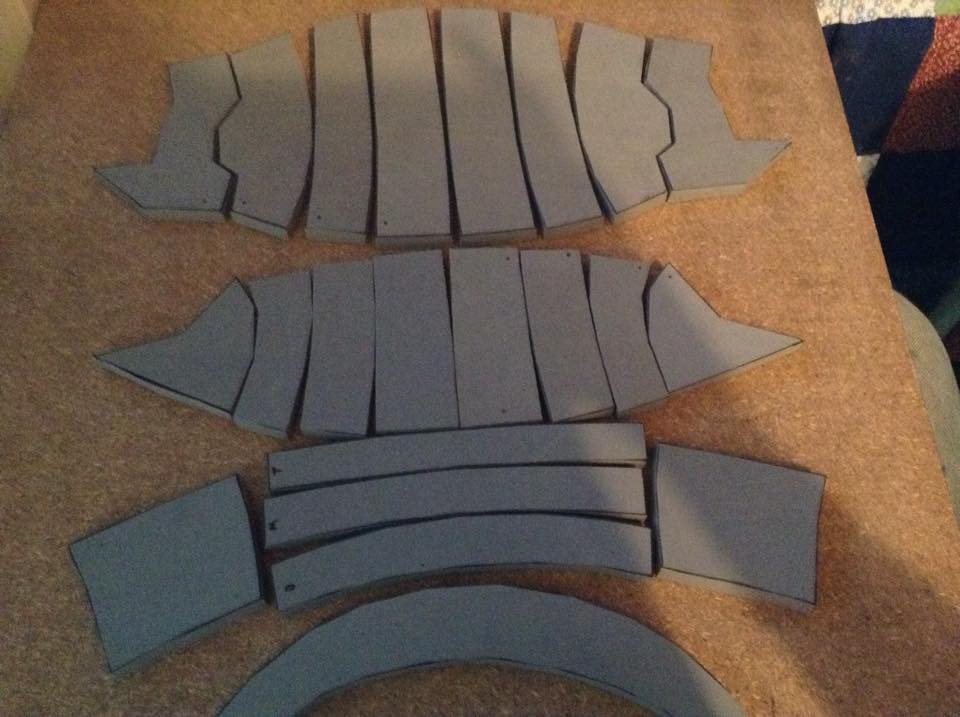
Check the Terminus Armor build for some awesome shots of the two together! Also, while you're at it, take a look over here and vote for me! Contest runs between August 18-28, 2014, and you can vote once per day. Appreciate it! 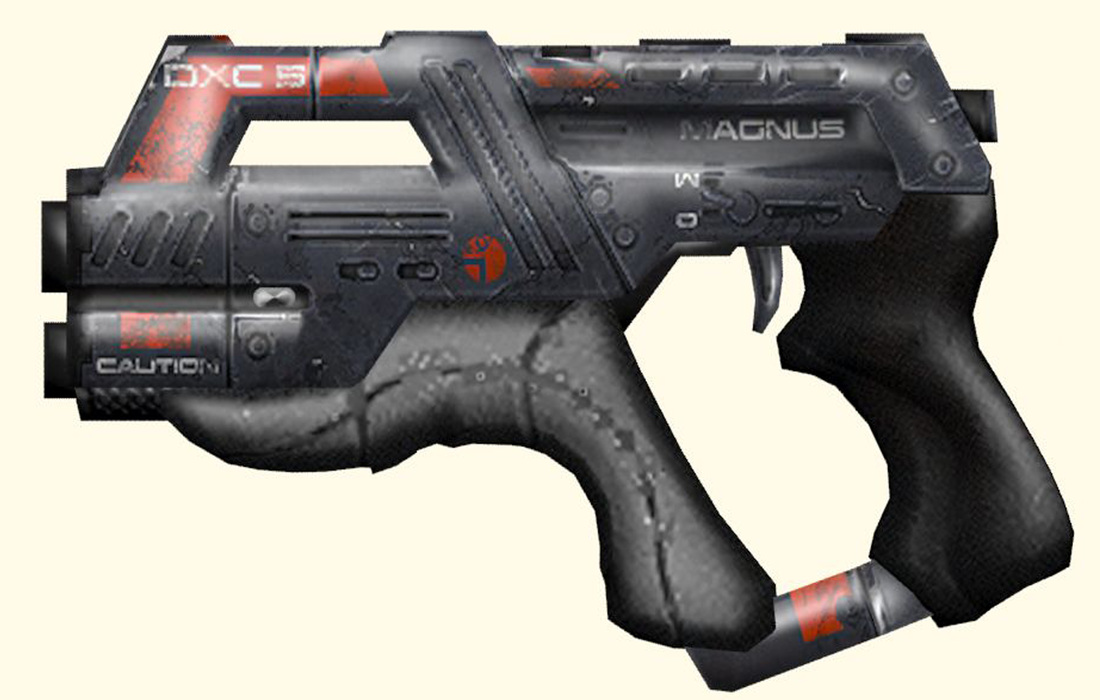 Yes, yes, I know: the title says Paladin, the picture says Carnifex. The two guns are 100% identical, besides the paint and decals though, so I'm sure you'll forgive me this slight oversight. ;) Anyway, got commissioned to do an M77 Paladin out of foam. Relatively simple, though due to all the open areas in the middle of the gun, I opted to try out a different method. 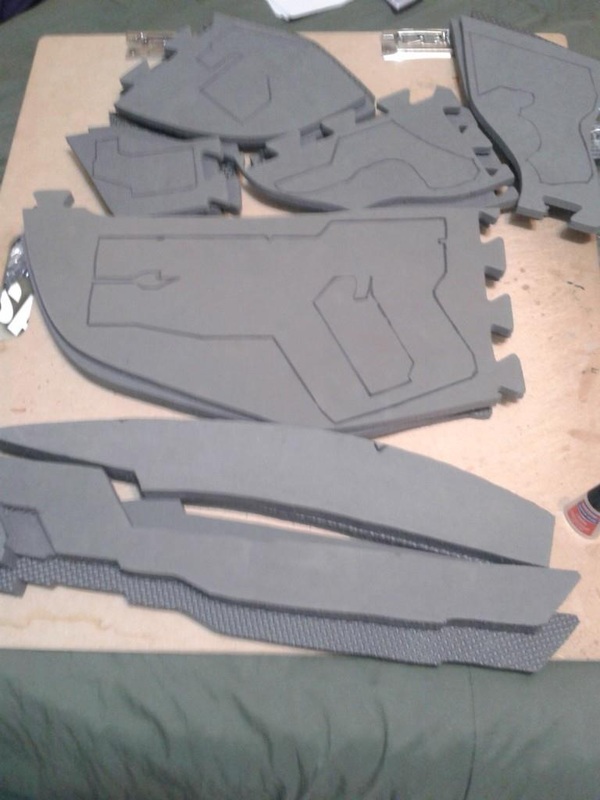 In the pile of foam at the top of the picture, you can see I'm still layering it to cut out all together, but it's a little more puzzle-pieced than the other two regulars you see below it. Makes it much easier to get to all the holes inside! Once all those layers were glued down, I cut out the puzzle pieces, glued them all together, then used the extra to cut out the small bit at the bottom of the grip. 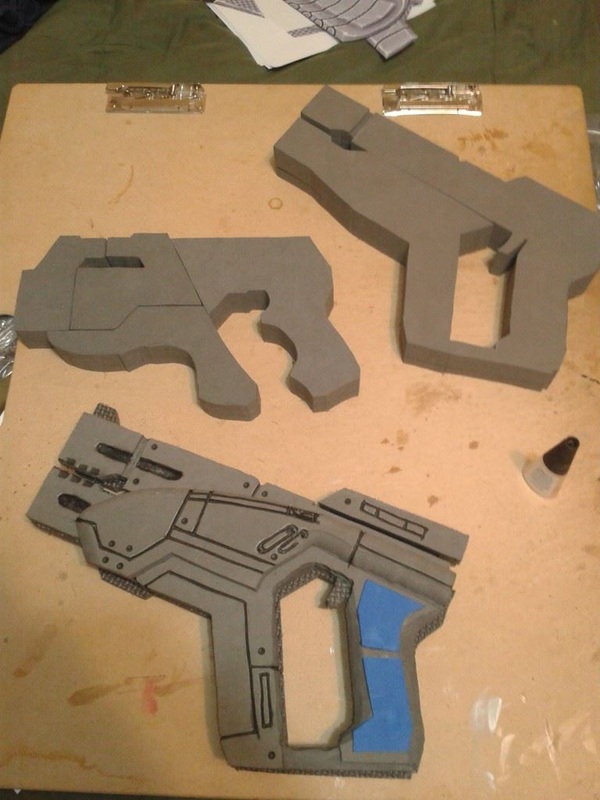 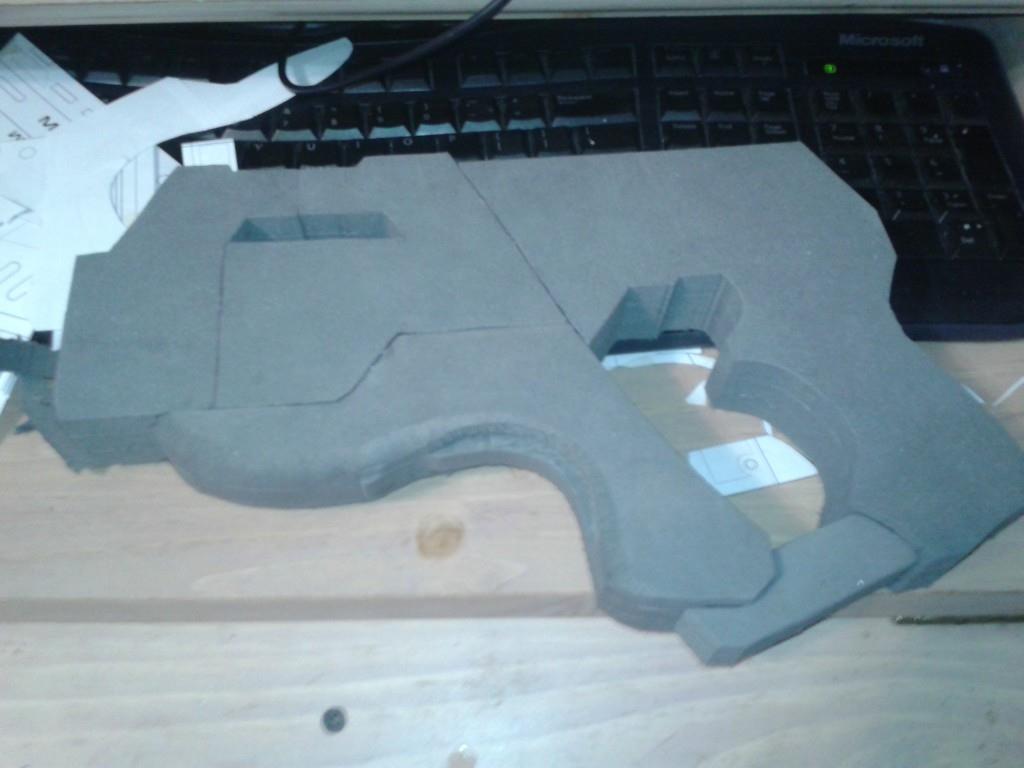 Super simple. It's remarkable how quickly this came together and how simple it really is. After assembly, I grabbed my craft foam and cut out the top layer. 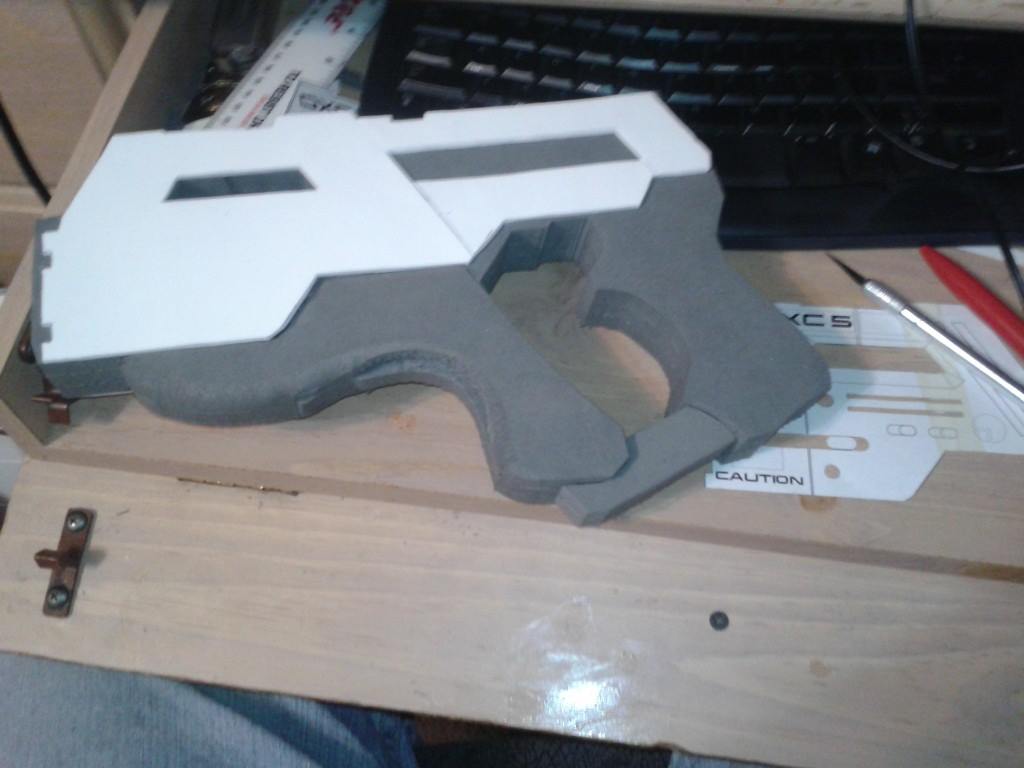 Then, I did the light scoring trick with my xacto knife and heat gun for all the details, after marking all the lines with a pen, and cut out the angled bit on the upper hole with the xacto as well. I also threw on the upper details with more craft foam, and cut out the barrels, and heat sink on the back out of PVC pipe. I covered the back of the heat sink with more craft foam. 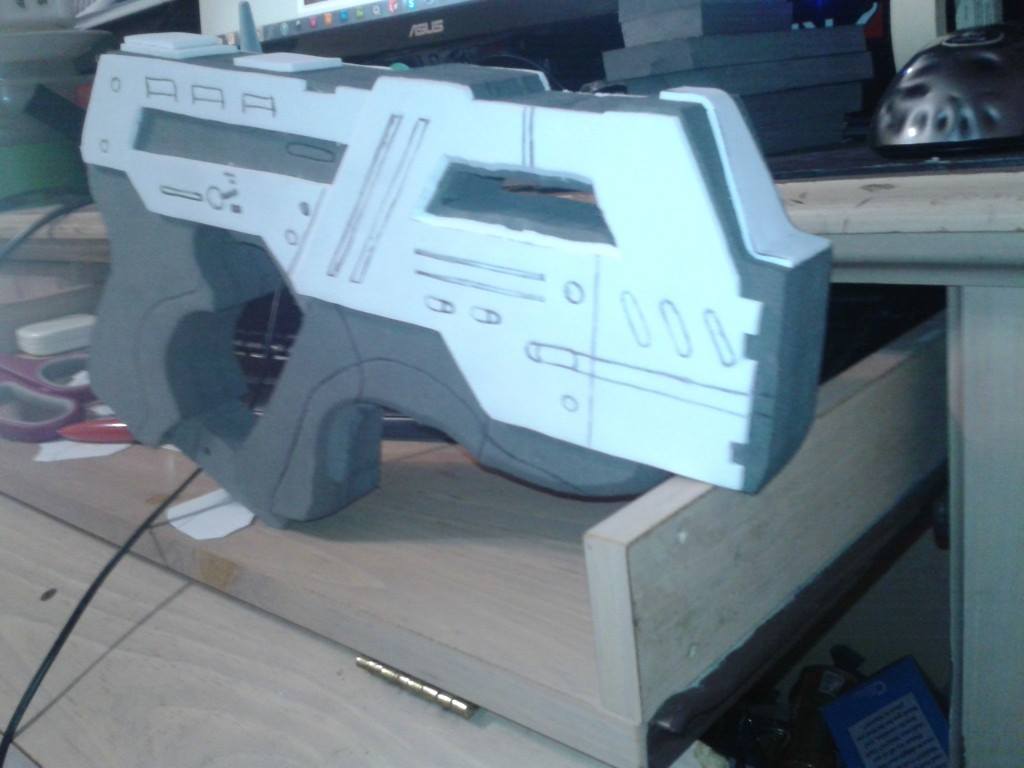 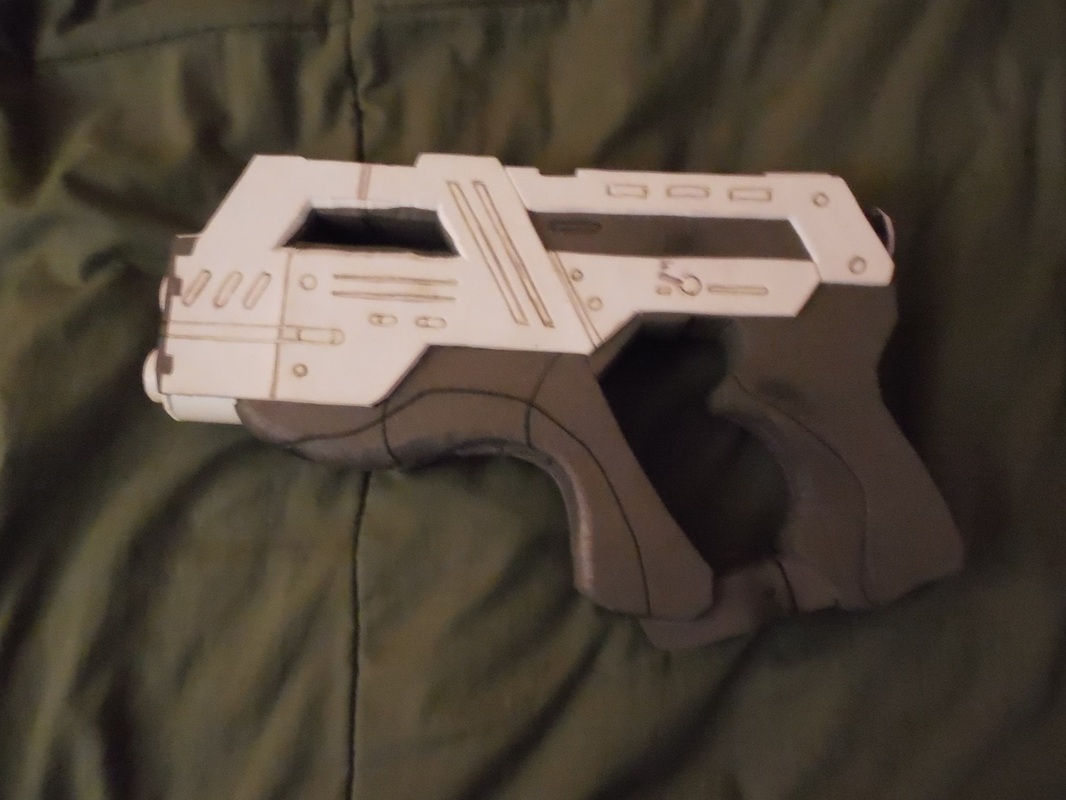 Next came the Plasti Dip! Lather, rinse, repeat. Oh, and, naturally, the paint and weathering. ;) 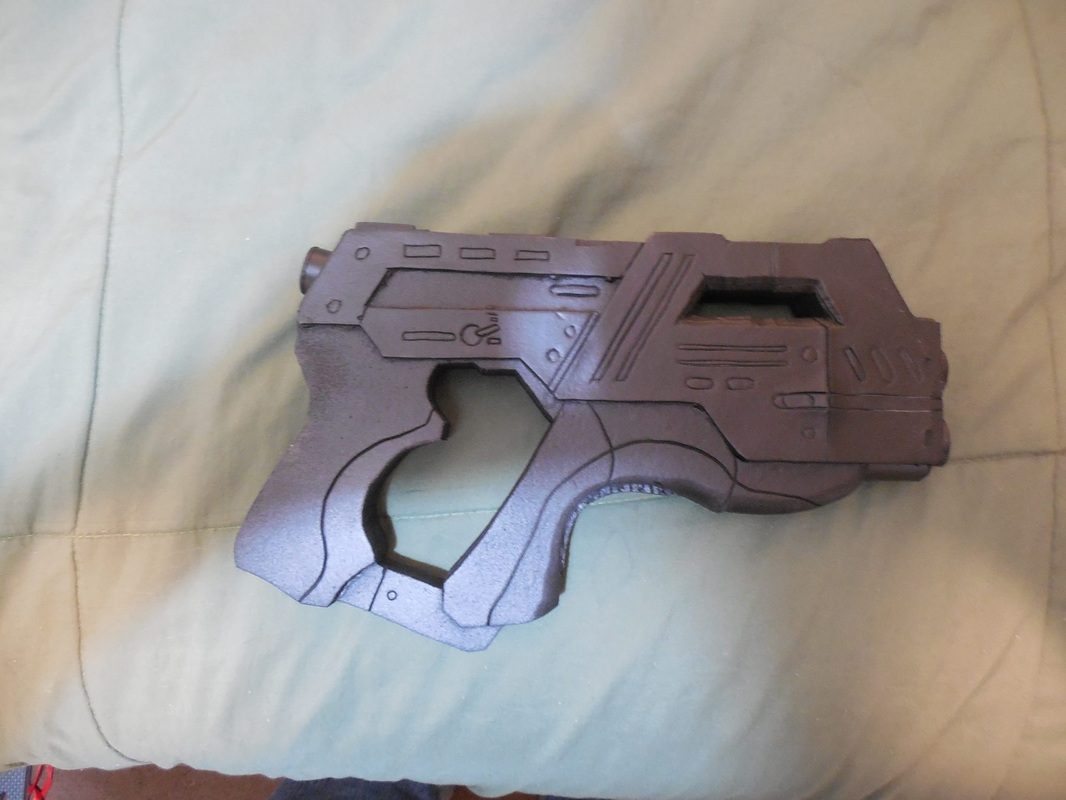 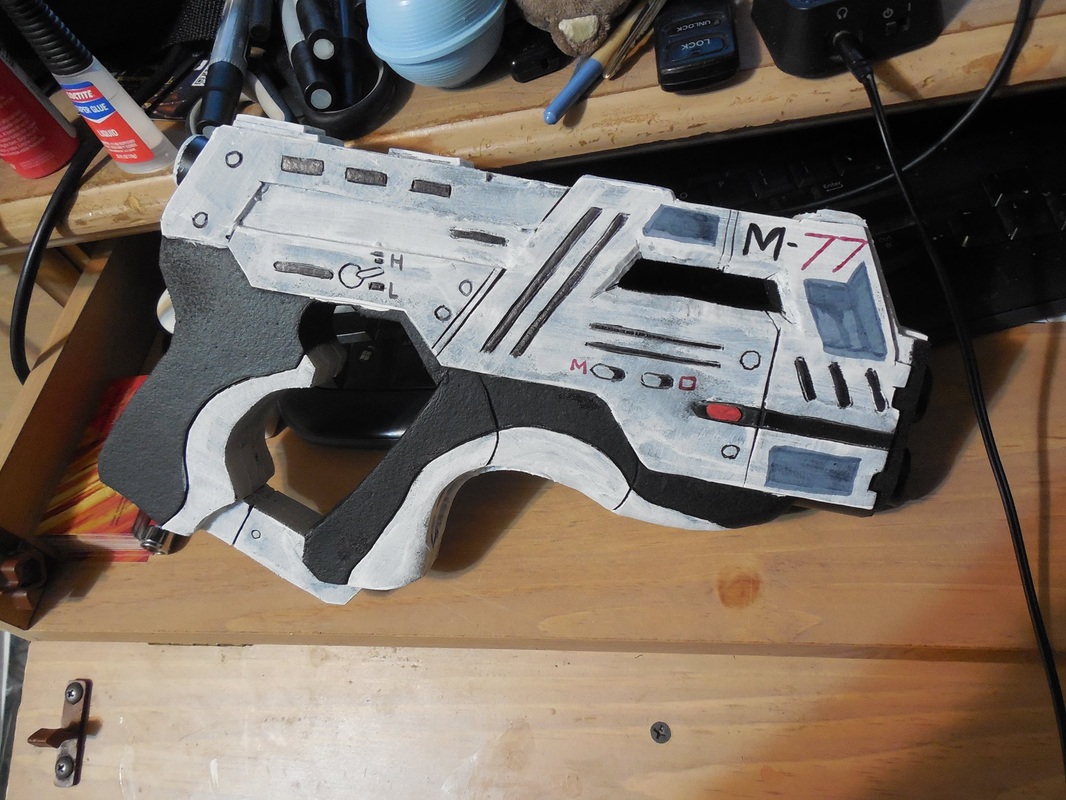 I was both surprised and happy at how quickly this build came together, and I can definitely see why most people start out by making this or the Carnifex. I'm super tempted to make a wooden master and mold a few, though there are already so many out there that I don't think it'd go anywhere. Still though! :D
|
|


 RSS Feed
